
Sitecore Module 2.0.0
SearchStax provides a special module that connects Sitecore directly to the SearchStax Site Search solution and lets you publish a custom search page immediately.
Contents:
- What is the Sitecore Module?
- Install the Sitecore Module
- Configure the Sitecore Module
- Populate Schema and Rebuild
- Reload the Search App’s Schema
- Create a Search Page
- Computed Fields
What is the Sitecore Module?
This package is a Sitecore module that Sitecore developers can install to leverage all the search capabilities offered by SearchStax Site Search for your client-facing search pages. It contains a Sitecore index connector which can index your Sitecore items using the out-of-the-box Indexing Manager provided by Sitecore. Not only that, but it comes with a functional search page that can be built in minutes instead of weeks of work. With this package your client can focus immediately on improving the real search experience, since that is where the business value is.
First, create a SearchStax Search App!
You cannot install the Sitecore Module until you have created a Search App.
The App must have suggestions enabled on the Auto-Suggest Tab.
One Sitecore Server per SearchStax Search App!
To prevent data corruption and/or bad website results, do not connect two different Sitecore Content Management servers to the same SearchStax Search App.
Install the Sitecore Module
The first step is to contact the SearchStax team and ensure you already have a SearchStax Site Search account and App created with a Solr core configured to deal with your Sitecore. Once you have this you are ready to go.
This is almost a plug-and-play module, thus installing it is as easy as possible.
Below are the supported Sitecore versions, with the links for downloading the Sitecore package:
| Sitecore Version | Package | WDP Package |
|---|---|---|
| Sitecore 9.0 | SearchStax package for 9.0 | WDP Package for 9.0 WDP Package for 9.0 CD |
| Sitecore 9.0 Update 2 | SearchStax package for 9.0.2 | WDP package for 9.0.2 WDP package for 9.0.2 CD |
| Sitecore 9.1 Sitecore 9.2 |
SearchStax package for 9.1 and 9.2 | WDP package for 9.1 and 9.2 WDP package for 9.1 and 9.2 CD |
| Sitecore 9.3 Sitecore 10.0 Sitecore 10.1 Sitecore 10.2 Sitecore 10.3 |
SearchStax package for 9.3, 10.0, 10.1, 10.2, 10.3 | WDP package for 9.3, 10.0, 10,1, 10.2, 10.3. WDP package for 9.3, 10.0, 10.1, 10.2, 10.3 CD |
| Sitecore SXA (All versions) | SearchStax package for SXA | WDP package for SXA WDP package for SXA CD |
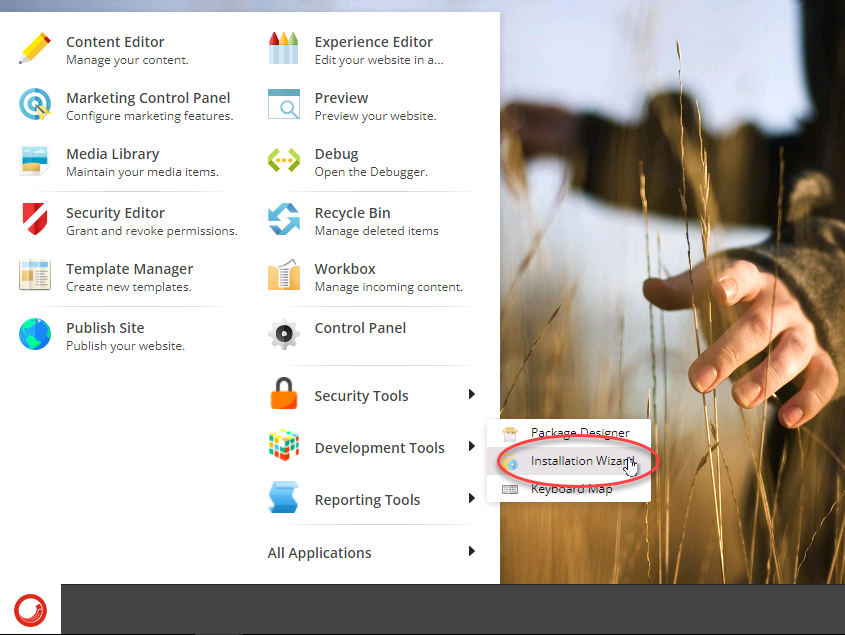
Once you download the package, open the Sitecore Installation Manager:
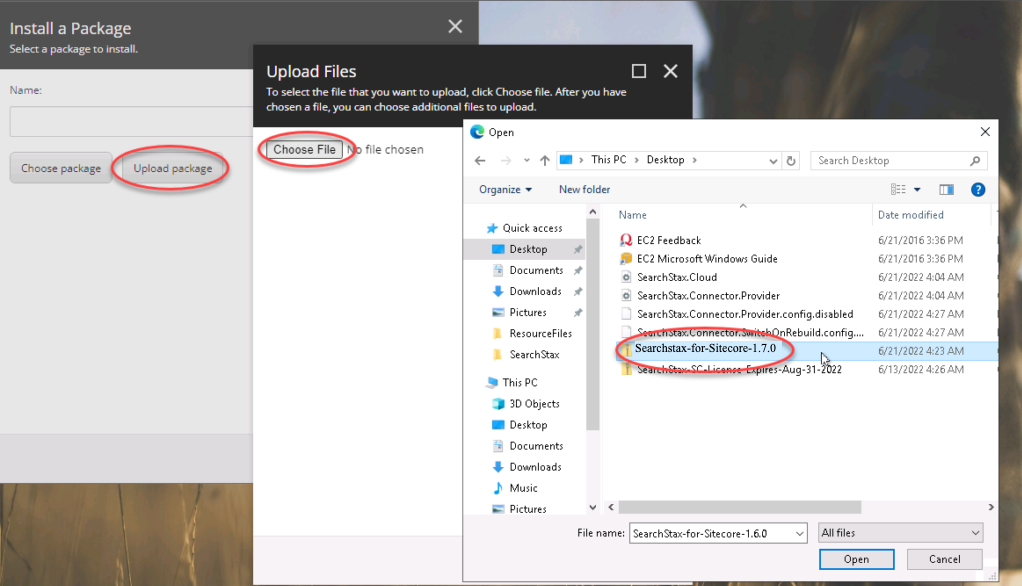
Use the Choose File option to select the downloaded file and upload it to your Sitecore.
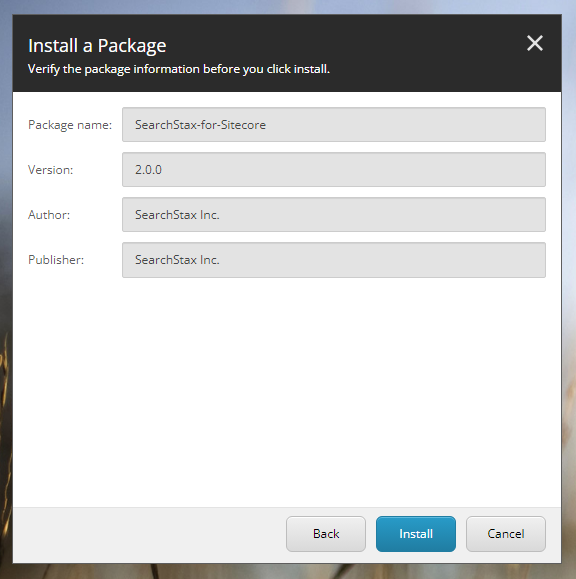
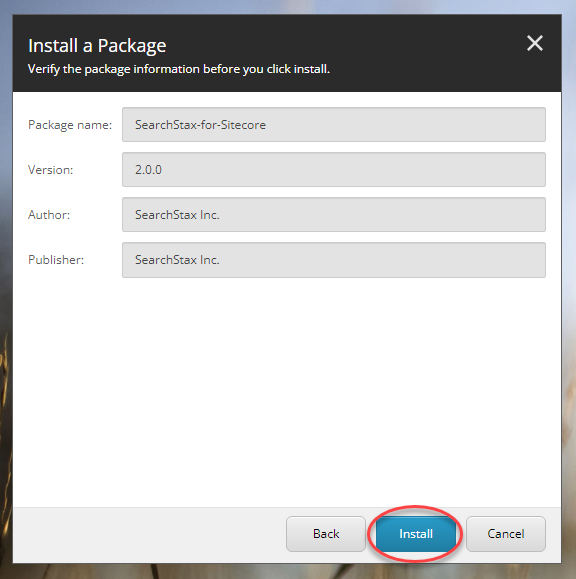
Once the package is uploaded it’s time to properly install it. You can do this by clicking on Next and then on Install.
The installation should take no more than a few minutes. You will know the installation is completed when you see the below pop-up. Go ahead and click on the Configure SearchStax for Sitecore Package button:
Configure the Sitecore Module
Navigate to the SearchStax Module Configuration Page
From the Sitecore Launch Pad, click on the Sitecore Module Configuration button under SearchStax Site Search
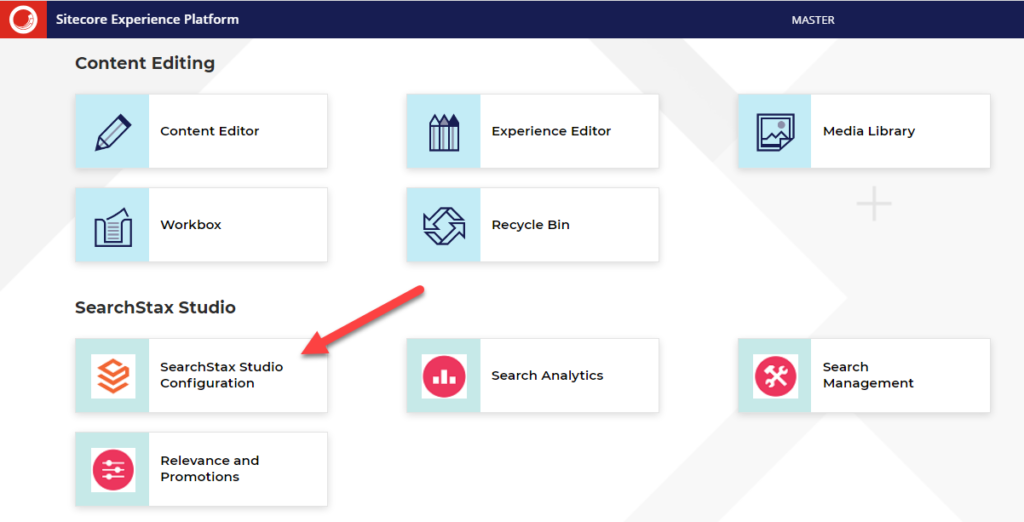
This will open up the the Site Search for Sitecore configuration page.
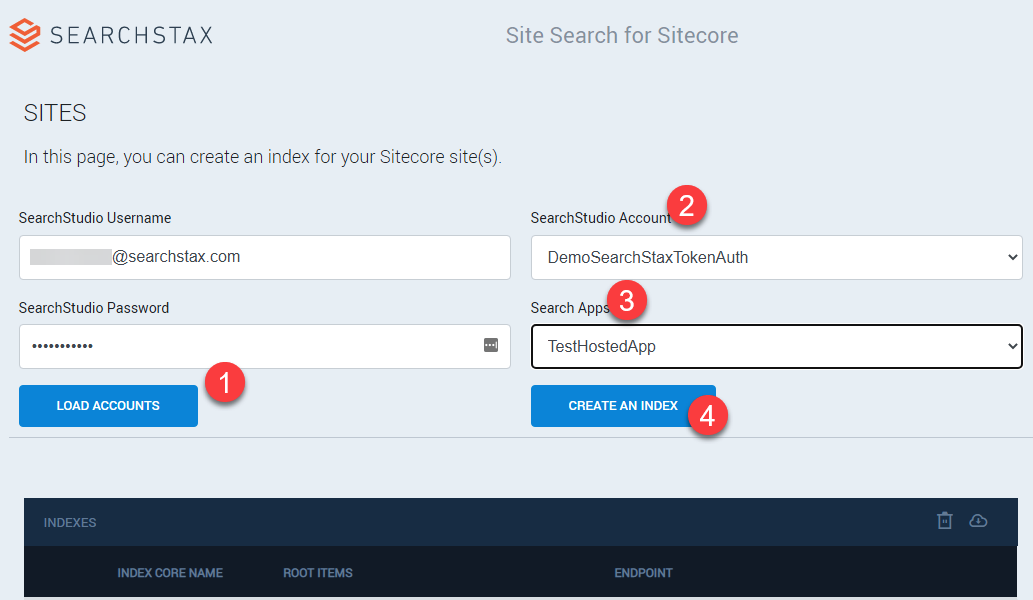
Enter credentials and select account and app.
- Start by entering your SearchStax Site Search username and password. Then press the Load Accounts button. This will populate the Site Search Account drop down.
- Select the appropriate Site Search Account. It’s probable only one account is available, but you might have access to multiple accounts. Once selected, this will populate the available Search Apps within the selected Studio Account.
- Select the appropriate Search App.
- Once you have selected the above options, then press the Create an Index button.
Configure Site Search for Sitecore
The next page that the configuration will take you to is the Index Properties page for the Search App that you selected in the previous step.
In the case that your Search App is using Basic Authentication, go here. Otherwise, follow these directions:
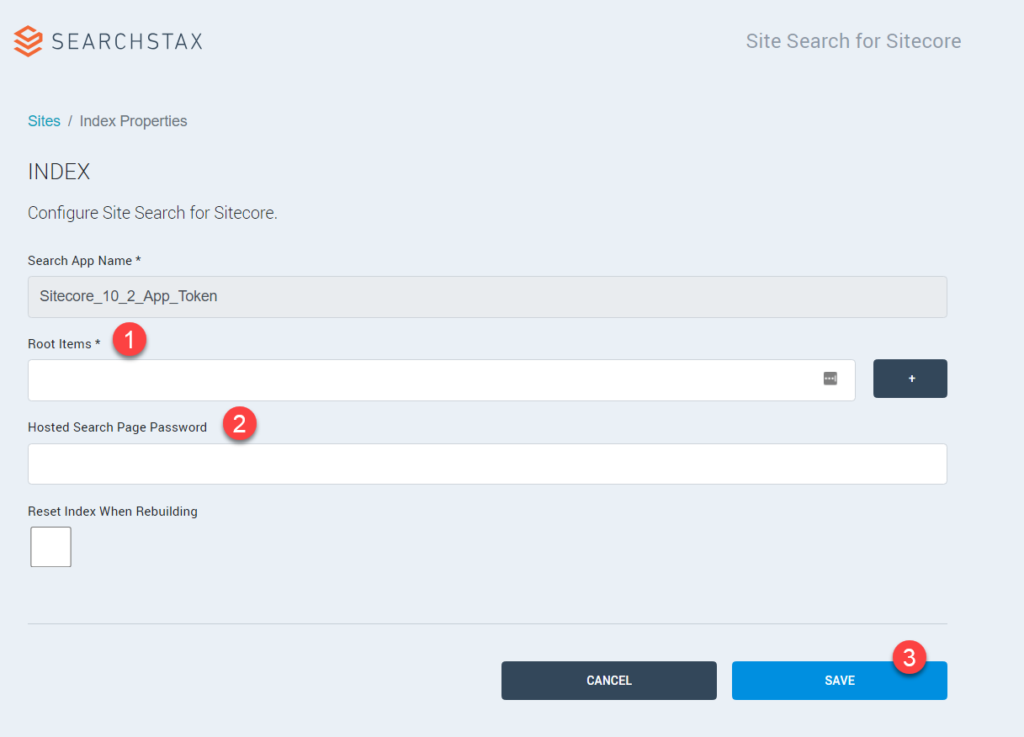
- Select your root Item(s). This is going to be the Sitecore Path where the Index should start it’s indexing from. You can list multiple root item paths if there are multiple locations within your Sitecore Content tree that content should be searchable from. By default, the module will index every page under /sitecore/content/home/.
(Optional) You are given an opportunity to enter the Hosted Search Page Password. At this point, unless you know what this password is, and you have previously configured it, we can safely skip this field.
- Press the Save button. Now move on to the next step.
Configure Site Search for Sitecore with Basic Authentication:
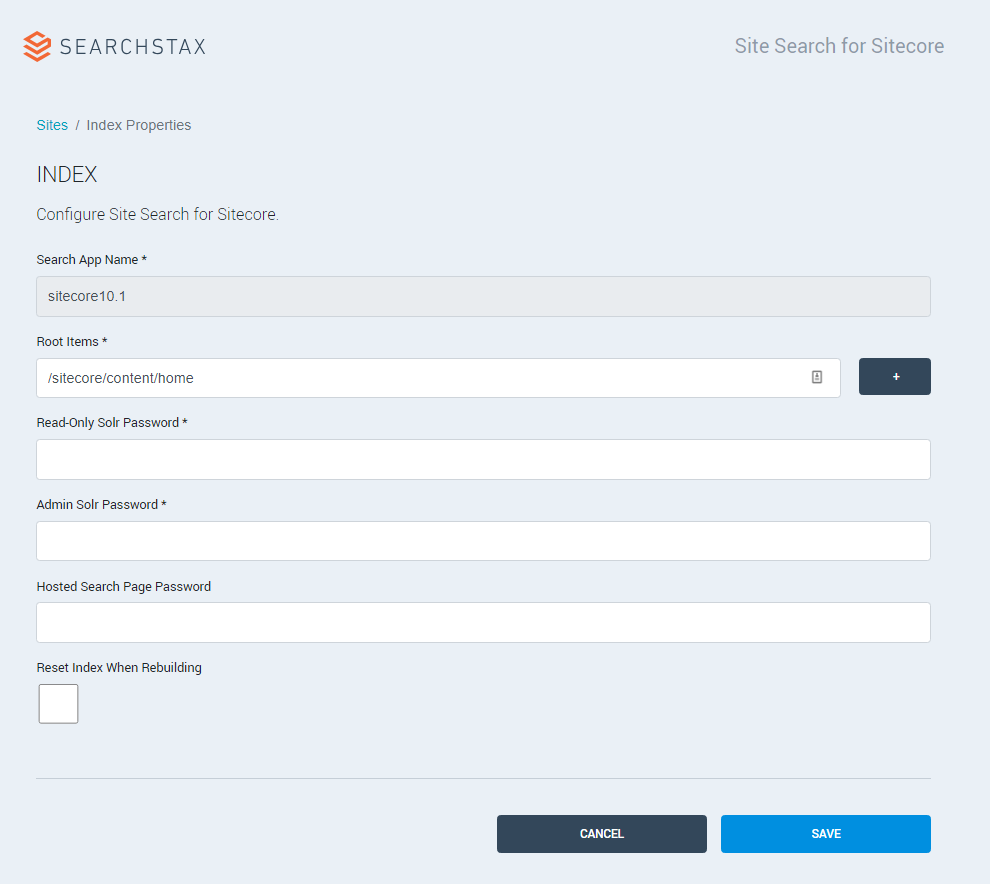
- Select your root Item(s). This is going to be the Sitecore Path where the Index should start it’s indexing from. You can list multiple root item paths if there are multiple locations within your Sitecore Content tree that content should be searchable from. By default, the module will index every page under /sitecore/content/home/.
- Read Only Solr Password and Admin Solr Password: These are the “Read-Only API Credentials” and the “Read-Write Search API Credentials” from the Search API tab of the Site Search > Navigation Menu > Search App > Settings > Apps Settings screen. You’ll have to scroll down to the bottom of the screen to find them. The User ID is set by the system, but you can set the password (both Read only and Read Write need to be set).
(Optional) You are given an opportunity to enter the Hosted Search Page Password. At this point, unless you know what this password is, and you have previously configured it, we can safely skip this field.
Reset Index When Rebuilding: Check this field if you want SearchStax to completely clear your index right before rebuilding it. Keep in mind that doing so your index will be empty during the rebuilding process, which might take minutes, and that your search page will return no results during this period of time.
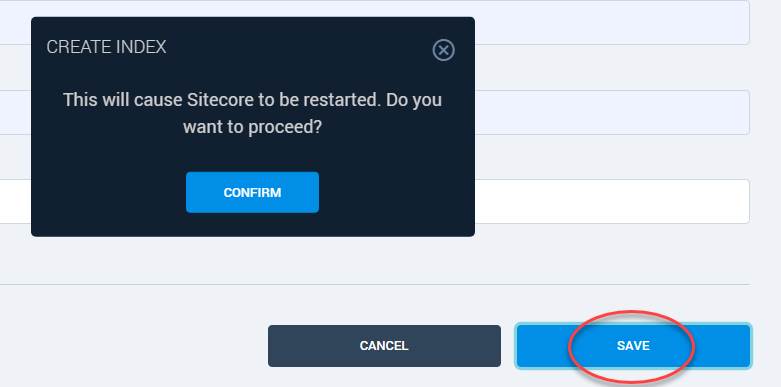
Press the Save button.
After pressing Save you’ll be prompted a confirmation box. Press confirm to allow Sitecore to apply the appropriate configuration files.
Validate Index Creation and Populate Managed Schema
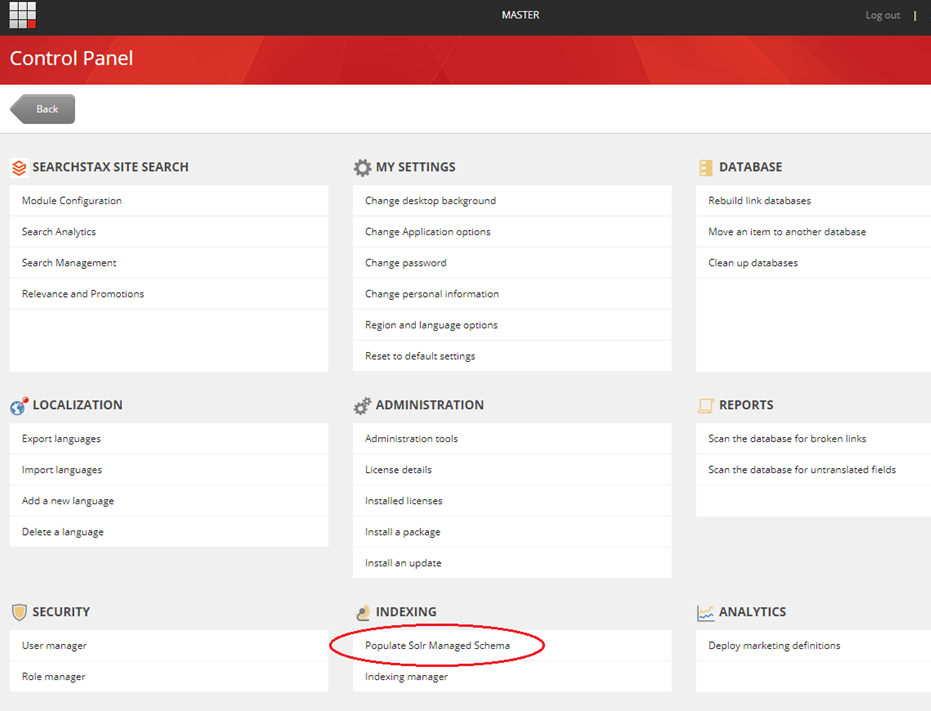
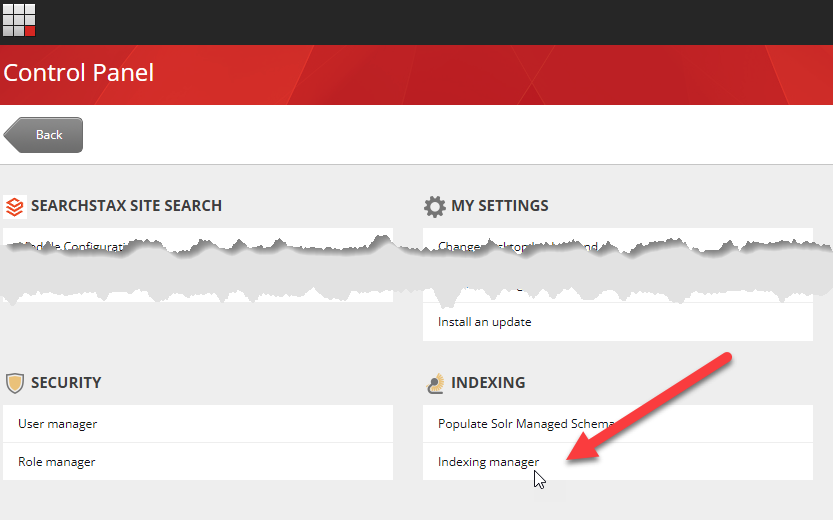
Once you have installed and configured the Sitecore module, you must run a Populate Schema operation on this new Solr collection to update its schema with the one used by Sitecore. You can find more details about this at https://doc.sitecore.com/xp/en/developers/90/platform-administration-and-architecture/solr-managed-schemas.html. This is a common operation that must be executed on every Solr index used in Sitecore and is very easy to perform. Open your Sitecore admin page and click on Control Panel -> Populate Solr Managed Schema.
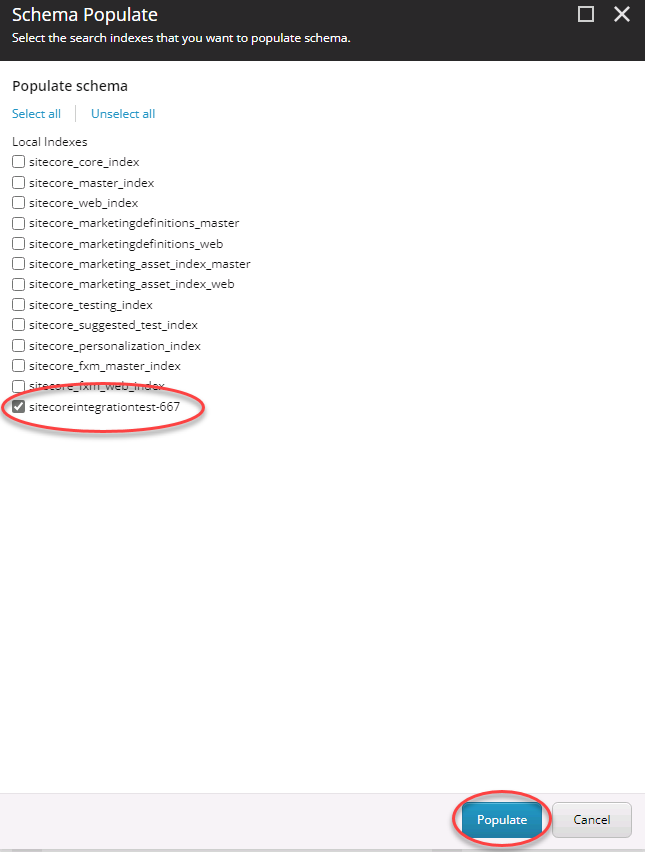
Select your previously configured core name and then click on Populate.
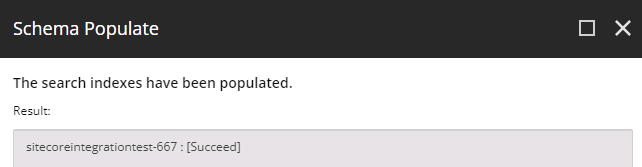
Once this operation is completed, you should see a success message like this:
Now go back to the Control Panel and click on Indexing Manager. When it opens, select your previously configure core name and click on Rebuild.
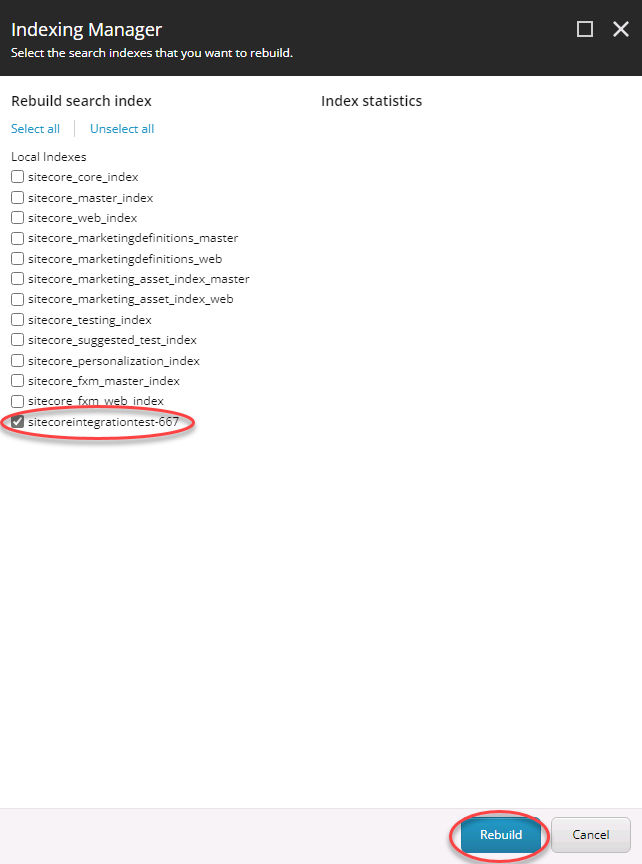
Usually, it should only take a few minutes but keep in mind that the time this operation will take is proportional to the number of items you have in your Sitecore.
Once this operation is completed you should see a success message like this:
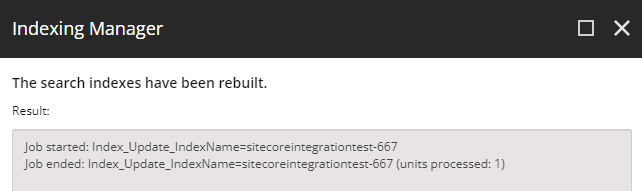
This means that your schema is updated and your SearchStax index is ready to receive new indexed items and search queries.
Reload the Search App’s Schema from within the Site Search Dashboard
At this point, we navigate away from Sitecore and login to your SearchStax Site Search Dashboard.
(You can search SearchStax Site Search directly by going to www.searchstudio.com or click on Search Management from within Sitecore as shown below.)

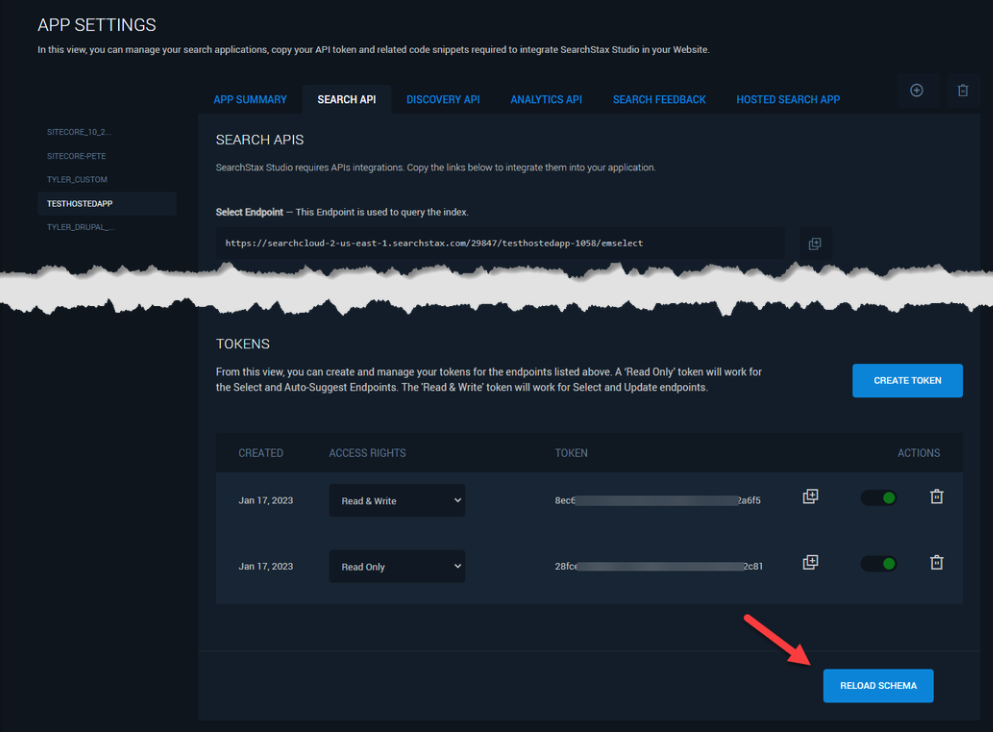
- From within Site Search, select the appropriate app that you are in the process of setting up. Navigation Menu > Search App > Apps Settings.
- Click on the Search API tab at the top, then scroll to the bottom of the screen, and press the Reload Schema button.
Rebuild the Index
Head back to the Sitecore Control Panel and select on Indexing Manager.
Select the appropriate index and then click the Rebuild button.

Create a Search Page
- Configure Result Fields in SearchStax Site Search
- Go to Site Search > Navigation Menu > Search App > Search > Results Configuration
- Select all fields that you would like to be displayed in Result Items. You can map some of the fields to the Result Cards to show them in a special way. Make sure you have at least one field set up.
- Click on Publish to publish the Results Configuration.

- Configure Relevance Model for SearchStax Site Search
- Go to Site Search > Navigation Menu > Search App > Search > Relevance Modeling
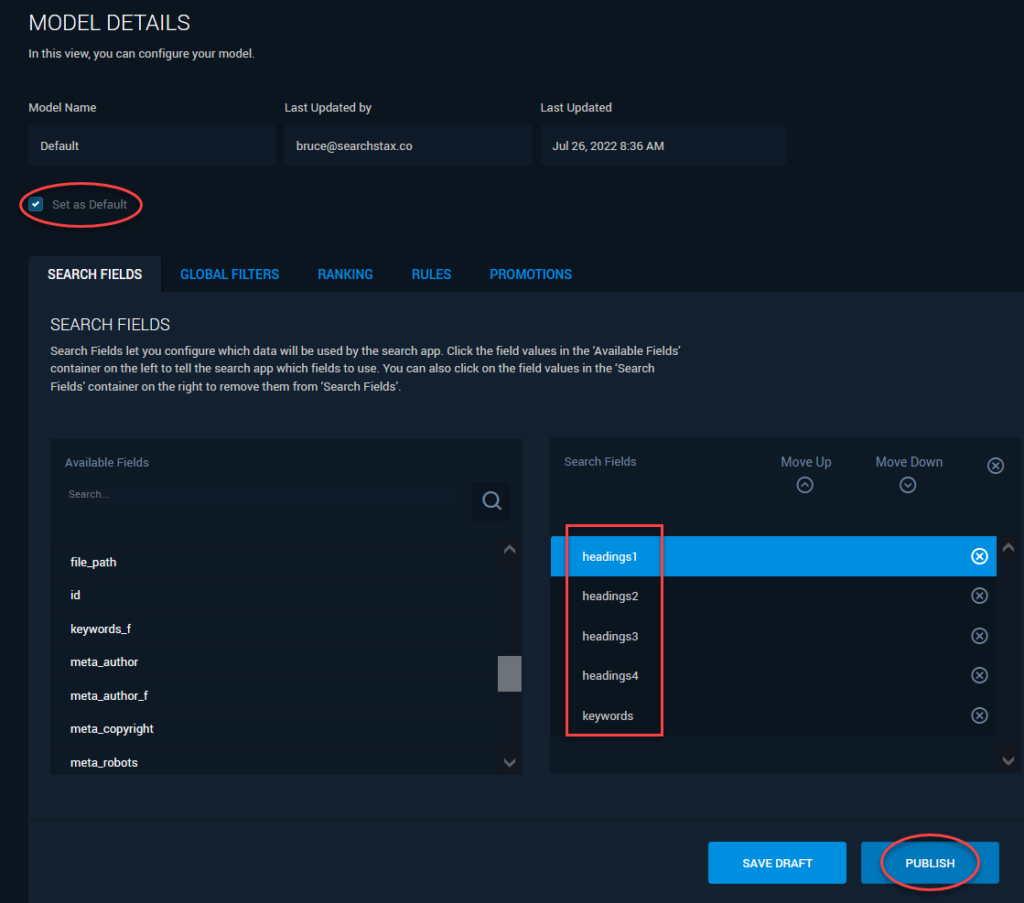
- Click on “Create a Model” and create a new model named “Default”. If one already exists, you can click on it to edit it.
- Check “Set as Default” for this model
- From the Search Fields, select one or more fields that you would like to search on. At least one field should be selected.
- Click on Publish to publish the Relevance Model.
The Sitecore Module comes with a plug-and-play search page template that you can use to create your search page in a few minutes. Use the /sitecore/templates/Feature/SearchStax/SearchPage/SearchStaxPage template to create it.
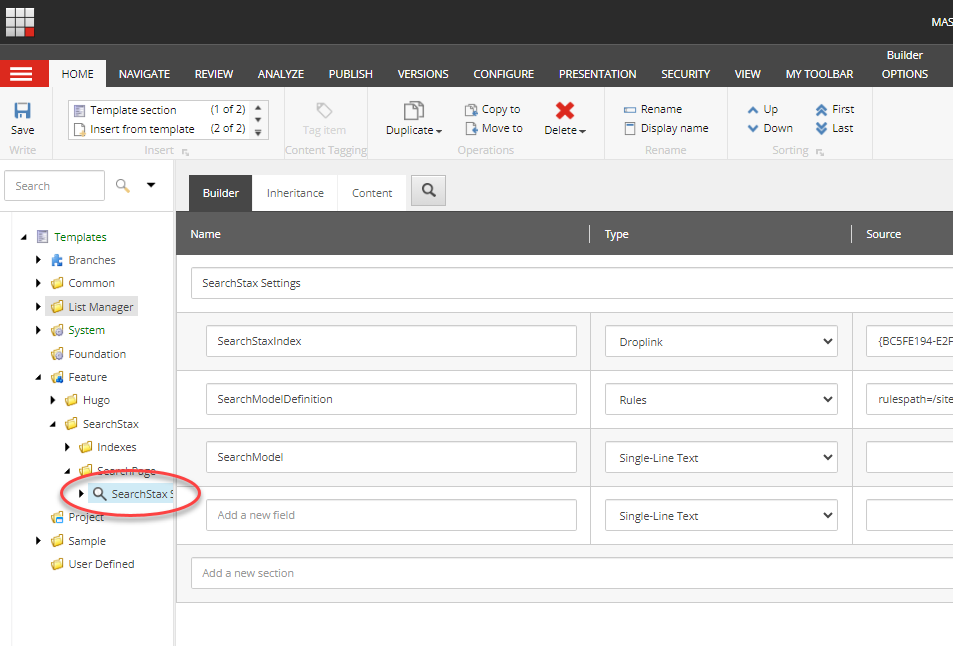
And then use the SearchStax Index field to select which index must be used by this search page when performing queries:
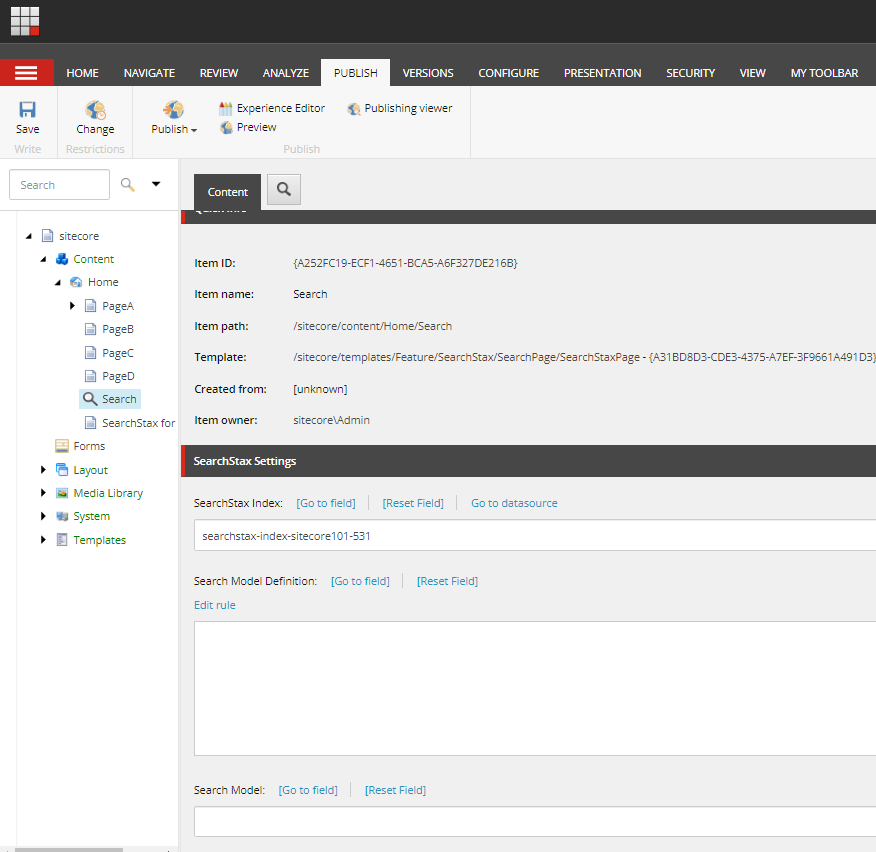
You just need to publish it to start testing your new search experience:

Computed Fields
The Sitecore Module uses a few computed fields out-of-the-box. These fields improve the search experience of your initial search page, but they can be replaced or removed as your project matures. The module’s computed fields are described in the following sections.
For general information on Sitecore’s computed fields, see https://doc.sitecore.com/xp/en/developers/91/platform-administration-and-architecture/create-a-computed-index-field.html.
ResultTitle
This field contains the title of the result item, based on the Sitecore item DisplayName property. If that is empty, the returned string is its Name property value.
This field is not required by the module to make it work properly. However, it is the field that the module uses as the result template title. If you decide to remove or change, do not forget to change the Site Search config connector.fields.title property on the /Views/SearchStaxPage/Index.cshtml.
ResultURL
This field contains the result URL. It leverages the native Sitecore MediaManager.GetMediaUrl method for media items to get the item URL. When the item is not a media item, this fields starts by defining the current website context. It uses the indexed item Paths.FullPath property and tries to find a website definition which has the same Database property value and has a RootPath which is a parent item from the current one. Once it finds the current website context, it then leverages the native Sitecore LinkManager.GetItemUrl method to get the item URL.
This field is not required by the module to make it work properly. However, it is the field that is used as the result template clickable URL. If you decide to remove it or change, do not forget to change the Site Search config connector.fields.url property on the /Views/SearchStaxPage/Index.cshtml.
RenderedContent
This field contains a string value that improves the search relevance of the website. It indexes not only the current item text fields, but also the text fields from every data source present on any given indexed page rendering, except the renderings on the <renderedContentFieldExcludedRenderings> configuration list.
In order to add new rendering ids to this list and remove them from being indexed by this computed field, please edit the < renderedContentFieldExcludedRenderings > node children’s values on the App_Config/Modules/SearchStax/SearchStax.Cloud.config file. This field is not required by the module to make it work properly. You can remove it from your index if you wish.
Adding a Custom Computed Field
What if you would like to add a custom computed field to the configuration? After the SearchStax index has been created, find the index within [site]/App_Config/Modules/SearchStax/SearchStax.Connector.Provider.config, where [site] is the folder of your inetpub/wwwroot/site. In the <fields hint=”raw:AddComputedIndexField”> section, add an entry for the CustomComputedIndexField:
<field fieldName="CustomComputedIndexFieldName" returnType="string">
     YourNameSpace.CustomComputedIndexField,YourNameSpace
</field>
Bear in mind that computed index fields are expensive and place a load on the CPU. One should minimize their use.
Questions?
Do not hesitate to contact the SearchStax Support Desk.