
Site Search / Drupal Integration
Setting up SearchStax Site Search for Drupal Module is an easy, step-by-step process that you can complete in just a few minutes.
1. Install and enable the following modules. They are dependencies for SearchStax Site Search module. It’s recommended that you install the following modules using Composer
- Install the Search API – https://www.drupal.org/project/search_api and enable it in Drupal
- Install the Search API Solr – https://www.drupal.org/project/search_api_solr and enable it in Drupal
- Install the Search API SearchStax module (skip this if your app is using Basic Authentication) – https://www.drupal.org/project/search_api_searchstax and enable it in Drupal
2. Click on the Configuration tab. Look for the Search and Metadata section and click on Search API to configure it.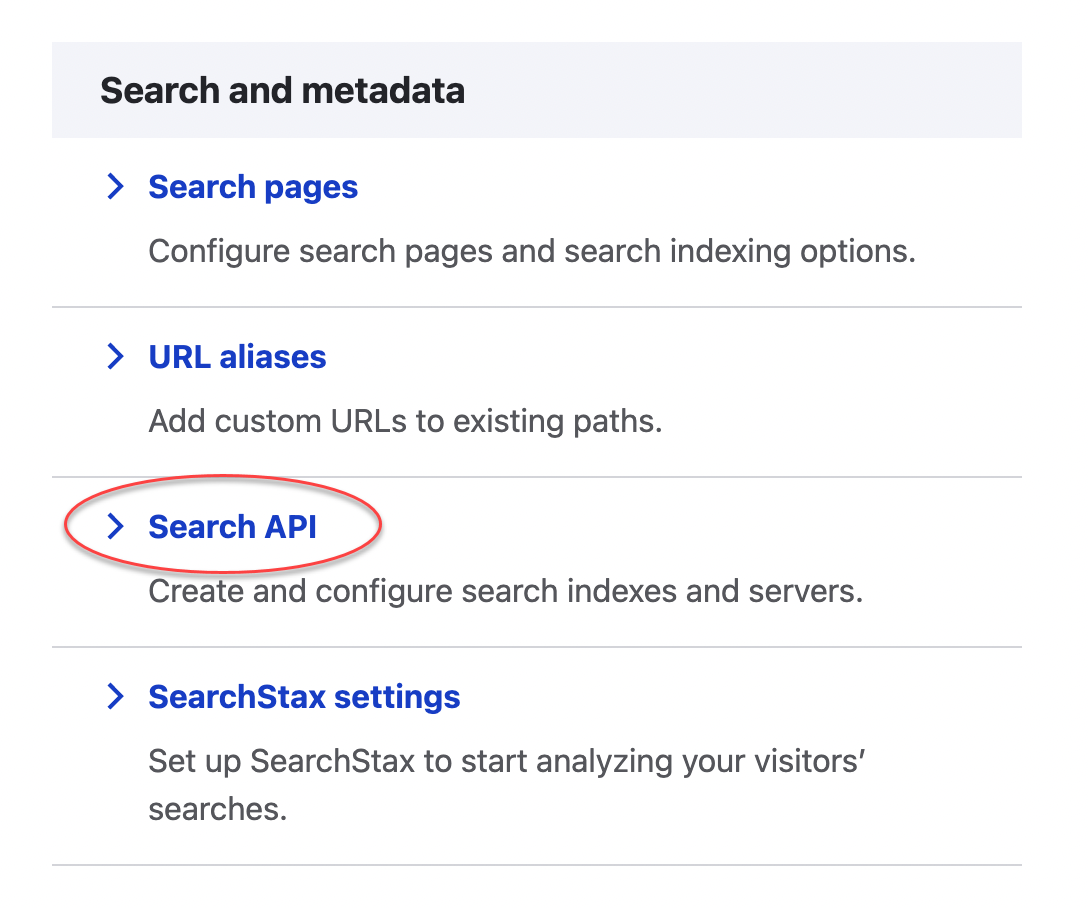
3. Once there, click Add Server.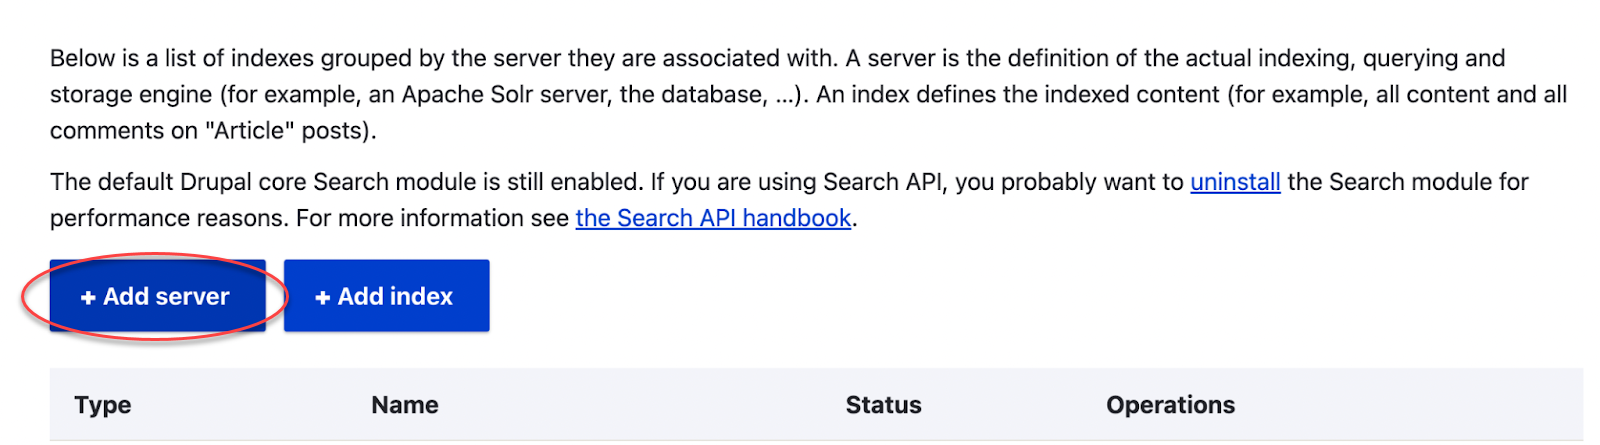
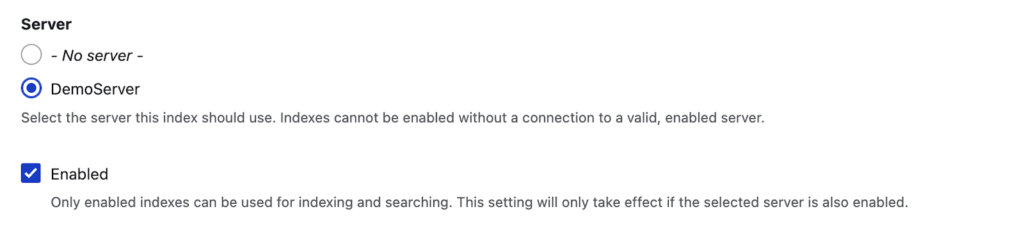
4. Give your server a name. Make sure the Backend is set to Solr. 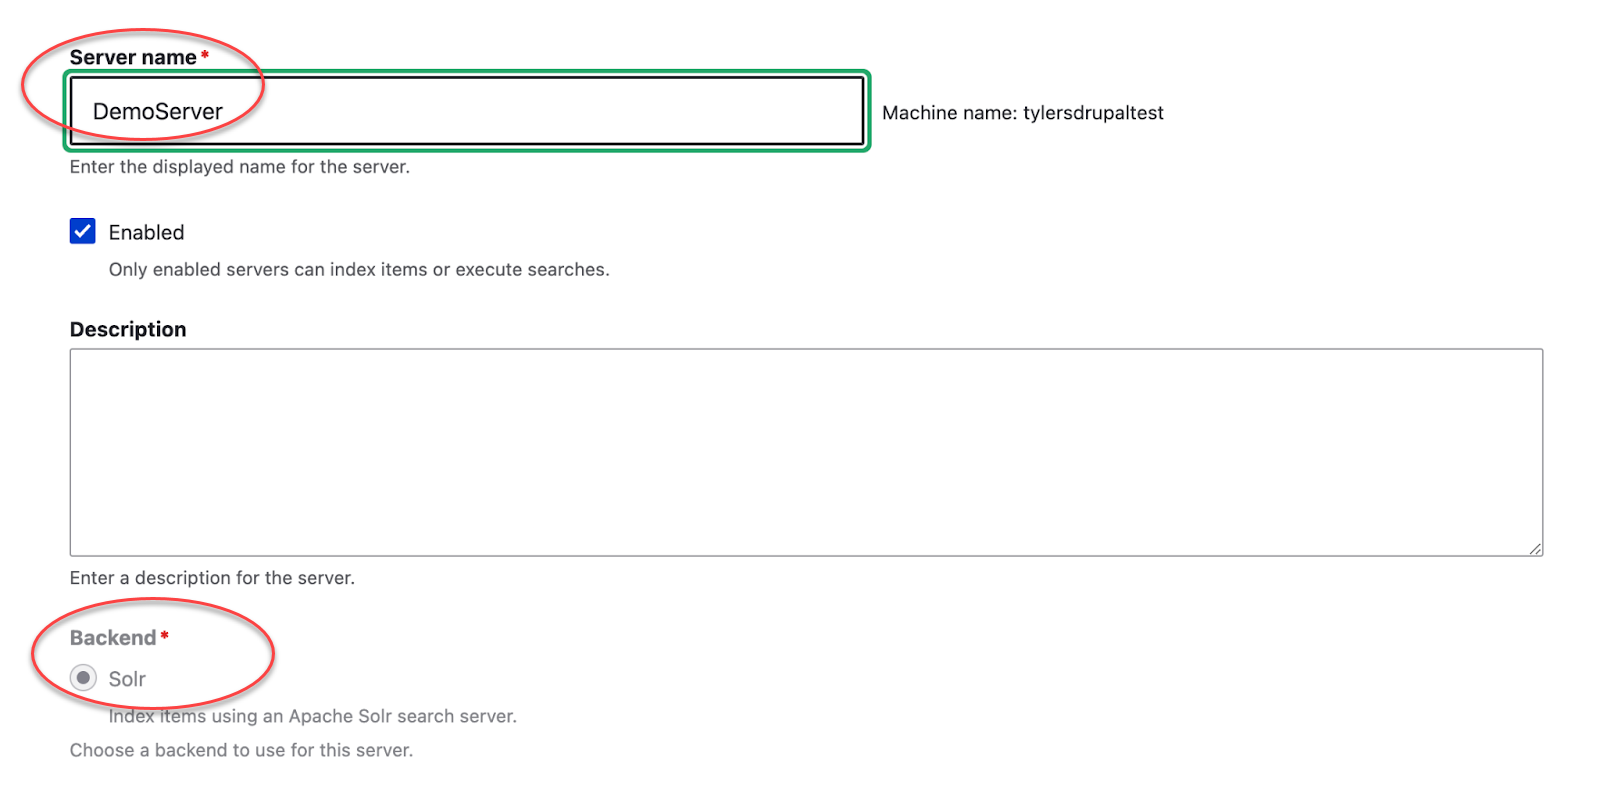
5. Configure the Server
In the case that your Search App is using Basic Authentication, go here. Otherwise, follow these set of directions below:
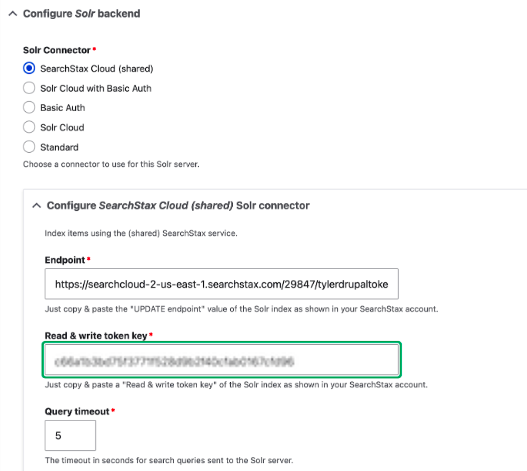
- The Solr Connector: SearchStax Cloud (shared).
- Check that HTTP protocol is set to https.
- The Endpoint: the Update endpoint for your Search App. The Update endpoint can be found in Site Search > Navigation > App Settings > Search API
- The Read & write token key: the Read & Write token for your Search App. The Read & Write Site Search token can be found in Site Search > Navigation > App Settings > Search API
- Scroll down and click the Save button. Now move on to the next step.
Configure the server with Basic Authentication:
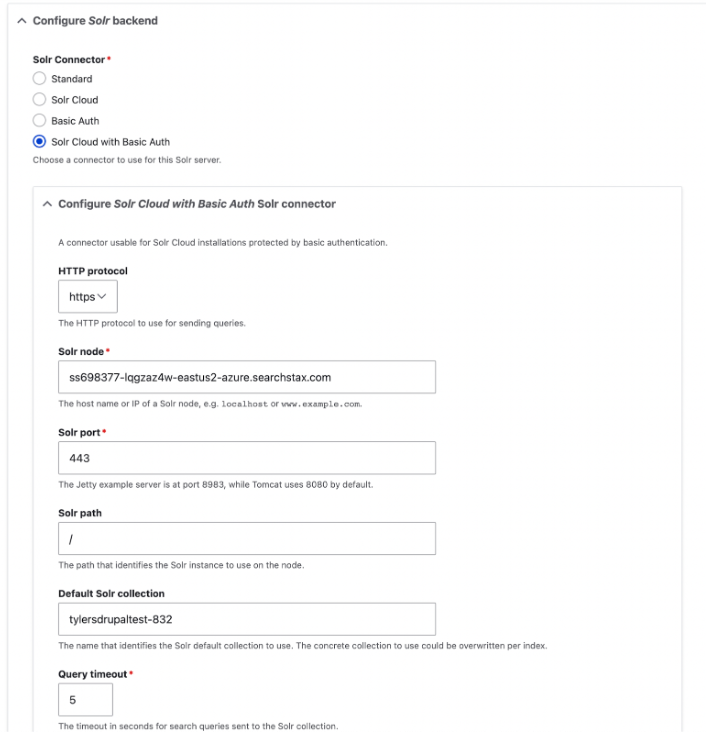
- The Solr Connector: Solr Cloud with Basic Auth.
- Check that HTTP protocol is set to https.
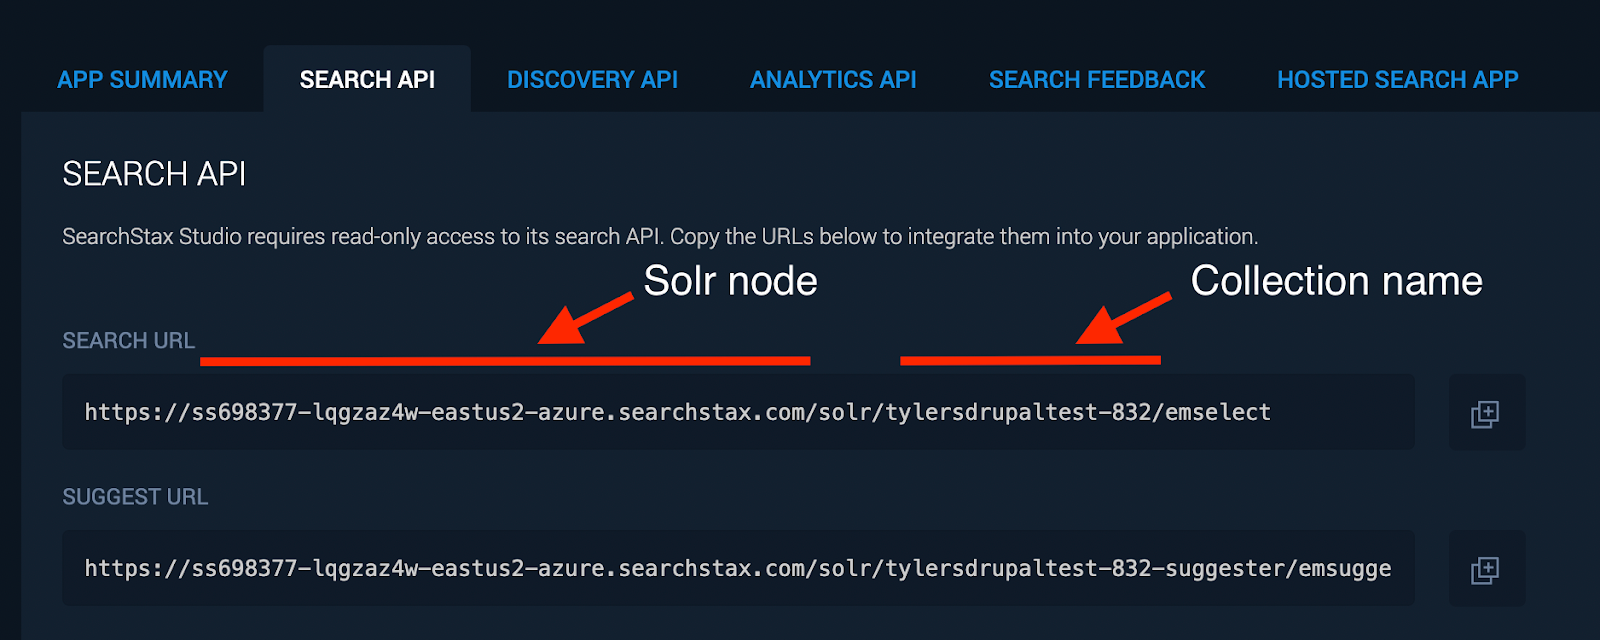
- The Solr node: the deployment’s Solr HTTP Endpoint without the /solr/ element. You can find this in your Site Search dashboard under Site Search > Navigation > App Settings > Search API.
- For incoming connections from Drupal, the Solr port is always 443.
- The Solr core is the name of the collection. Your collection name is between solr/ and /emselect.
- Note that the Solr path was /solr in version 8.x-2.7 of the Search API Solr Module, but it changed to / (no “solr”) in version 8.x-3.1. See Upgrade Search API Solr from 2.x to 3.1 for further information.
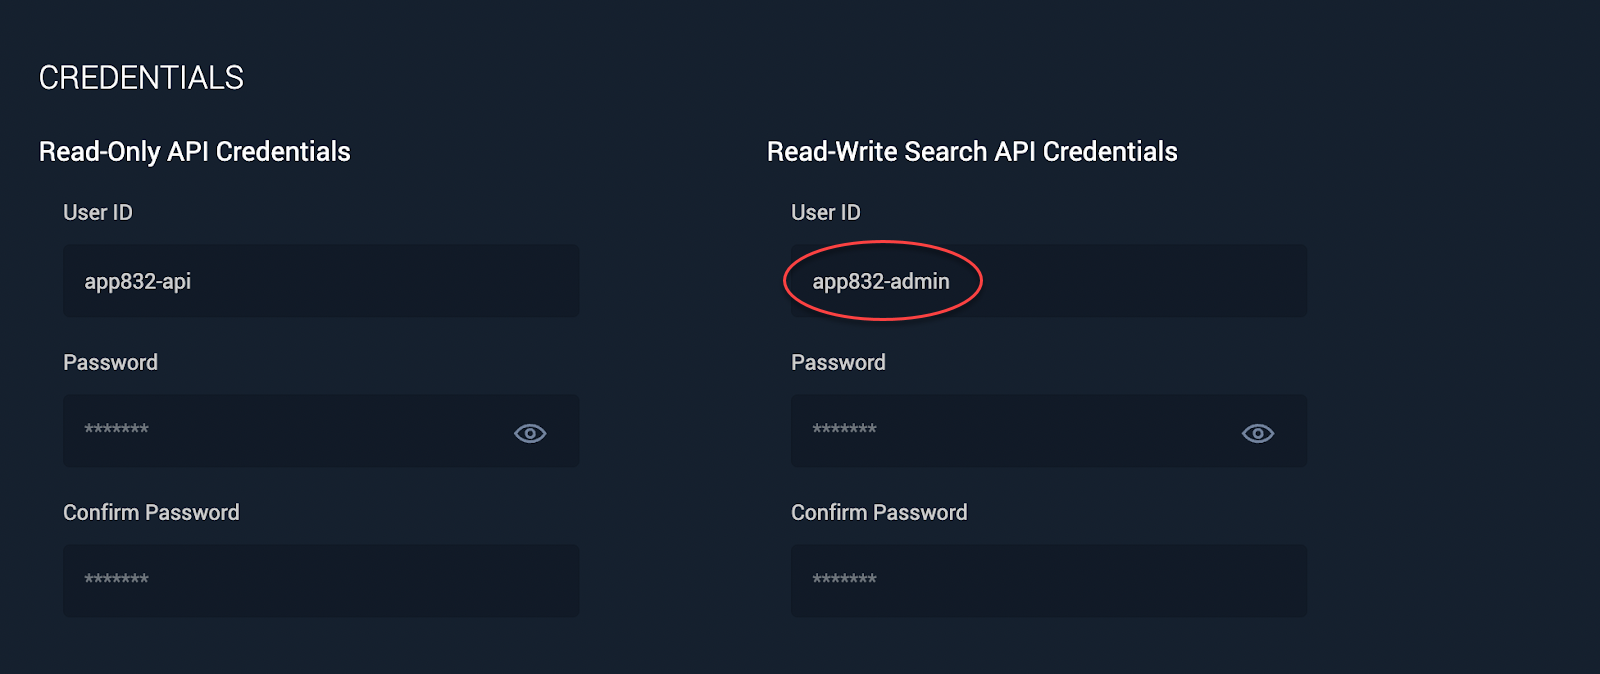
- Enter user credentials for HTTP Basic Authentication. These are your Read-Write Search API credentials in Site Search > Navigation > App Settings > Search API.

- Click the Save button.
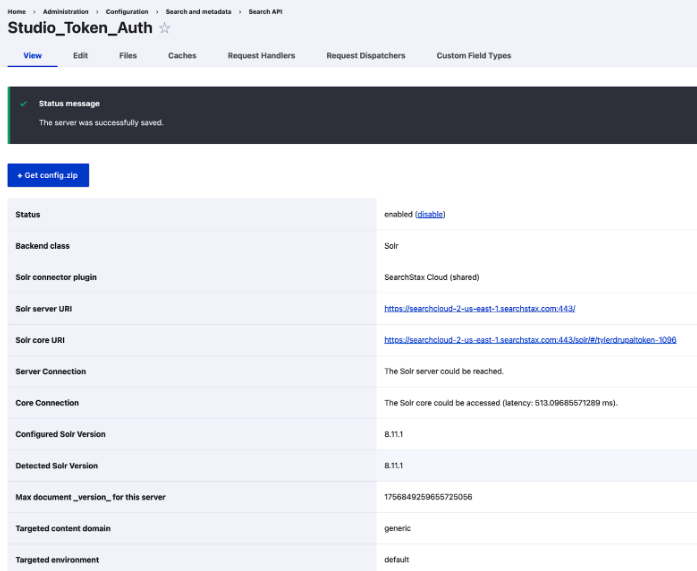
6. After pressing Save, your Server details should appear with a status message that “The server was successfully saved”.
- Server Connection status should read “The server could be reached.”
- Core Connection should read “The Solr core could be accessed” with a latency reading.
7. Next you will need to define an index. In the Search API configuration screen, click on Add Index.

8. Give your index a name, and select the data sources you wish to index. For this example, select Content. Select the Server created earlier. Click Save and add Fields.

9. Select Fields to Index. It is up to you what fields you’d like indexed. These will eventually be searched against, used for faceting, and more in SearchStax Site Search. We recommend the following fields:
- rendered_item
- langcode
- Status
- uid (author)
- Content
- body
- Title
- published date
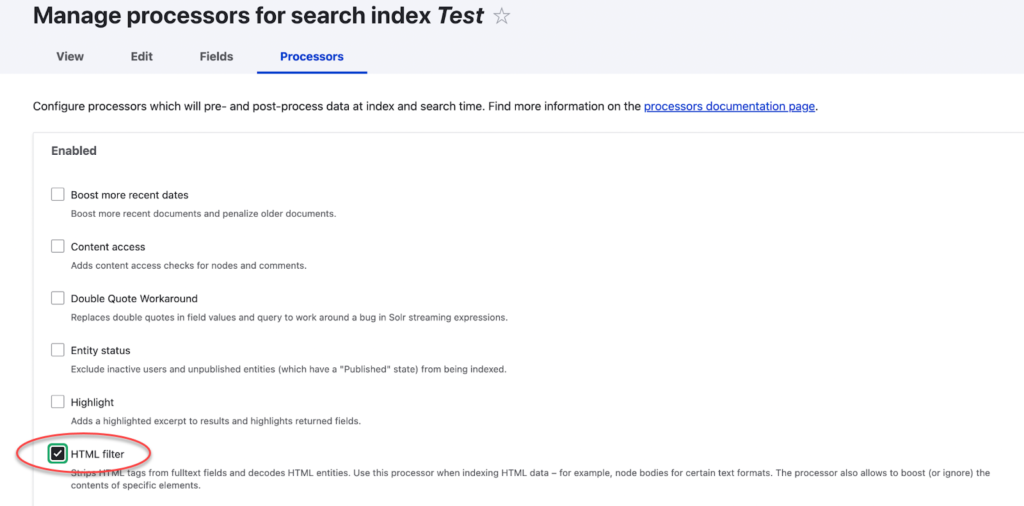
10. Add a Processer. We recommend adding an HTML filter found in the Processor tab.
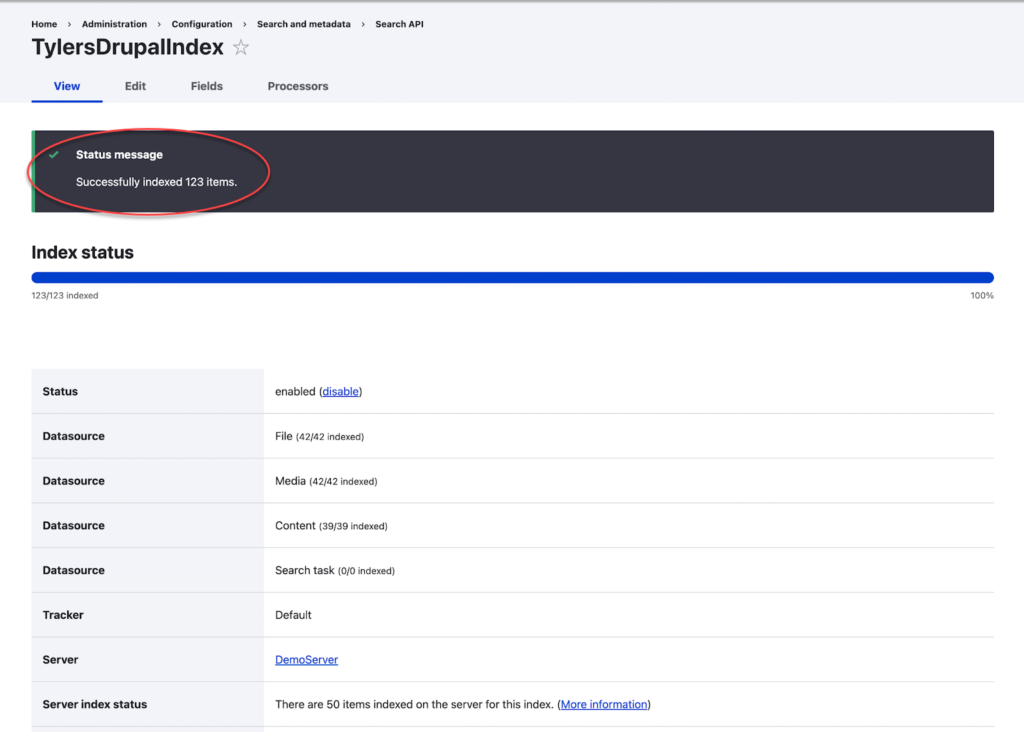
11. Manually Index Your Site: A cron job will periodically index your site automatically, but if you want to see your results immediately go to the Search API configuration screen and click on the index created earlier. At the bottom, click on the Index now button.

12. After you begin, you will see a progress bar. Once it reaches 100%, you will get a success message.
13. If you are planning to use the UX Accelerator or implement Site Search directly from the APIs, see the instructions below.
- Instructions on implementing with the Accelerator – https://www.searchstax.com/docs/searchstudio/searchstax-studio-ux-accelerator/
- Instructions on implementing with the APIs – https://www.searchstax.com/docs/searchstudio/searchstax-studio-search-api/
Otherwise, if you have a Drupal Views page configured or native Drupal search implemented, proceed to Configure the SearchStax Module.
Configure the SearchStax Module
Now that you have created a server and an index through Search API, the next step is to reroute your searches through SearchStax Site Search.
First, install the SearchStax module – https://www.drupal.org/project/searchstax and enable it in Drupal
Then, navigate to SearchStax module in your Drupal Admin – Administration > Configuration > Search and Metadata > Searchstax settings
Add configuration information. The configuration page contains the following options (subject to change):
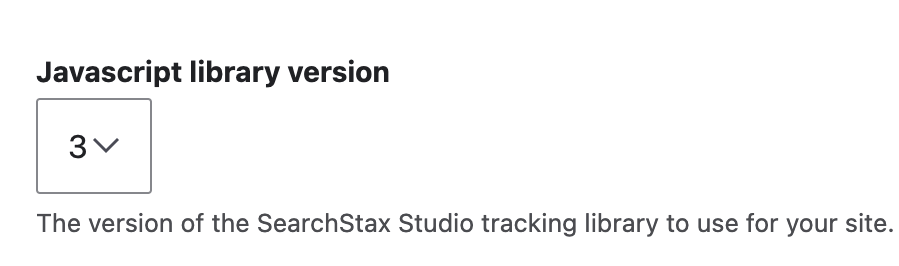
Javascript library version: Select the most recent version of the Site Search Analytics library. As of this writing, it’s version three.
Please reach out to Support if you wish to use an earlier version to understand the ramifications.
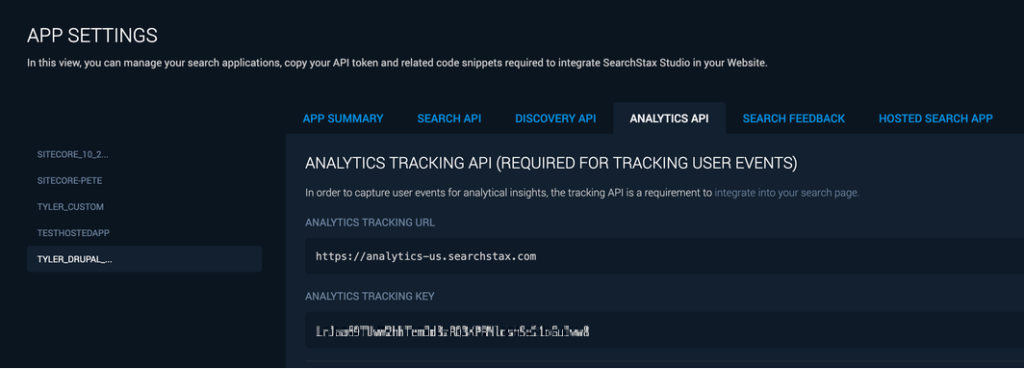
Analytics URL: To find the Analytics URL your Search App uses, navigate to your SearchStax Site Search account and select the App you are configuring for. Then go to Settings > Analytics API. Paste the Analytics tracking URL from Site Search into the Analytics URL field.

Global analytics key: The Global Analytics Key is the key Drupal uses for all searches unless search-specific analytics keys are identified below.
To find the Analytics Tracking Key your Search App uses, navigate to your SearchStax Site Search account and select the App you are configuring. Then go to Settings > Analytics API. Paste the Analytics Tracking Key from Site Search into the Analytics URL field.

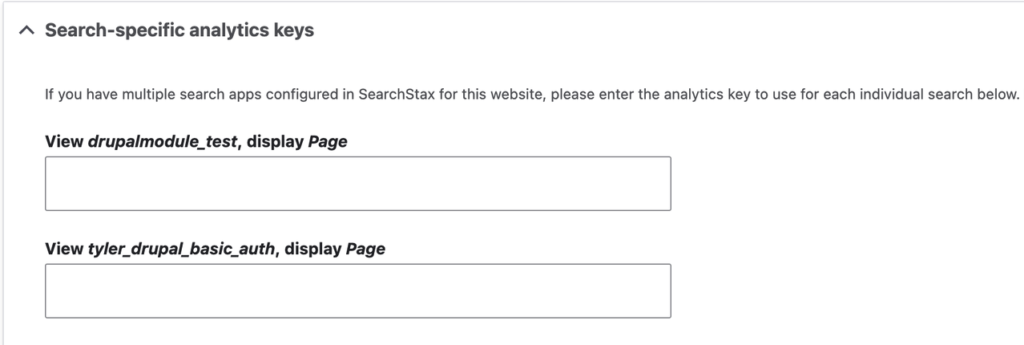
Search-specific analytics keys: In case you have several apps defined in the Site Search, you can use this section to change the analytics key used for every single search page on your site. (In case a search page is not listed here, its searches will also not be tracked!)
If you have only a single search app configured, you can safely ignore this section.
Auto-suggest core: (Only displayed if the Search API Autocomplete module is installed on your site.) If you want to use SearchStax’s auto-suggest capabilities, enter the Solr core to use into this field. You can find this in your Site Search account, under Apps Management » Search API » Suggest URL. The core is the second to last component – between /solr/ and /emsuggest.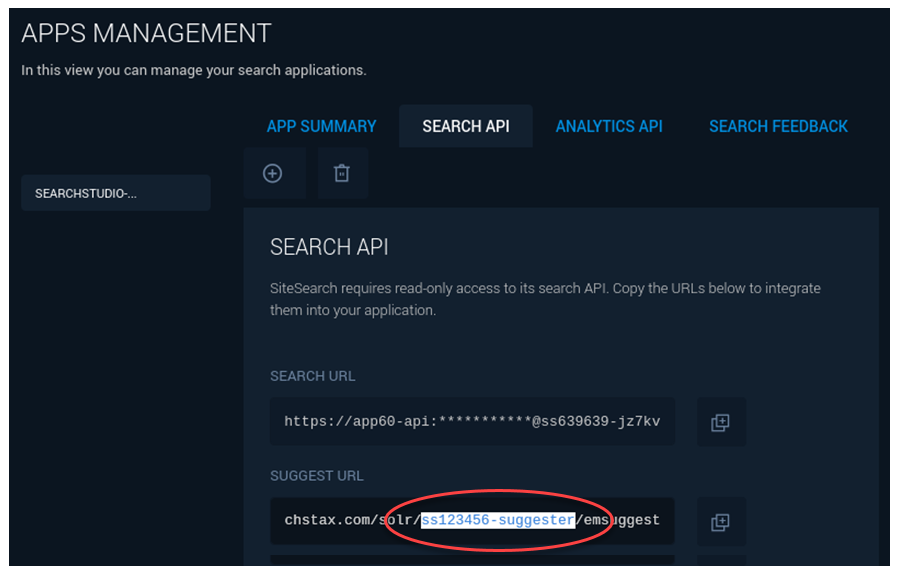
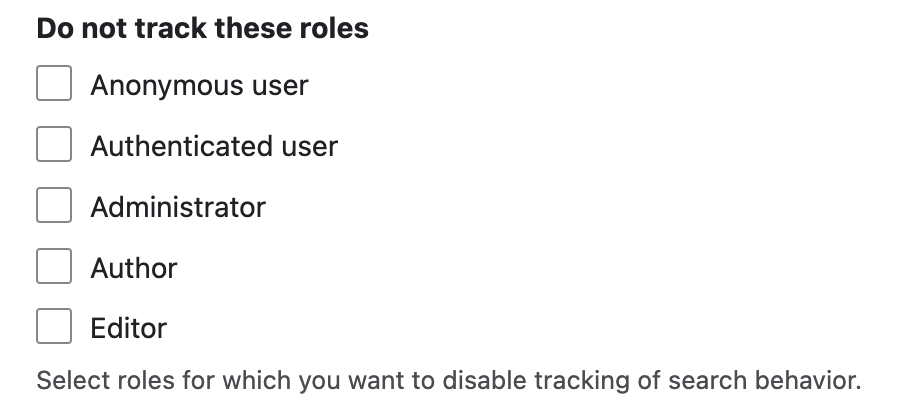
Do not track these roles: Choose which Drupal roles you wish to not track. In practice, Administrator, Author, and Editor should not be tracked.
Re-route searches through Site Search: To use Site Search on Drupal, this option must be checked. Instead of using native Solr (Select handler), Drupal send all search requests to the Site Search handler (emselect).
You can now tune your search relevancy with Relevance Modeling in Site Search.
Once this option is enabled, the module will make available a host of other options.

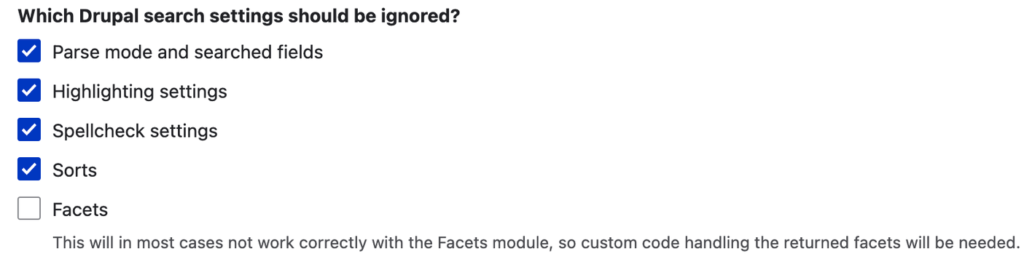
Configure searches via Site Search: Enable this option to ignore Drupal search settings (recommended). Enabling makes available the following options:
- Parse mode and search fields: This option must be selected to enable powerful features in Relevance modeling such as Rules and Promotions. It ensures the search query is passed in a way that the Site Search Relevance Model can understand.
- Highlighting settings: Select to have Site Search control hit highlighting instead of Drupal.
- Spellcheck settings: Select to have Site Search control spellcheck instead of Drupal. Learn how to configure spell check here.
- Sorts: Select this option to give Site Search control of sorting. Drupal will pass sorting as URL parameter when a search request is sent to Site Search.
- Facets: Select to control let Site Search decide what facets to display on the Drupal Facets module. Not recommended unless advanced user.
With all of this configured as desired, simply click Save configuration to complete the setup.
Follow the instructions in Your First Search to get started with SearchStax Site Search.
Questions?
Do not hesitate to contact the SearchStax Support Desk.