Migrate Drupal Solr Index to Site Search
The SearchStax Drupal Module integrates the SearchStax Site Search solution with a Drupal 8, Drupal 9, Drupal 10, or Drupal 11 environment. This page concerns the Migration submodule, which is included in the SearchStax Drupal Module. The Migration module enables you to seamlessly transfer a Solr index from Drupal into Site Search by following a straightforward series of steps, ensuring zero downtime.
To download the latest version of the SearchStax Drupal Module, visit SearchStax Studio – Site Search.
Basic Steps
- Create a Site Search App
- Migrate the Server from Drupal to SearchStax
- Migrate the Index from Drupal to SearchStax
- Enable the SearchStax Module and Route Searches through It
- Validate
Step 1: Create a Site Search App
Set up a new App on your Site Search account dashboard using the steps detailed at Creating a Search App. During the creation process, select Drupal as the platform, and choose one of the available versions in the dropdown.
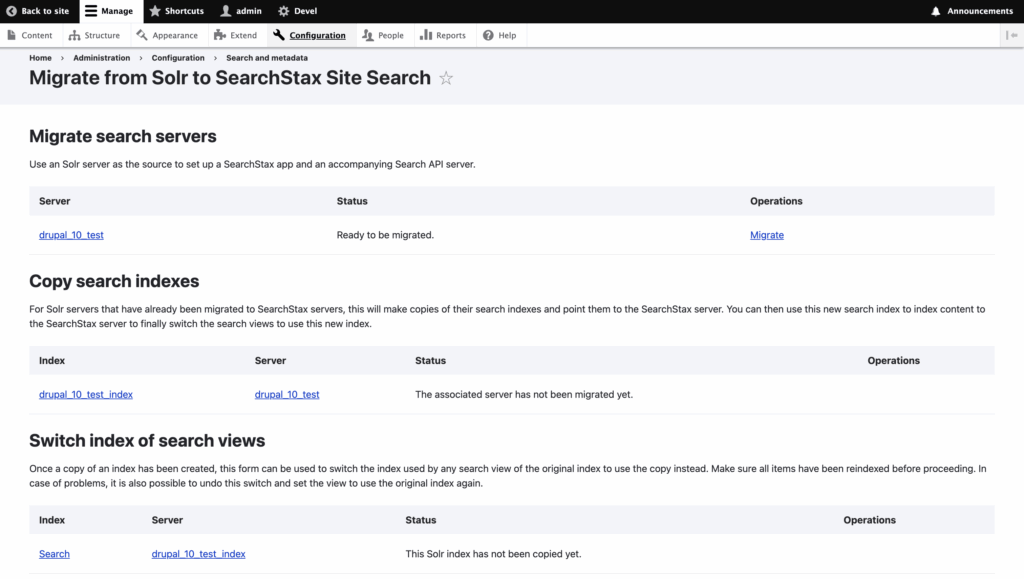
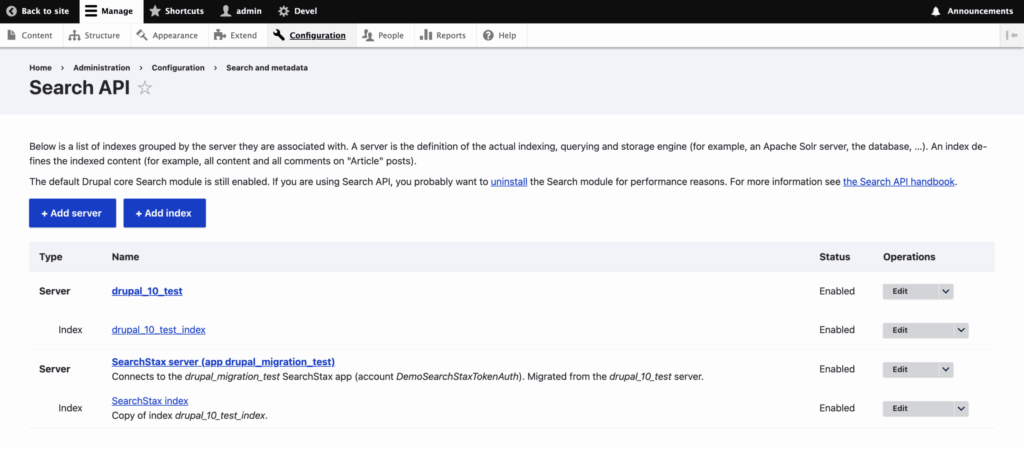
Step 2: Migrate the Server from Drupal to SearchStax
Go to your Drupal website’s admin dashboard.
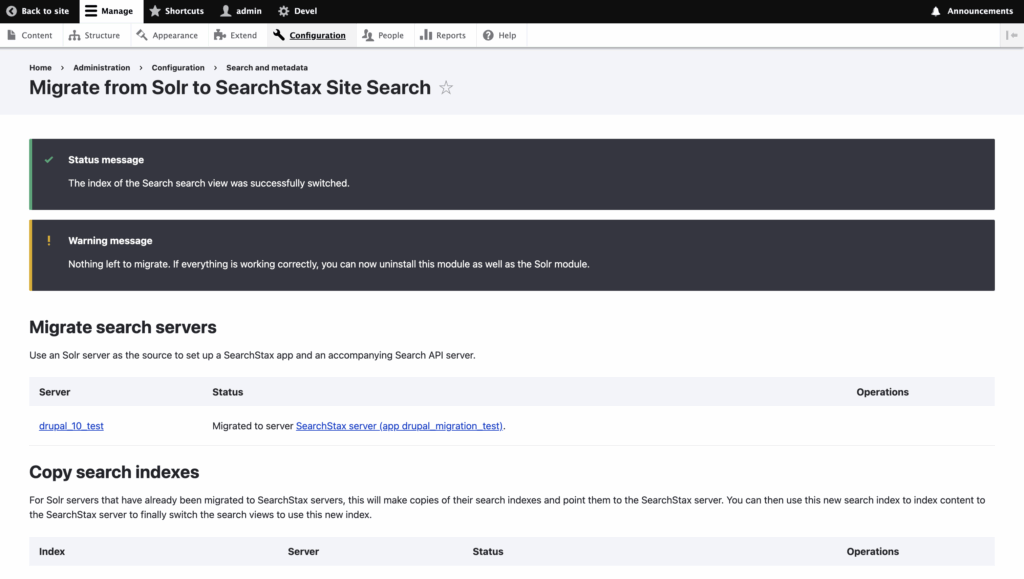
Go to Configuration > Search and Metadata > Migrate from Solr to SearchStax.
Click on the Migrate button.
You will see a login screen similar to the one shown below.
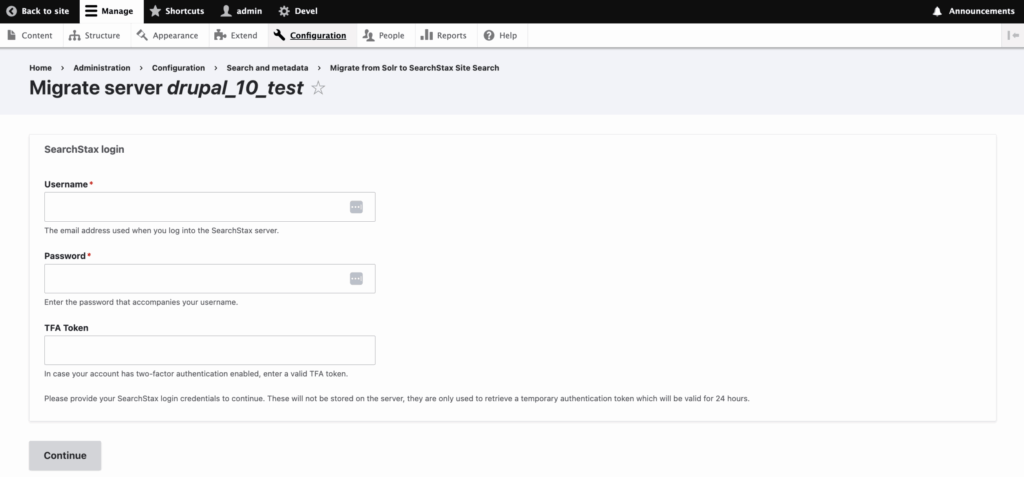
Credentials
Use your Site Search Account credentials to log in during the “Migrate Server“ step, along with the 2FA token, if you have it enabled.
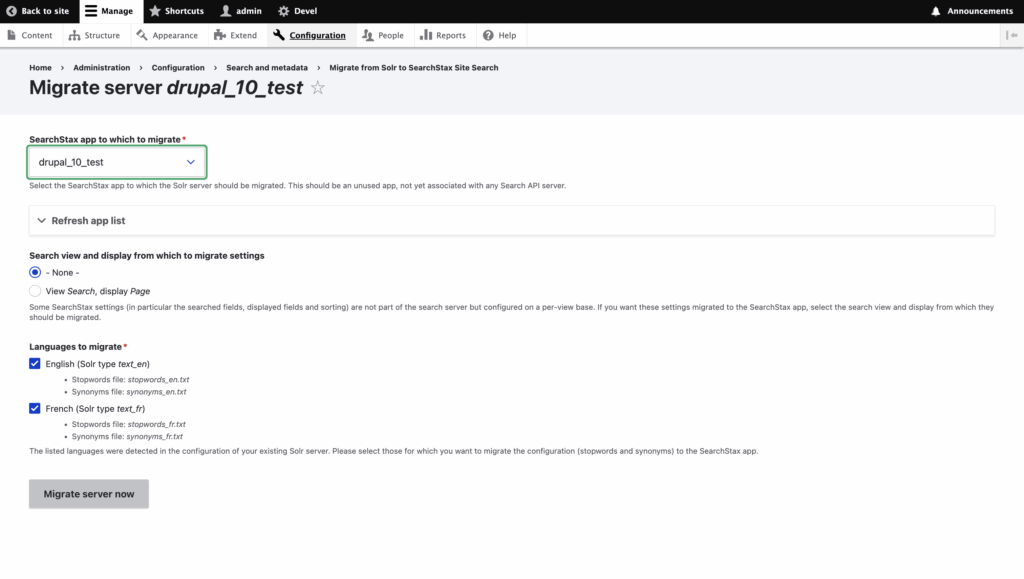
Once you log in, you will see a list of all Apps present on your Site Search account.
Select the App you want to connect to from the dropdown list.
Then, select the view from which you want to retrieve the settings, and choose the languages to migrate.
Finally, click on the Migrate server now button.
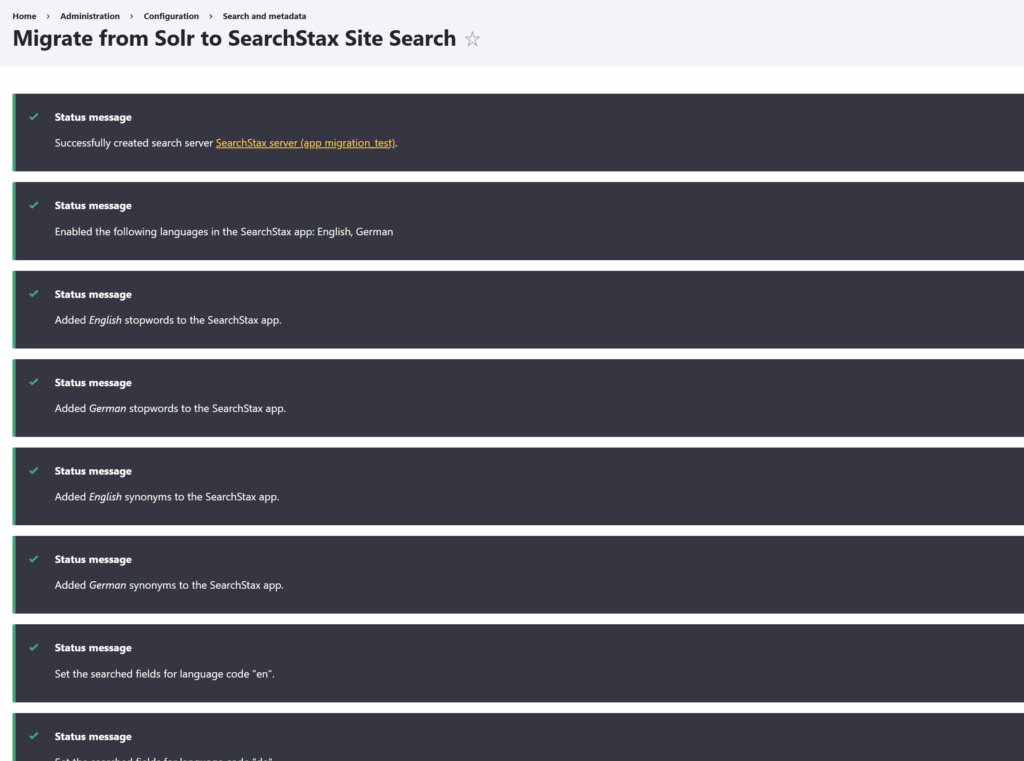
After successful migration, you should see several success status messages, indicating the artifacts that migrated:
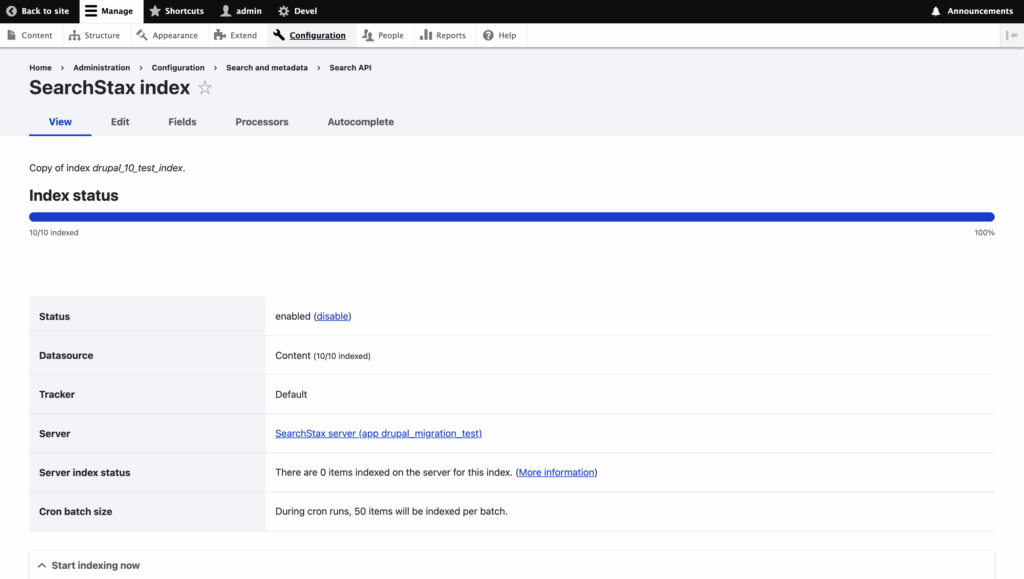
Step 3: Migrate the Index from Drupal to SearchStax
Create a copy of the existing index that you want to migrate, by clicking on the Create copy button:

Once the copy is created successfully, select it, then click on the Index now button and reindex the data:


Once the indexing process is successful, the Index status progress bar at the top should be completely filled, indicating the number of items that have been indexed.
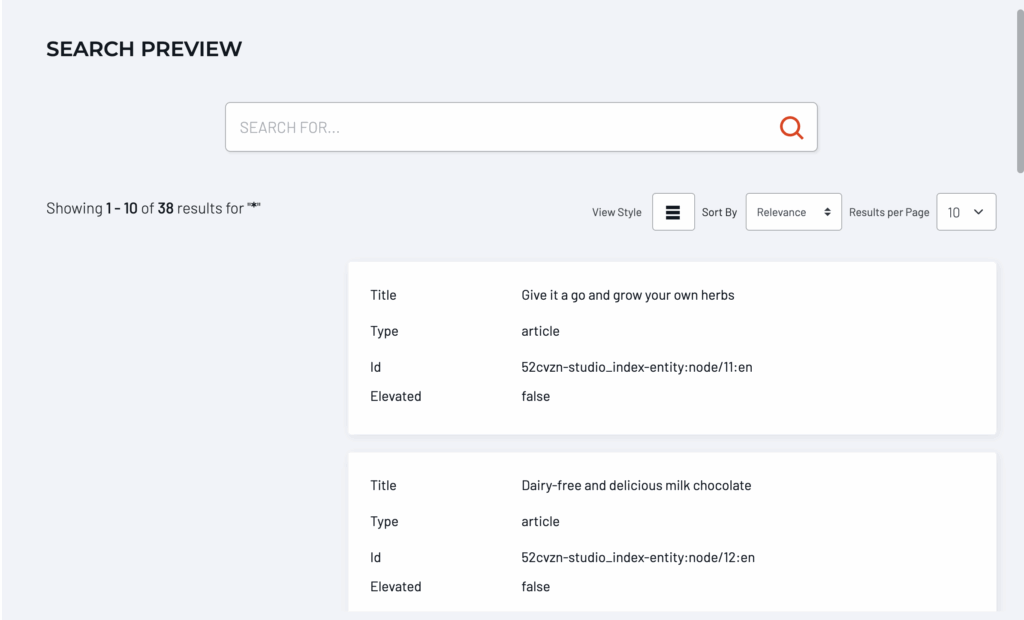
Wait ten minutes for the data to show up in the Site Search App’s Search Preview:
Finally, migrate the View by switching it to the copy of the index.
Click on the Switch to copy button:
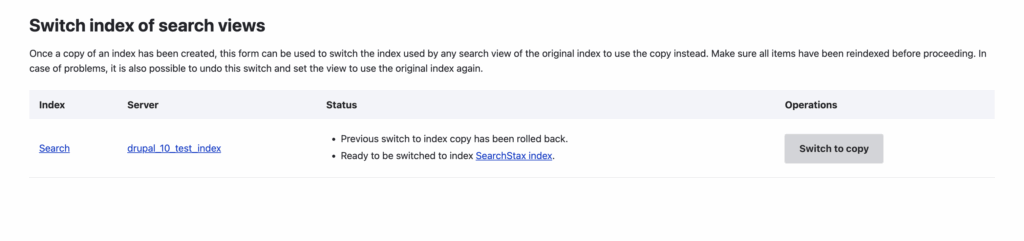
If the migration is successful, you will see a success status message like the following:
Step 4: Enable the SearchStax Module and Route Searches through It
Follow the instructions in the Set Up Drupal Module page under Configure the SearchStax Module to enable the SearchStax module, route the API through Site Search, and add the analytics information.
Step 5: Validate
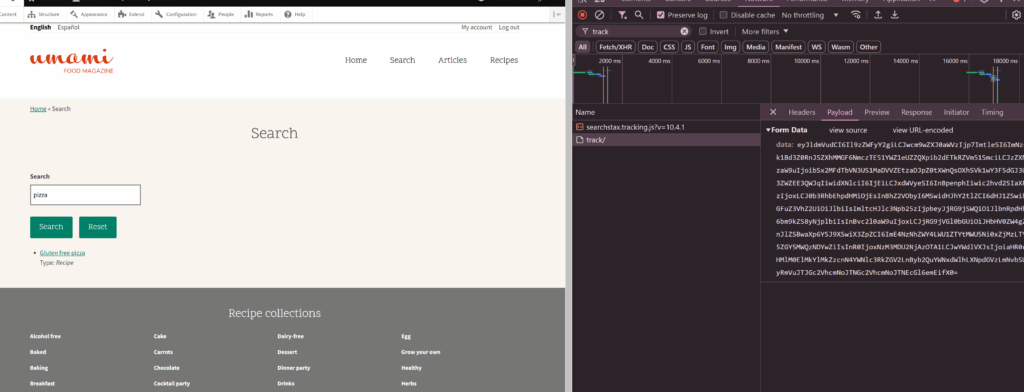
The final step is to validate the search page and make sure the relevant data is being tracked correctly.
Go to your Drupal website’s search page, and open up the Inspect element’s Network tab.
Network Tab
To view the Network tab on your search page, right-click anywhere on the content of the page, and click on the Inspect option in the menu that pops up.
Then, click on the Network tab from the Inspect window’s menu bar at the top.
Type in a search term, and verify that the track/ API calls are being made when a search is performed.
The Analytics data on your Site Search dashboard is updated hourly.
That’s it! You have now successfully migrated your existing Drupal index over to SearchStax.
Questions?
Do not hesitate to contact the SearchStax Support Desk.