Install Apache Solr on a Drupal 8 Website using Managed Search
Overview
The SearchStax Managed Search service can be used to install Apache Solr on a Drupal 8 website using Drupal’s Search API and its Search API Solr modules.
This article was based on a blog post – How to Set Up a Drupal Website Connected to a SearchStax Solr Deployment – by Thomas Hada of Anant.
This example uses Drupal 8.3 and Solr 6.4.2.
Basic Steps:
- Create a new deployment in SearchStax.
- Install the Zookeeper script.
- Upload a custom configuration to your Solr Server.
- Install Drupal.
- Install the Search API and Search API Solr modules.
- Configure the Search API Solr module.
- Optional – Add sample content.
- Optional – Manually index your site.
- Optional – Secure your site
Step 1: Create a New Deployment in Managed Search
Assuming you have already created a SearchStax account and do not already have a deployment set up, click on the Deployments tab and then click on the Create New Deployment button at the top. Enter a deployment name, and select the most appropriate region, plan, and Solr version for your needs. In this example we will be using Solr 6.4.2.

Once you create your deployment, you will see it in the Deployments dashboard.

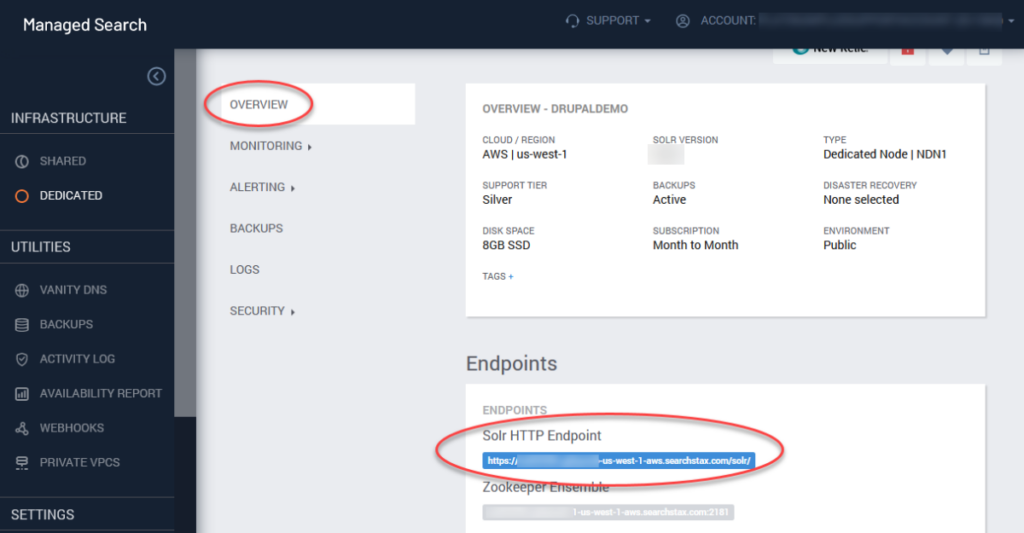
Clicking on the name of the deployment will give you pertinent information about your deployment’s servers. The Solr HTTP Endpoint will take you to your Solr server dashboard.
Step 2: Install the Zookeeper Script
Apache ZooKeeper is a centralized service for maintaining configuration information. In a SearchStax deployment, Zookeeper acts as a centralized repository for your Solr configuration files.
We have created a script to help you interact with Zookeeper. This script makes it easier to connect to Zookeeper and upload your Solr configurations. We provide both Linux and Windows versions of the script.
We have made the script available in several different ways. Choose the one that is easiest for you. All methods download the same master.zip or searchstax-client-master.zip file. This file contains both the Linux and Windows scripts. Unzip the file in a directory of your choice.
- From the Linux command line, you can use wget https://github.com/searchstax/searchstax-client/archive/master.zip.
- If you have a GitHub account, you can follow this link to a repository that contains the script and its libraries. Look for the green Clone or Download button to create and download a ZIP file. https://github.com/searchstax/searchstax-client
- If you are using Windows, or are not familiar with GitHub, you can download the ZIP file directly here: searchstax-client-master.zip.
Unzip the file. The top-level directory is \searchstax-client-master. Navigate to the scripts subdirectory (\searchstax-client-master\solr-6\scripts). Locate zkcli.sh and zkcli.bat in that directory. These are the Linux and Windows versions of the script, respectively.
Step 3: Upload a Custom Configuration to Your Solr Server
Download the Search API Solr module files: https://www.drupal.org/project/search_api_solr
Included in the Search API Solr download are several configurations in the solr-conf folder, with subfolders 4.x, 5.x, and 6.x for the respective Solr versions.

SearchStax uses Apache ZooKeeper for maintaining configuration information. Upload the appropriate configuration files via Zookeeper and create a new collection. If you have your Zookeeper script already, the two commands you will need are as follows:
Upload Configuration:
Linux:
> ./zkcli.sh -zkhost <zookeeper URL> -cmd upconfig -confdir <Solr configuration> -confname <configuration name>Windows:
$ zkcli.bat -zkhost <zookeeper URL> -cmd upconfig -confdir <Solr configuration> -confname <configuration name>Create New Collection:
Linux:
> curl '<Solr HTTP Endpoint>admin/collections?action=CREATE&name=<collectionName>&collection.configName=<configName>&numShards=1'Windows:
$ curl.exe "<Solr HTTP Endpoint>admin/collections?action=CREATE&name=<collectionName>&collection.configName=<configName>&numShards=1" -kStep 4: Install Drupal
Please refer to the official Drupal 8 installation page.
Step 5: Install Search API / Search API Solr Module
Install the Drupal Search API Module.
Once the Search API is installed, you can add the Search API Solr Module.
Before continuing, you may need to install the Composer Dependencies.
Finally, you will need to enable the installed modules. Enable the following items: Search API and Solr Search.
Step 6: Configure the Search API Solr Module
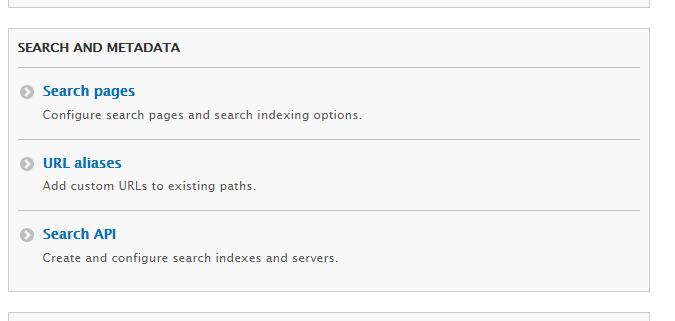
Now that the modules have been enabled, click on the Configuration tab. Look for section SEARCH AND METADATA and click on Search API to configure it.
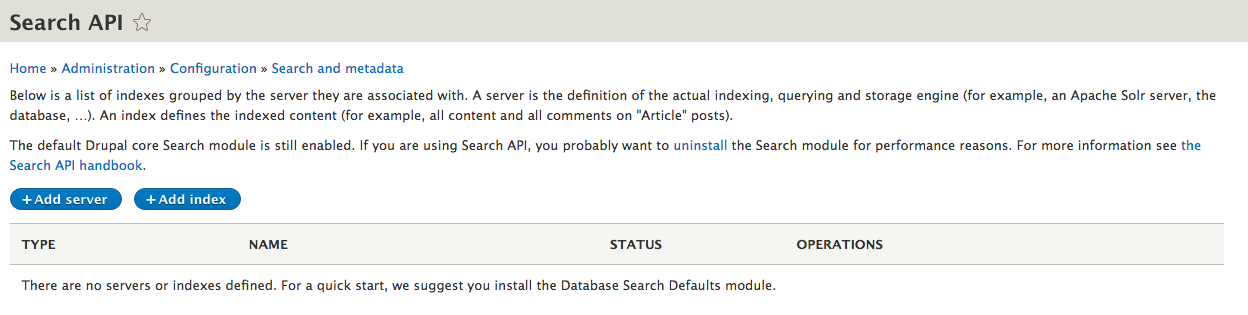
Once there, click Add Server.
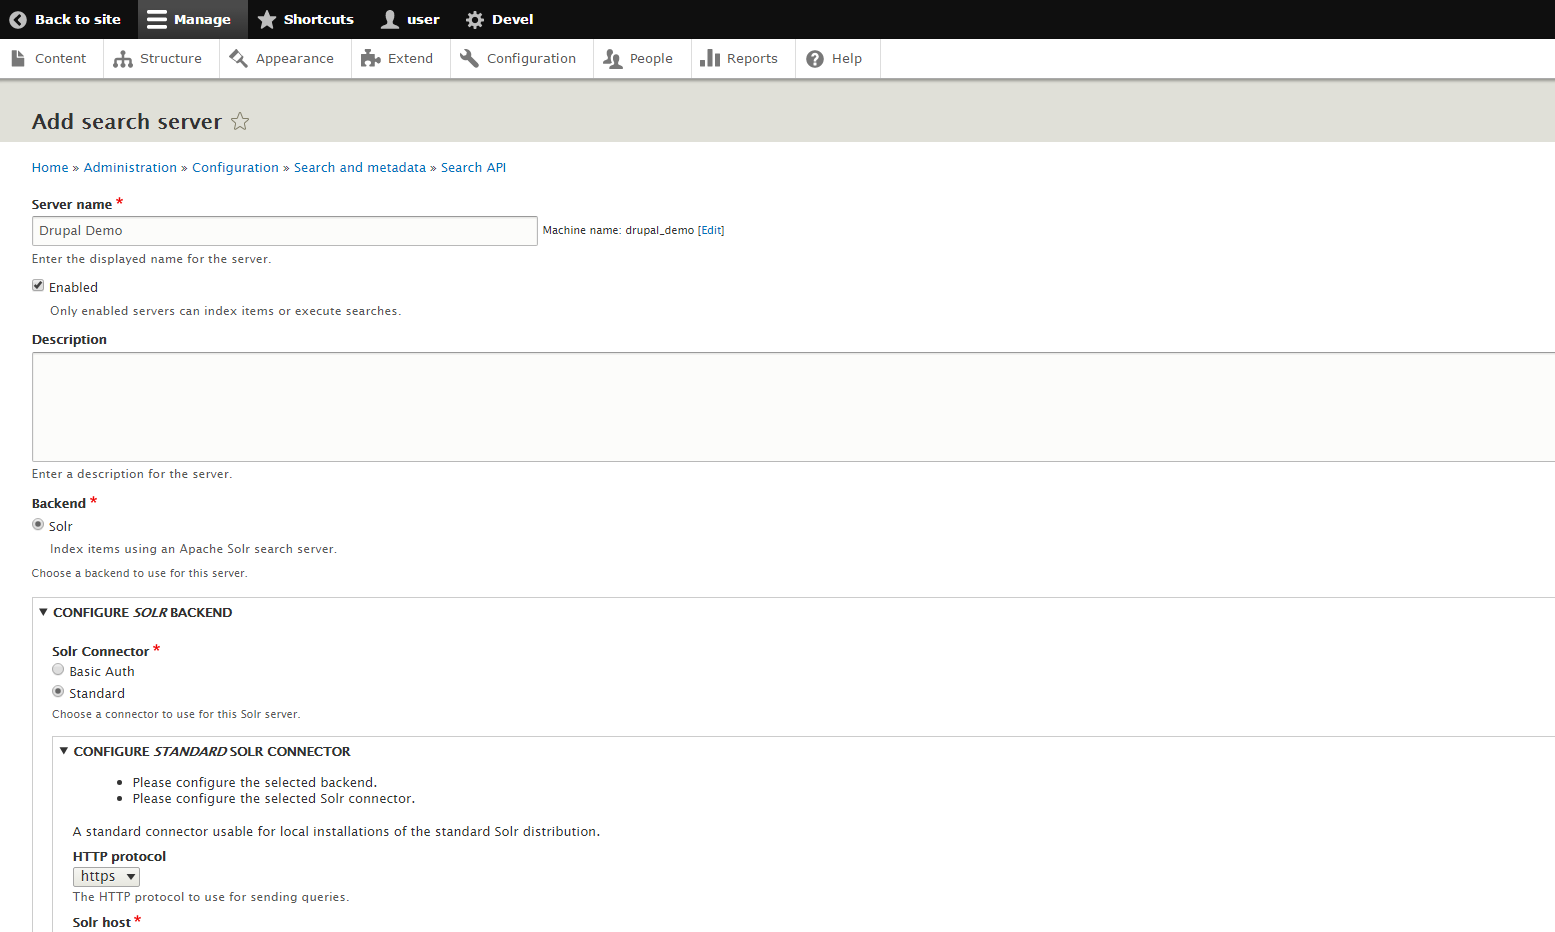
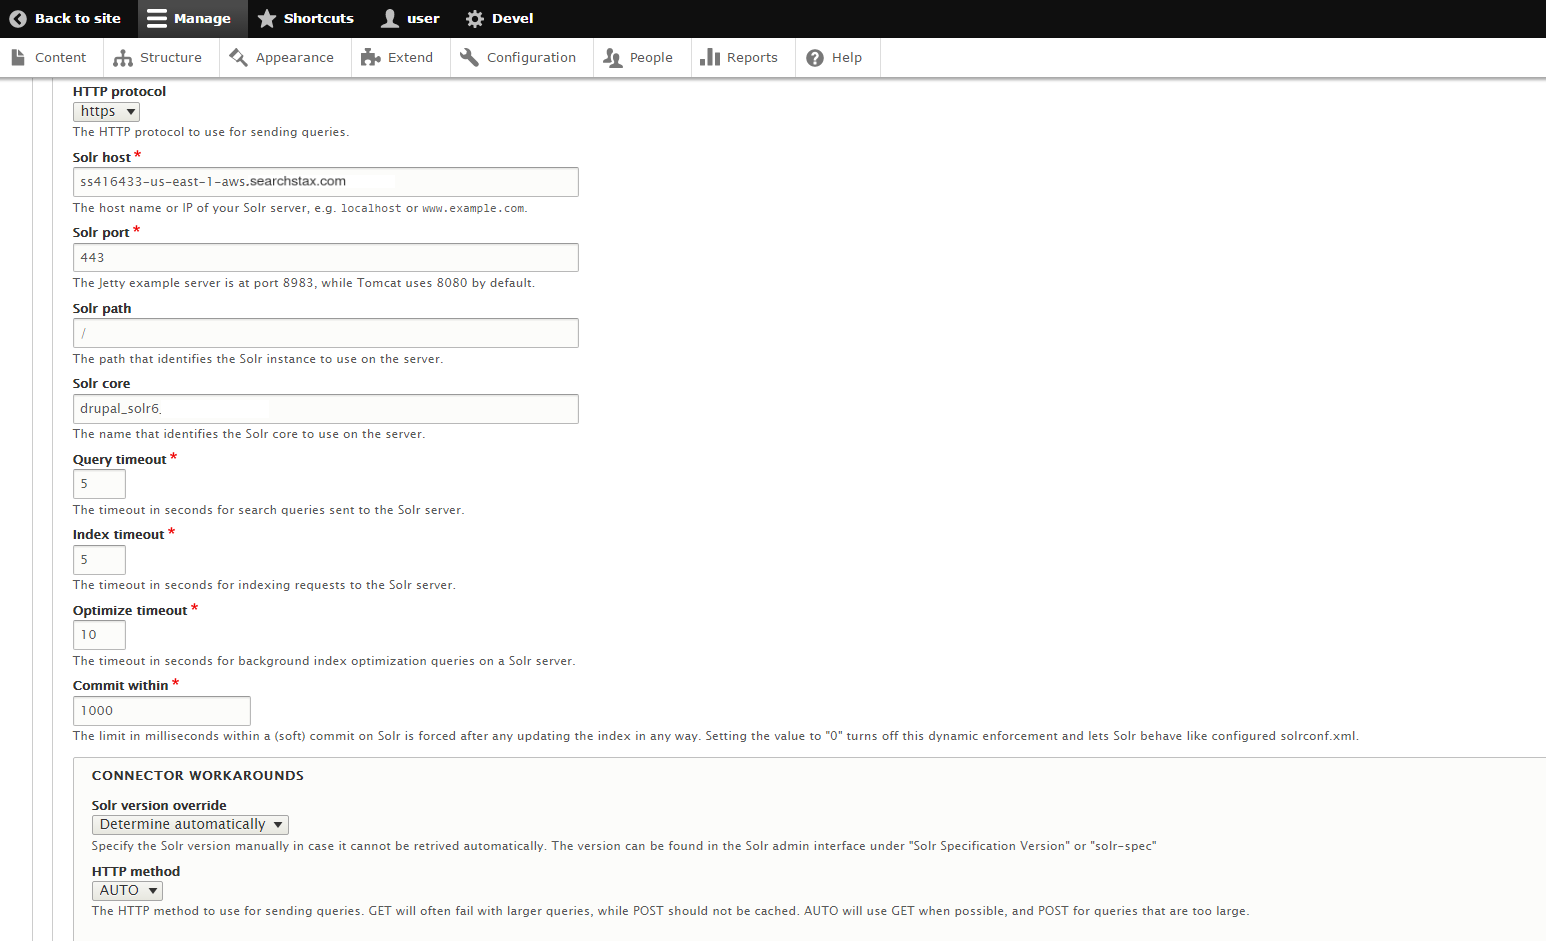
Give your server a name. Make sure the Backend is set to Solr. Check that HTTP protocol is set to https. The Solr host is the deployment’s Solr HTTP Endpoint without the /solr/ element. For incoming connections from Drupal, the Solr port is always 443. The Solr core is the name of the collection.
Note that the Solr path was /solr in version 8.x-2.7 of the Search API Solr Module, but it changed to / (no “solr”) in version 8.x-3.1. See Upgrade Search API Solr from 2.x to 3.1 for further information.
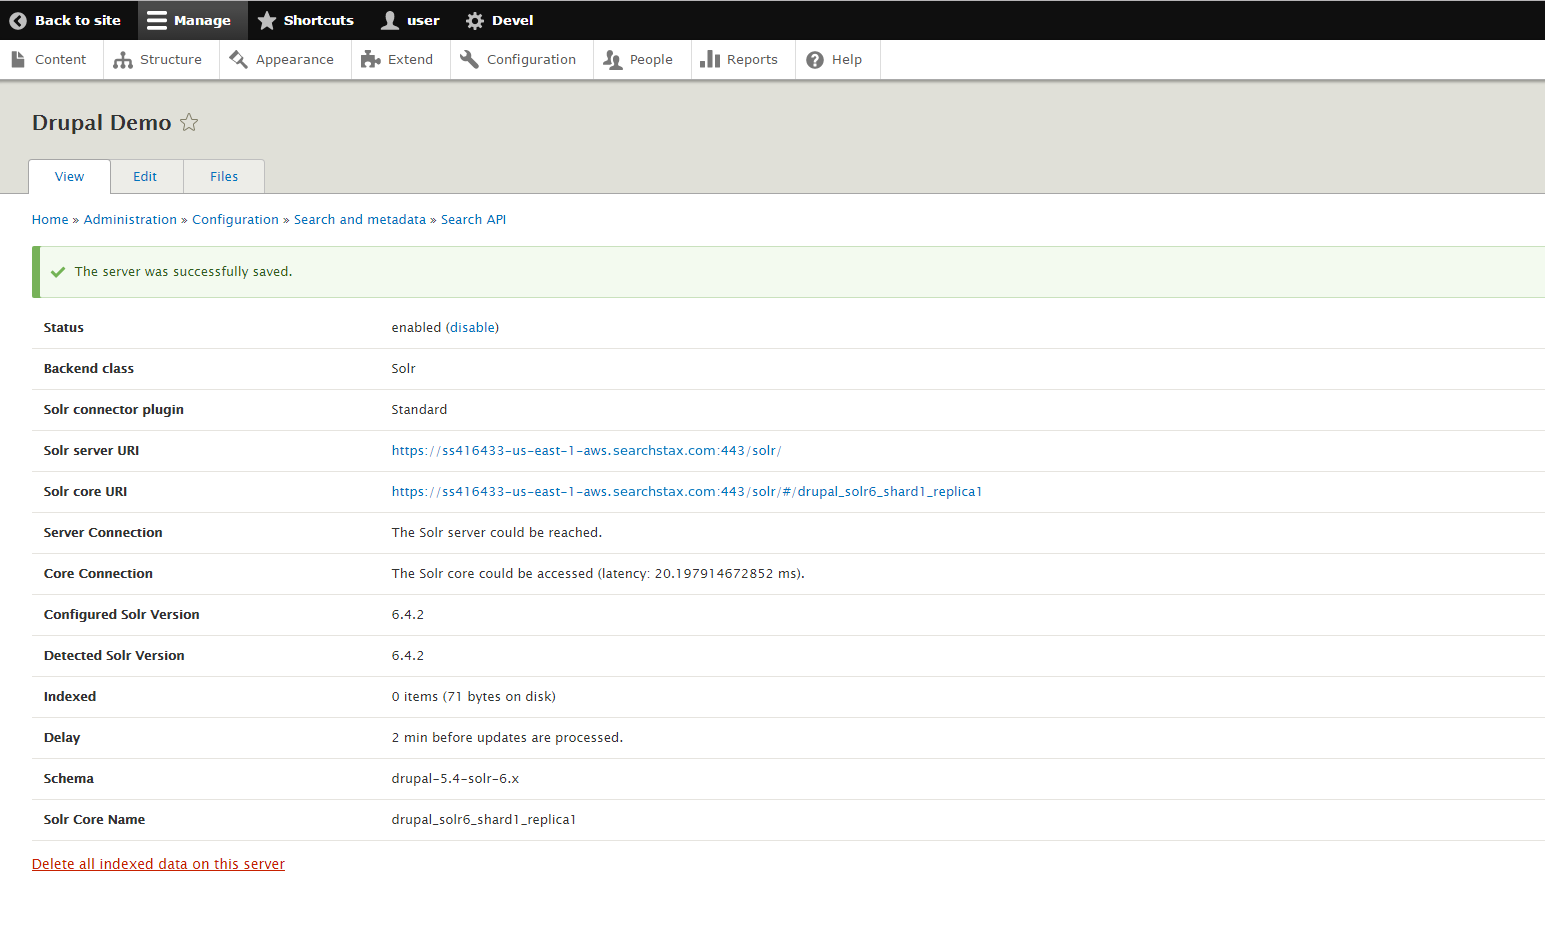
If your configuration settings are valid, you will see a message saying that the information was saved successfully.
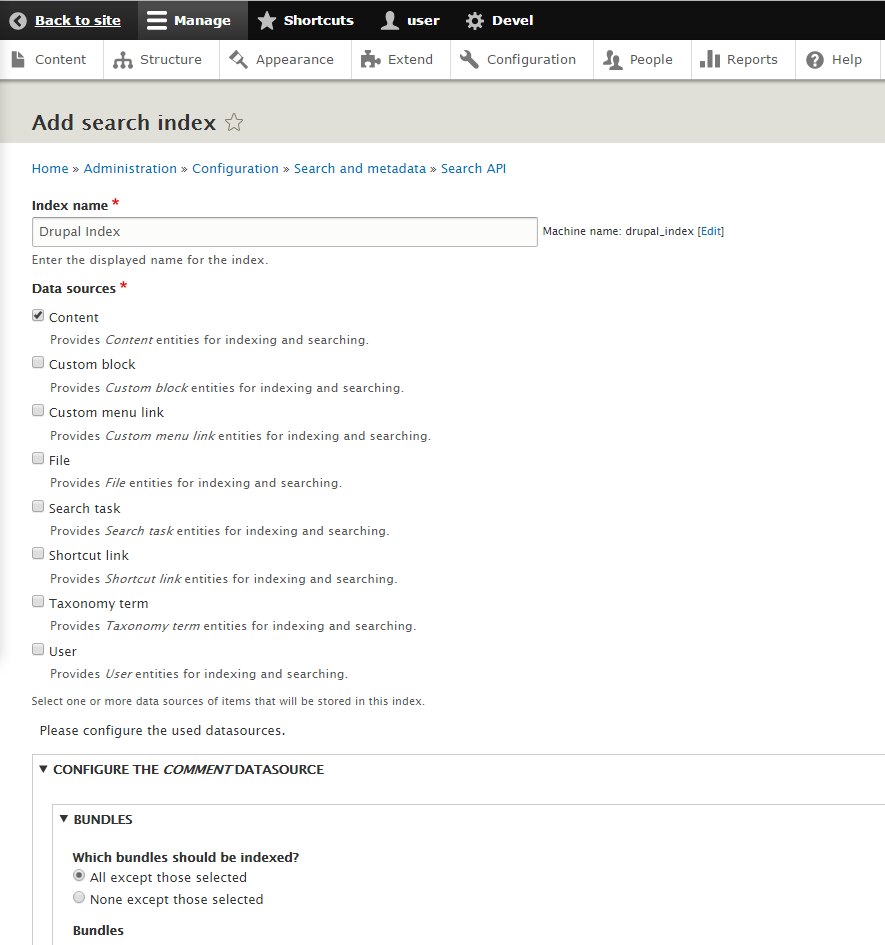
Next you will need to define an index. In the Search API configuration screen, click on Add Index.

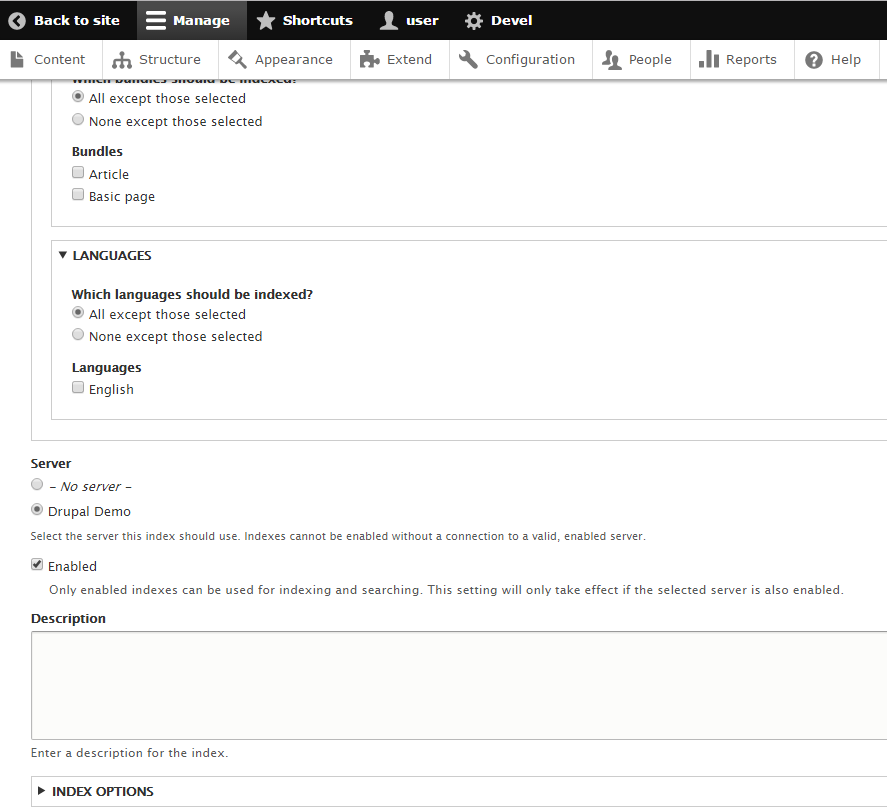
Give your index a name, and select the data sources you wish to index. For this example, select Comment and Content. Also, at the bottom of the page make sure that you select the Server created earlier.
Step 7: Optional – Add Sample Content
Install the Devel module: https://www.drupal.org/project/devel. Then, enable Devel and Devel generate.
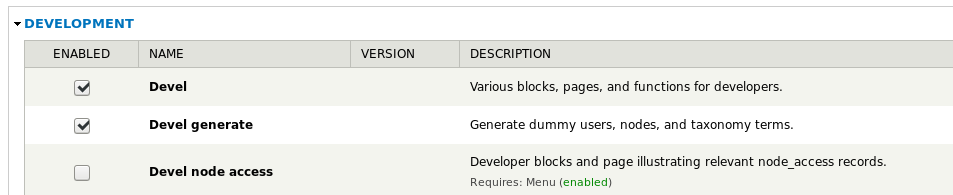
You will see new options in multiple menus. Go to Manage > Configuration, and scroll down to the Development section. Here you have options to Generate content via Devel.
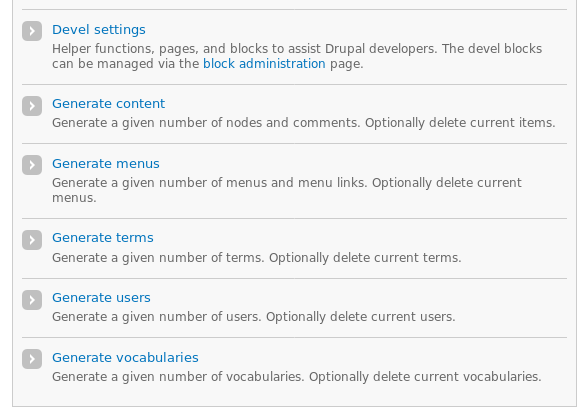
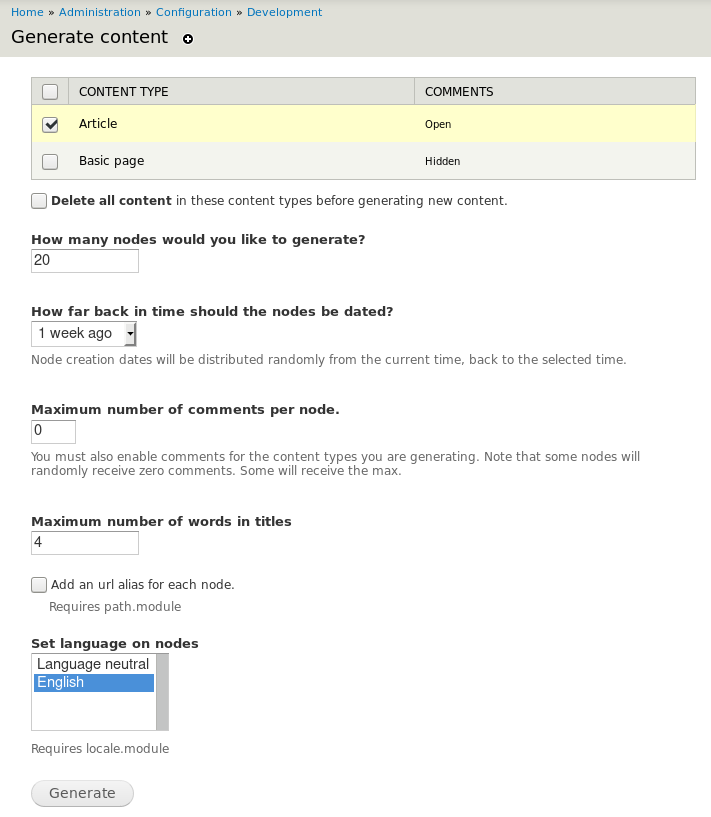
Click on Generate Content.
Select a Content Type and enter the number of nodes. For example, selecting Article and typing “20” nodes will produce 20 new articles filled with dummy data.
Step 8: Optional – Manually Index Your Site
A cron job will periodically index your site automatically, but if you want to see your results immediately go to the Search API configuration screen and click on the index created earlier. At the bottom, click on the Index now button.
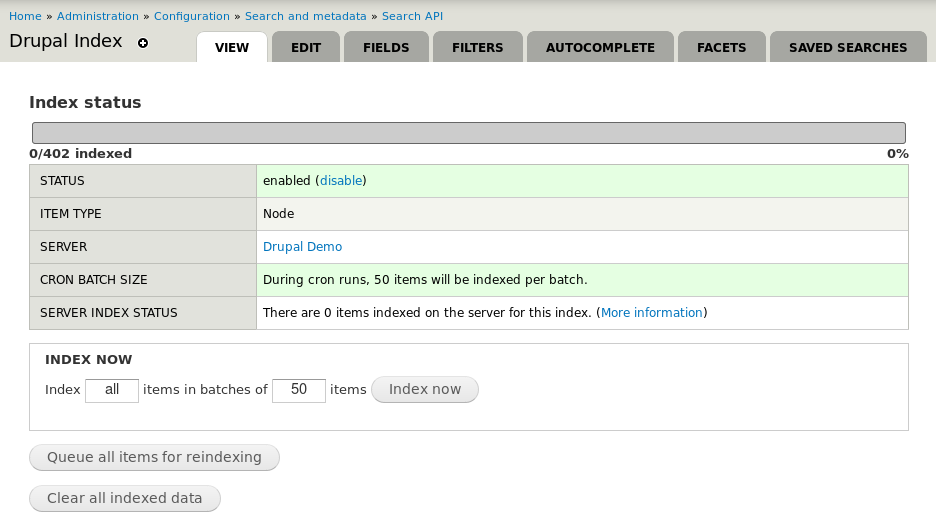
After you begin, you will see a progress bar. Once it reaches 100%, you will get a success message.
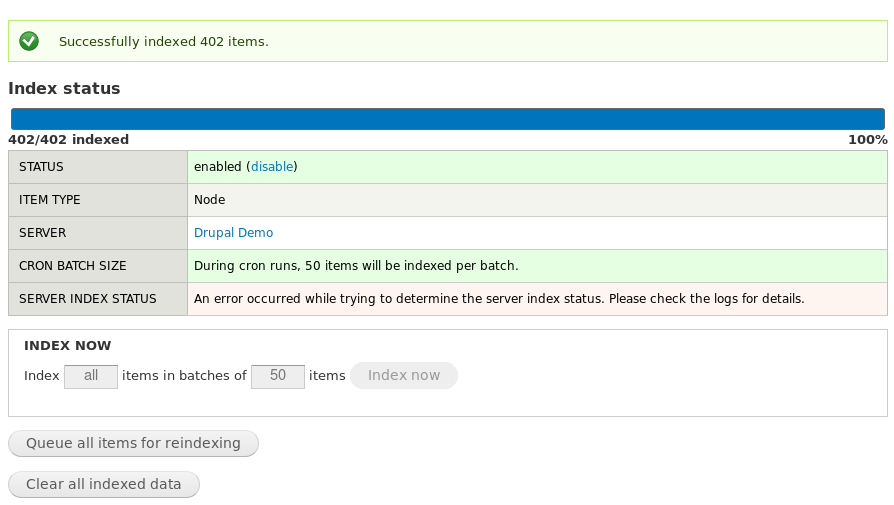
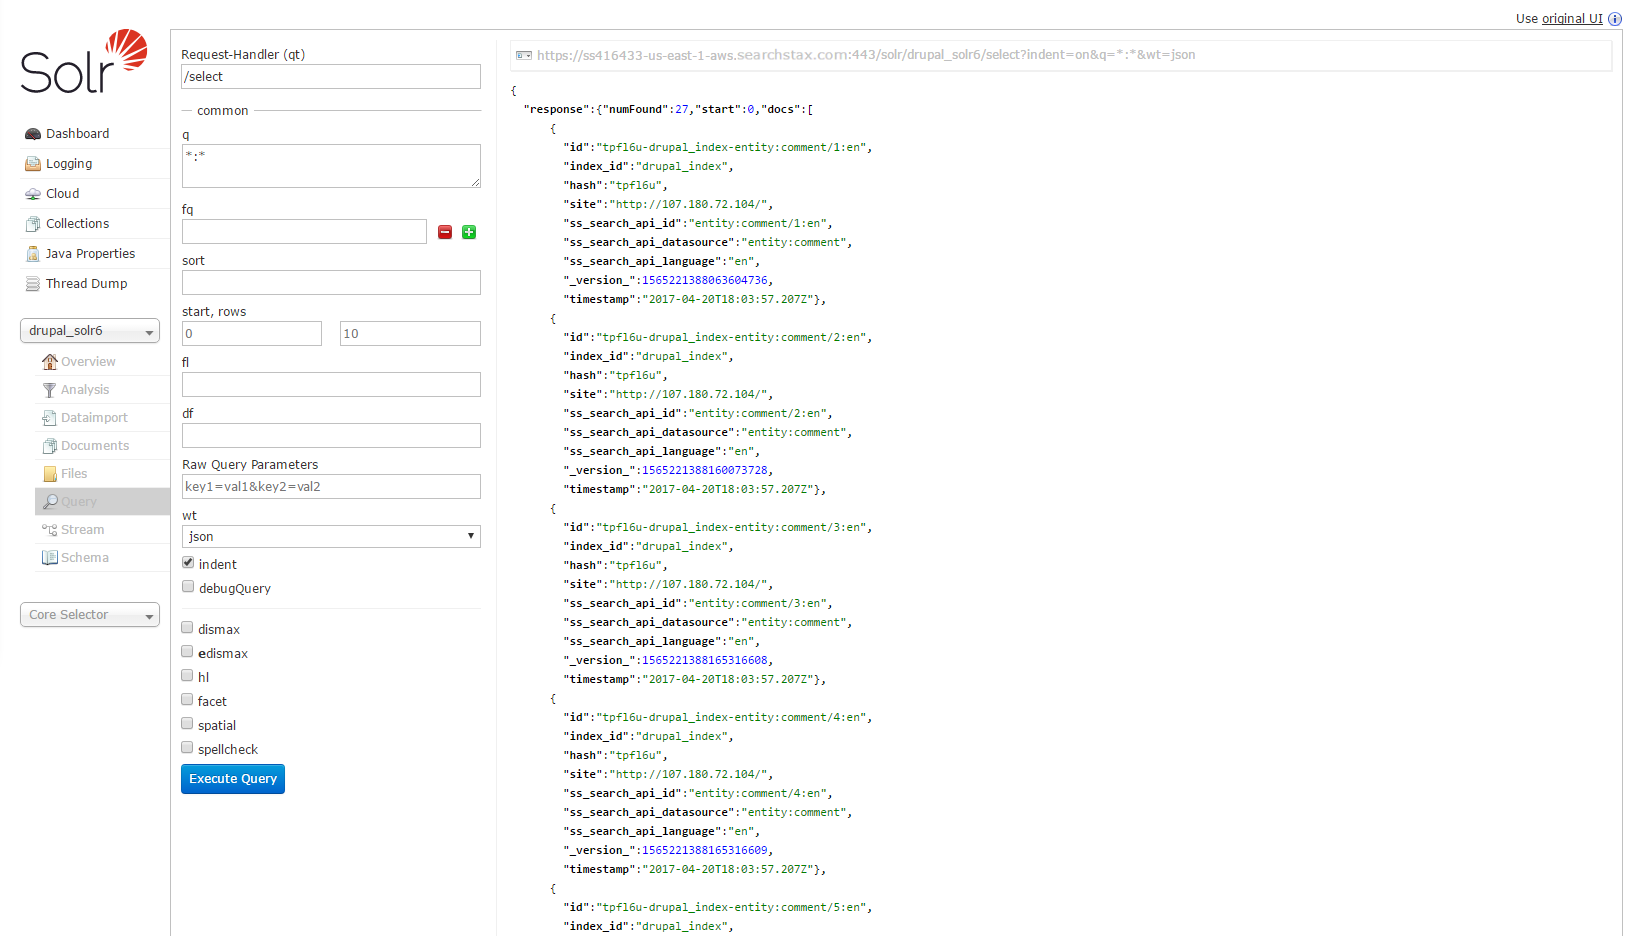
After your site has been indexed, you can view and query the data in Solr.
Step 9: Optional – Secure Your Site
SearchStax and Solr provide some optional security features that can help you lock down your Solr deployment. Please consider some or all of the following security options.
Connecting to the Managed Search Cluster
SearchStax recommends that you situate your application infrastructure in the same local network as your hosting provider (for example, the same AWS or Azure region). Internal network security for these hosting providers is extremely high and eliminates any chance of a hacker potentially sniffing your network traffic.
If your application is hosted elsewhere, try to host it as close to your search infrastructure as possible. This can be done by choosing the Cloud Provider Region which is closest to your application. This improves both security and performance.
Note that all connections to the SearchStax Dashboard use HTTPS, which encrypts your traffic in transit.
IP Filtering
SearchStax can limit access to a deployment to specific IP addresses. You can configure access
for Zookeeper and Solr servers separately. Instructions will be found at SearchStax IP Filtering.
Tenant Users
Each SearchStax account is restricted to the owner (and admin) of that account plus any SearchStax “tenant users” who have been granted access to that account by the owner. The additional users may be enrolled as normal SearchStax operators or as admins at the owner’s discretion. See Managing Users.
Solr Authentication and Authorization
Solr offers an Authentication and Authorization feature that lets you set up username/password protection for the Solr server dashboard. SearchStax makes it very easy to enable this feature.
Note that Solr user accounts are independent of SearchStax user accounts.
If you set a username/password for Solr, you’ll need to edit the Search API server (under “Basic HTTP authentication”) and input the same information there.
The only warning is that enabling/disabling Solr authentication forces the Solr servers to restart. See Solr Authentication and Authorization.
Questions?
Do not hesitate to contact the SearchStax Support Desk.