Managed Search Single Sign-On (SSO) Azure AD
The SearchStax Managed Search service now offers the ability for customers to set up Single Sign-On (SSO) to let their users log into SearchStax apps with a single ID and password that works across multiple software systems.
We use the open standard Security Assertion Markup Language (SAML) to allow identity providers (IdP) to pass authorization credentials to service providers (SP). We use Microsoft Azure Active Directory to implement SSO for SearchStax.
SSO is an add-on SearchStax feature that is purchased separately. If you are interested in SSO, please contact Sales.
The following steps explain how it can be set up for Microsoft Azure Active Directory.
Instructions
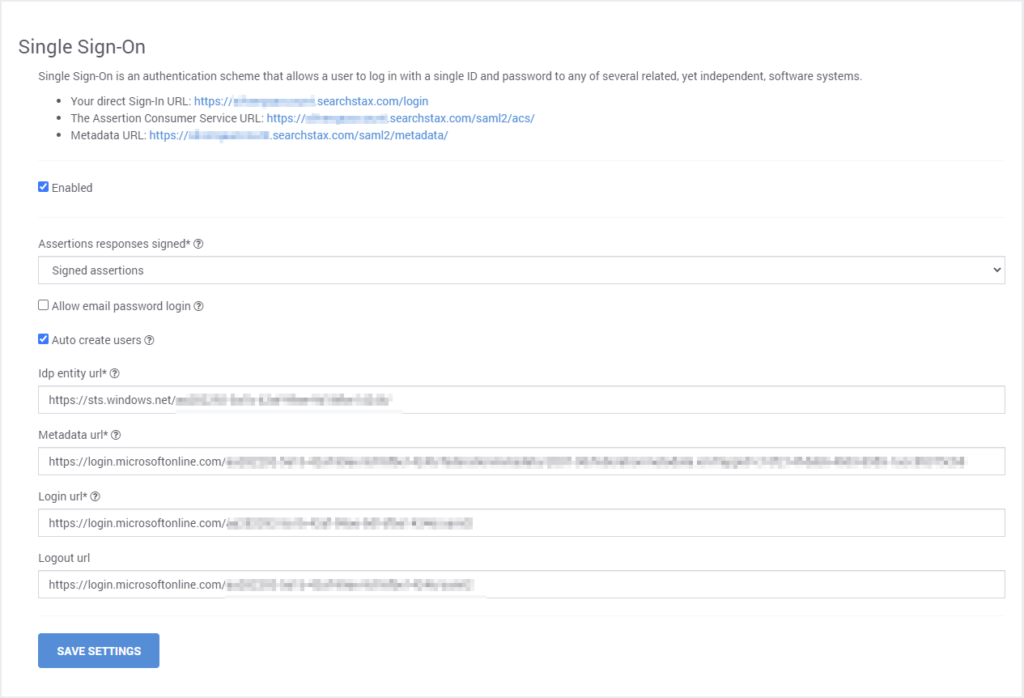
Once SSO is enabled by SearchStax for your account, the owner and/or admin can see options to set it up. The options to set up SSO are in the User Preferences screen of the Managed Search Dashboard:
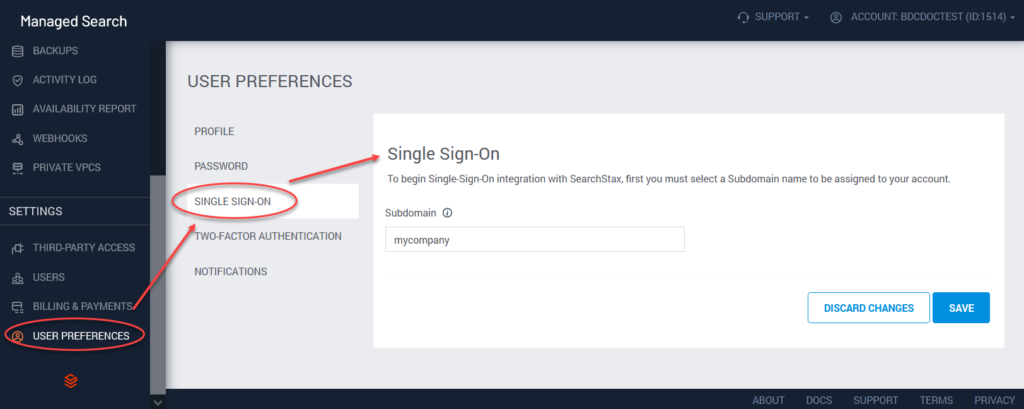
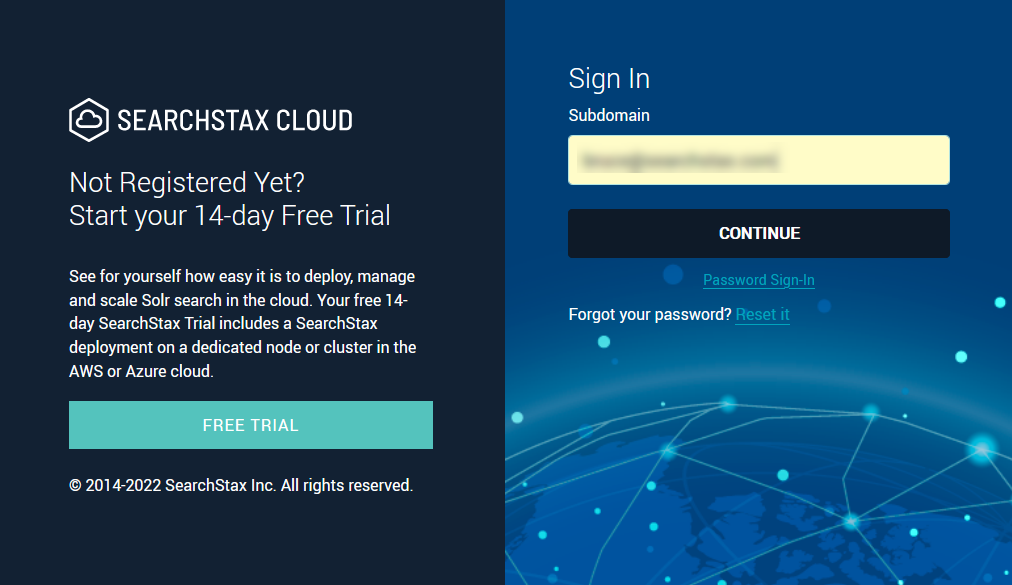
The first option is the Single Sign-On subdomain. This is a label like mycompany, which the system will use to build a URL such as mycompany.searchstax.com.
Click Next to view the next page of SSO parameters.
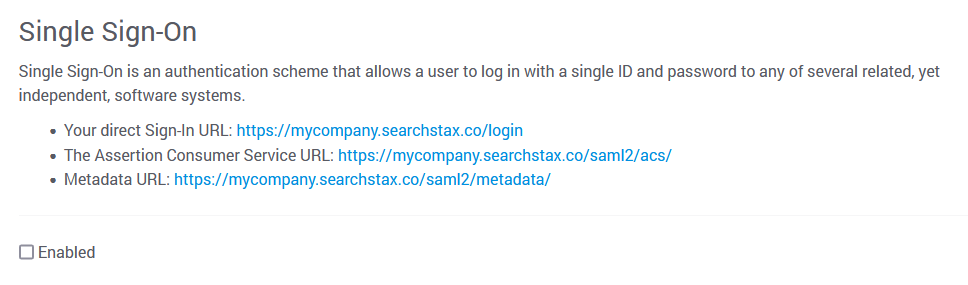
The “direct Sign-In URL” is the URL that your team can use for signing into Managed Search. The other two URLs are discussed below.
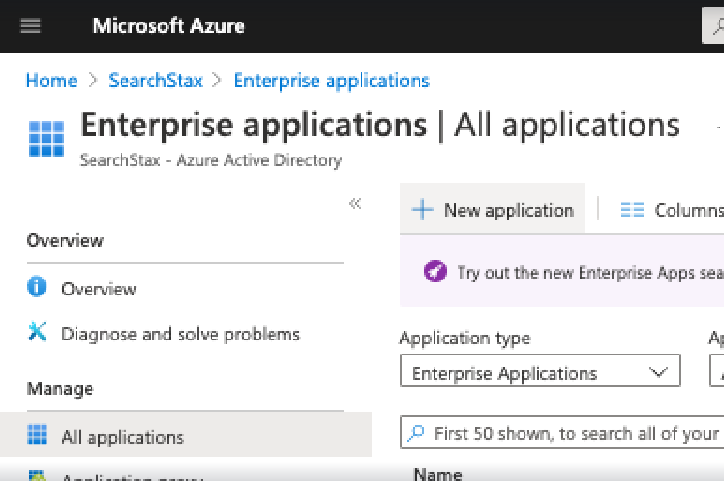
- Go to Azure Active Directory. Select Enterprise Applications, and then click on “New Application.”
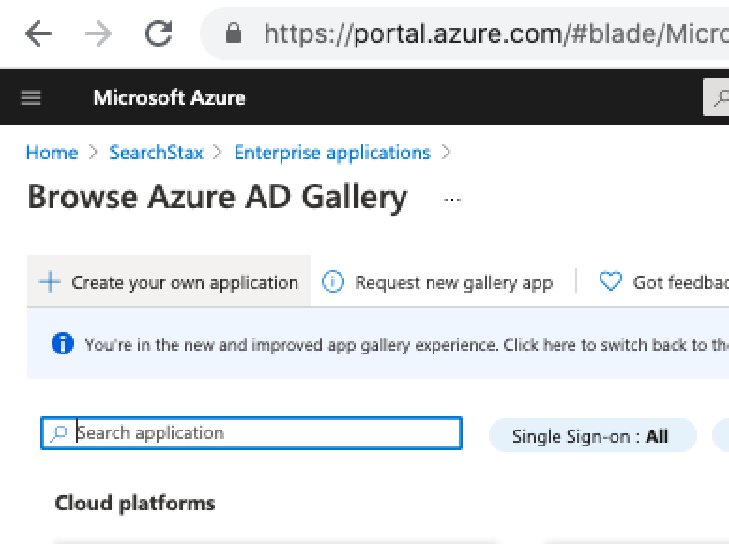
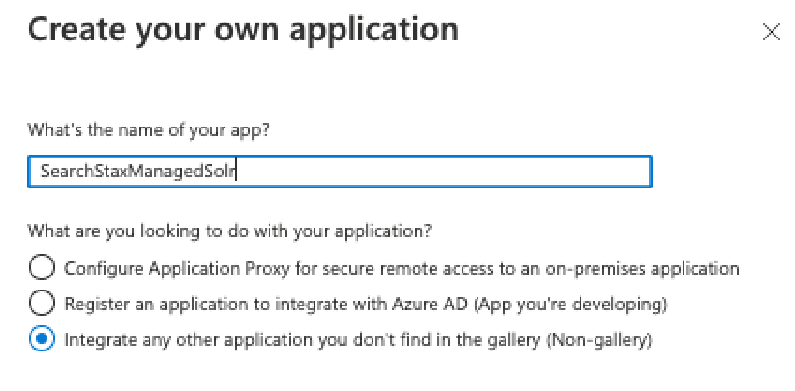
- Now Click on “Create your own application.”
- Enter a name for SearchStax application – say “SearchStaxManagedSolr”, and select the last dropdown “Integrate any application you don’t find in the gallery” and then click on the “Create” button.
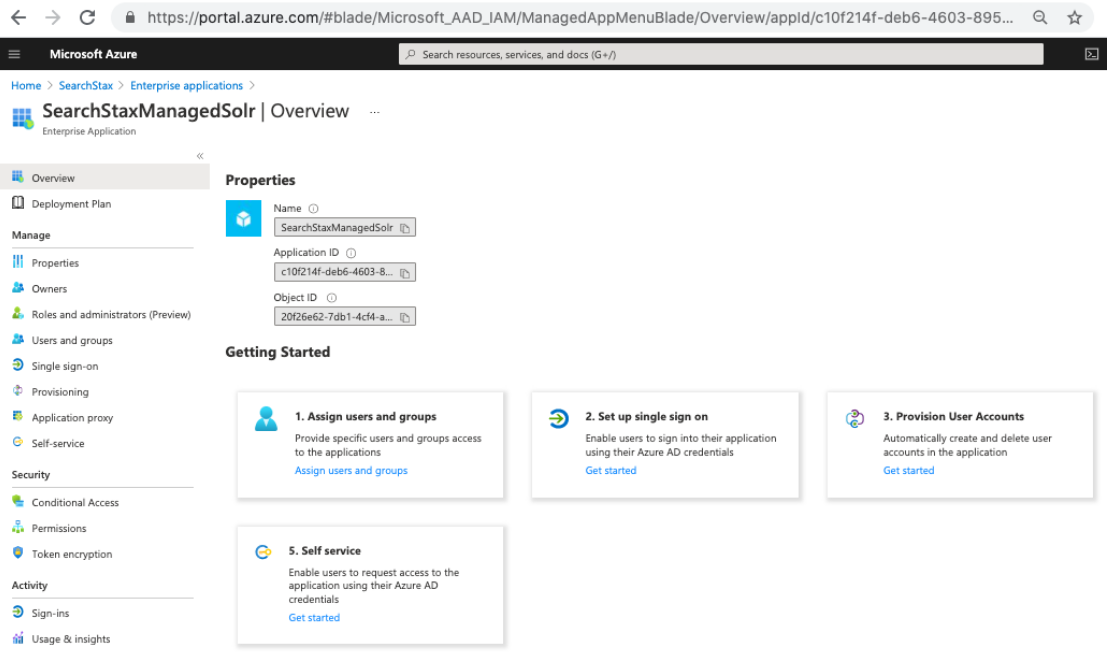
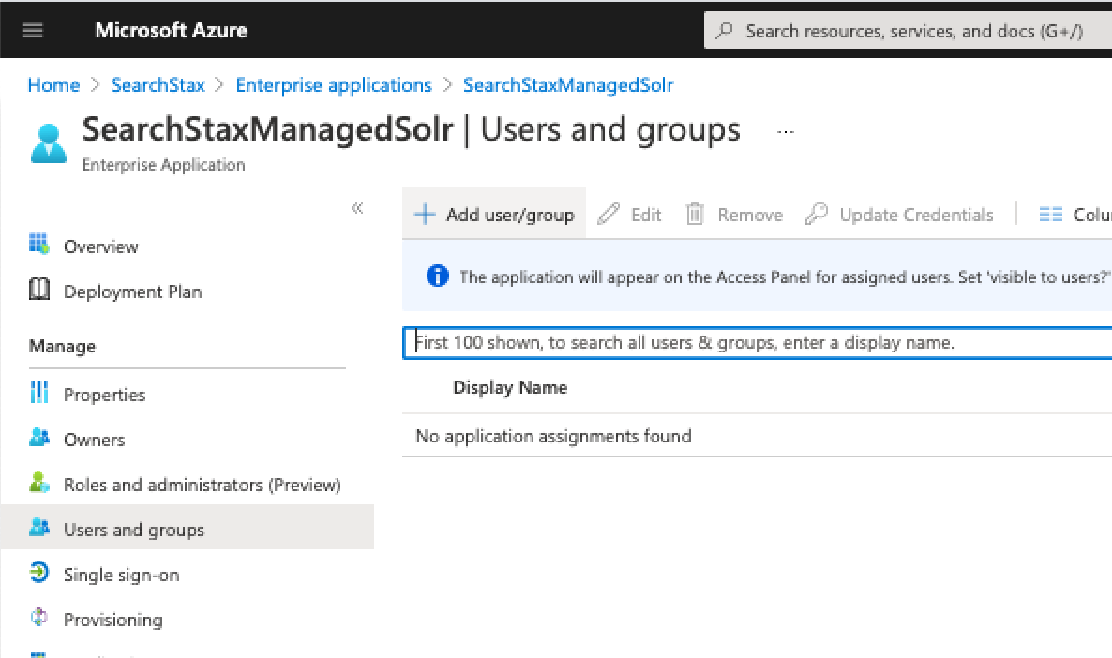
- This creates a new Enterprise Application. In the screen that appears, click on the link for Step 1 > Assign Users and Groups. Here you can assign which Users/Groups have permission to SearchStaxManagedSolr Enterprise Application.
- Click on “Add user/group” and then follow up to add all the users of groups that you would like to grant access to.
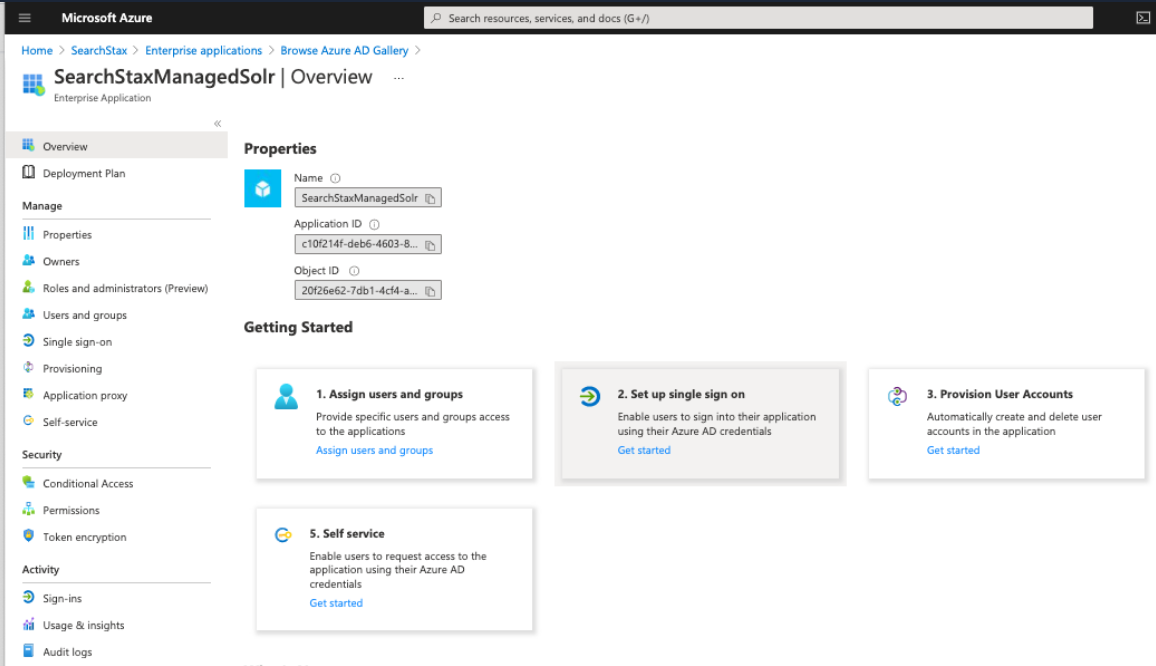
- Once you are done with Step 1, click on the “Get started” link for Step 2. Setup single sign on.
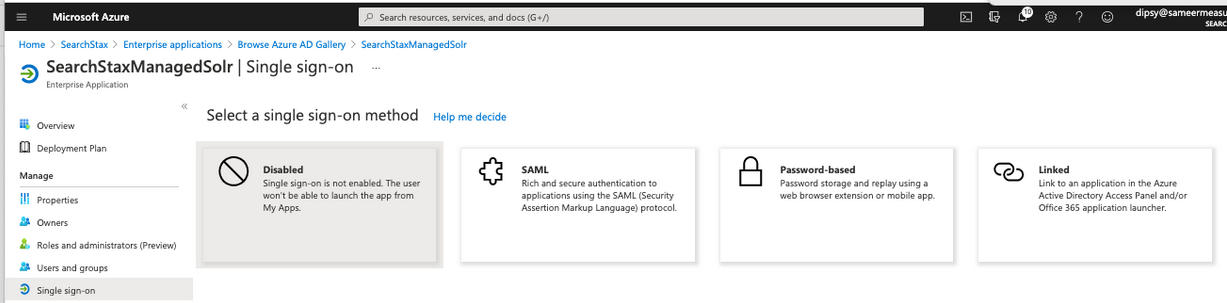
- Now select the single sign-on method as “SAML.”
- It now shows the screen to configure the SAML endpoints:
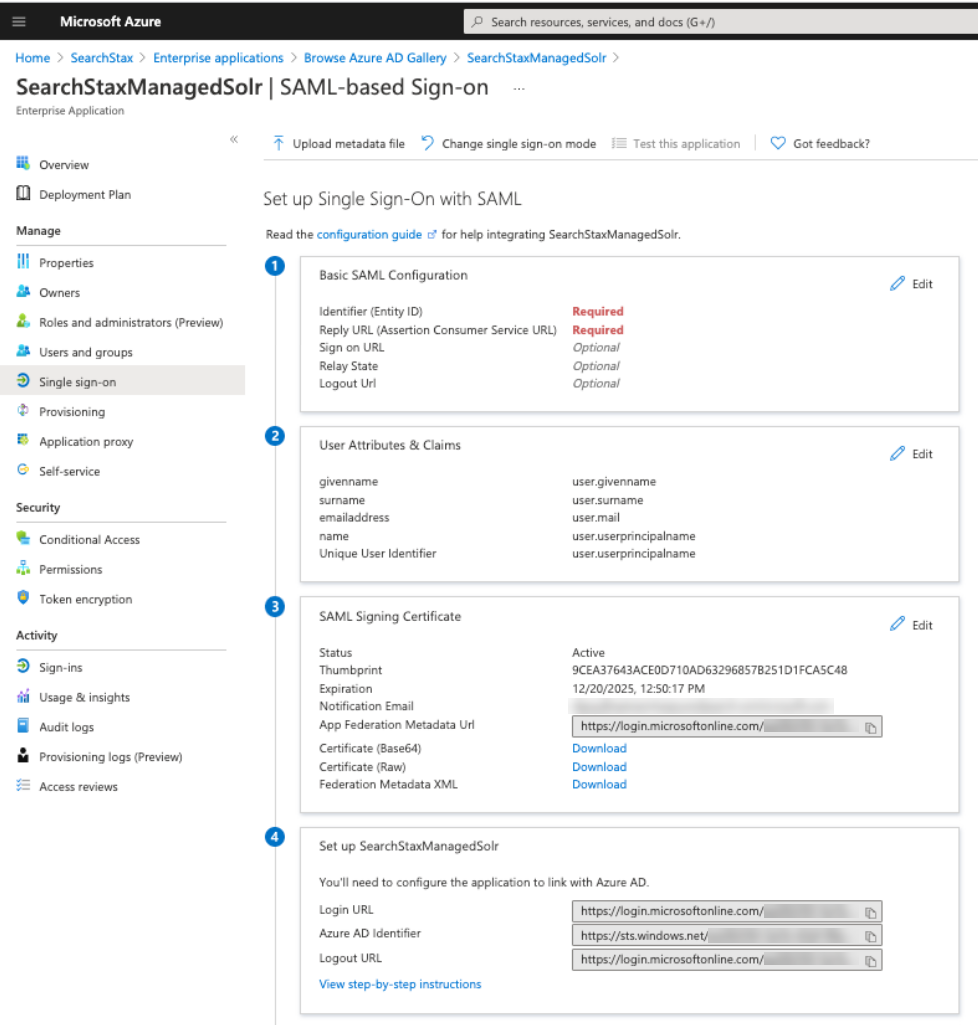
- Click on Edit on Step 3, and change Signing Option as “Sign SAML assertion” and click “Save.”
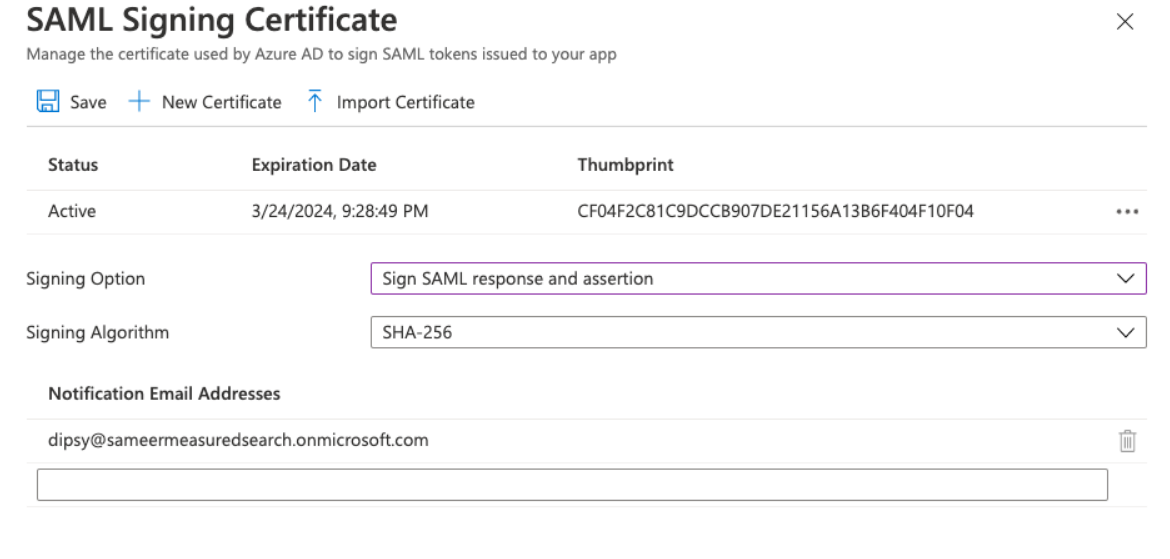 The option can be anything else too, but the same setting should then also be chosen in the Managed Search Dashboard in the SSO settings.
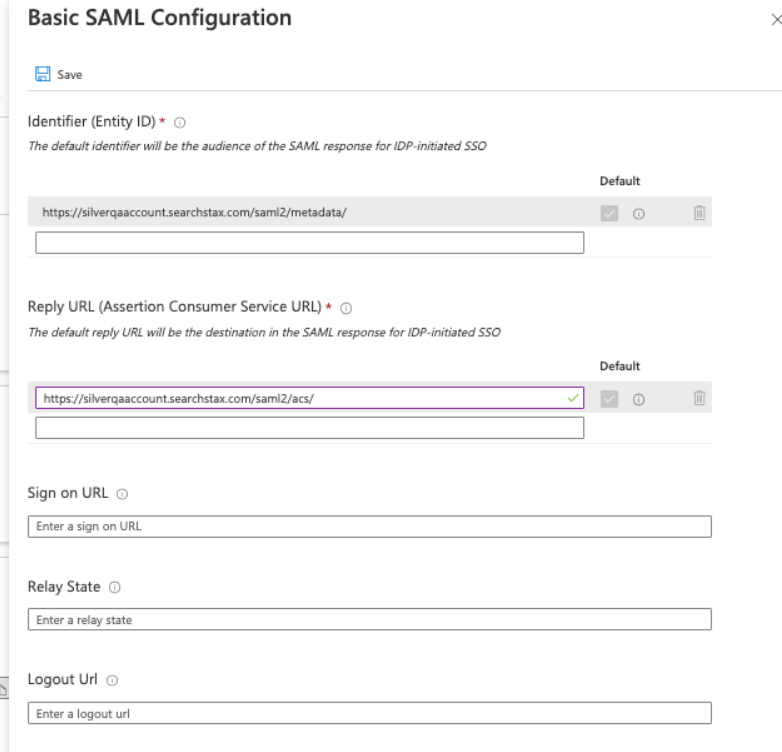
 - Click on Edit button for Step 1 > Basic SAML Configuration.
- Enter the “Metadata URL” that shows on your https://app.searchstax.com/admin/sso/configure/saml2/ page as Identifier (Entity ID). Remove any extra entries and make sure the “default” checkbox is checked.
- Enter the Assertion Consumer Service URL as the “Reply URL” as shown below.
- Click “Save.”
- Set up Step 2 > User Attributes & Claims. Click on Edit.
- Managed Search has roles defined. If your active directory has a field containing a mapping for those roles, click on “Add new claim” and assign “role”. If you do not have a mapping for Managed Search roles, you can leave it as it, and the users will get created with Team Member as the role by default. Those can always be changed later from the Managed Search Dashboard.
As just an example, we are mapping user.jobtitle field as the “role” as shown below.
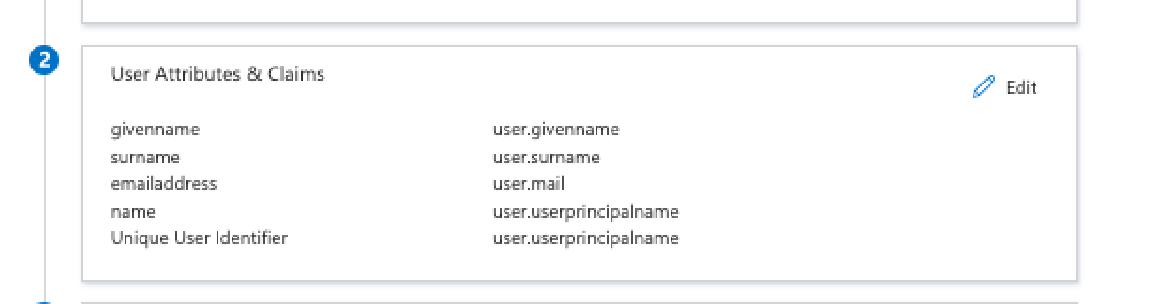
The Unique User Identifier (Name ID) should be mapped to your active directory field that is the email for the users that will use Managed Search. In our case, the default user.userprincipalname contained the information.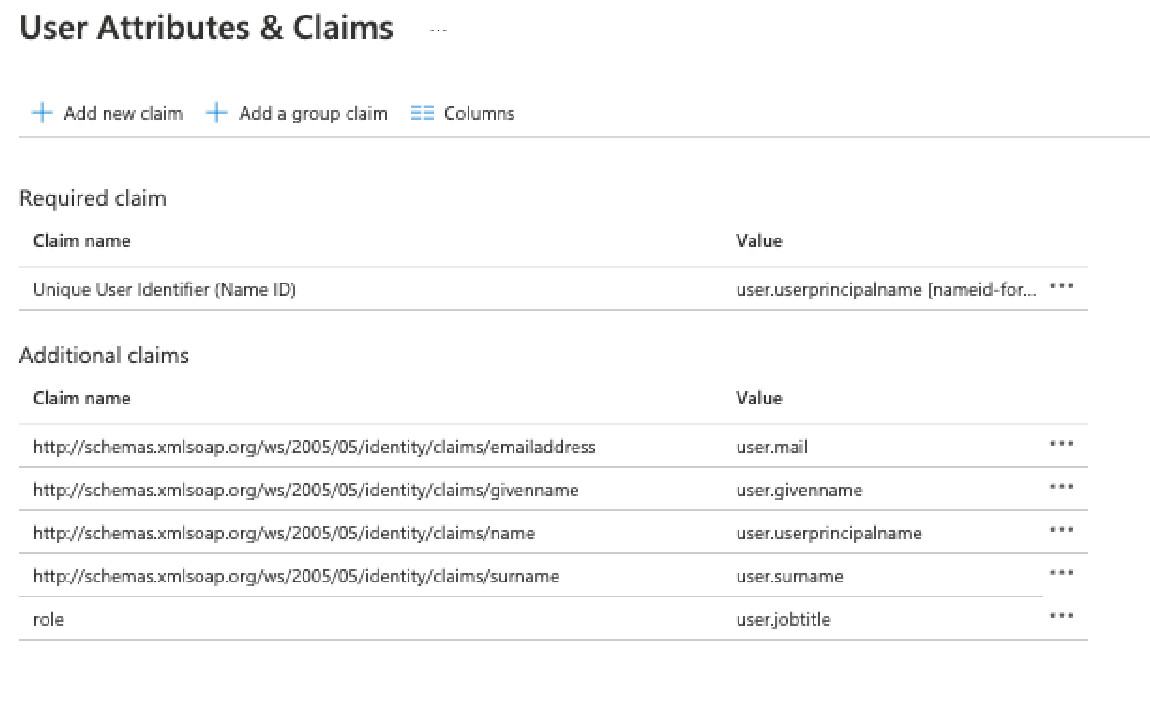
- Now back on the Managed Search dashboard…
- Set the “Metadata url” as the “App Federation Metadata Url” shown in Step 3.
- Set the “Login Url” as the “Login URL” shown in Step 4.
- Set the “Logout Url” as the “Logout URL” shown in Step 4.
- Set the “Idp Entity Url” as the “Azure AD Identifier” shown in Step 4.
Login Using SSO
https://app.searchstax.com/ now provides a button at the bottom for SSO – “Sign-In With your ID Provider.” Click this button.
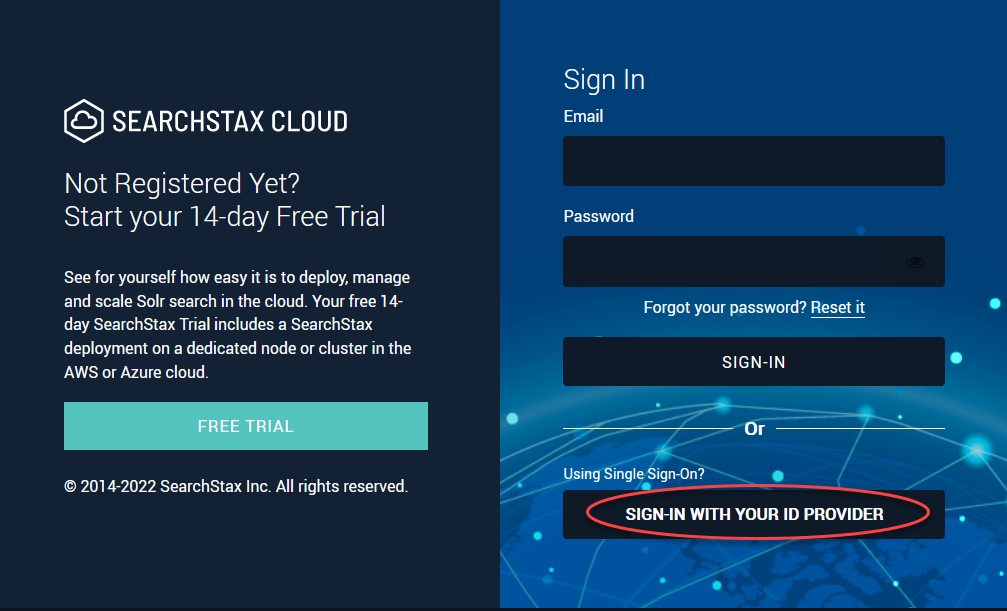
Enter the domain that was set up for the client.
Click Continue. This takes you to Azure Sign-in page. After you authenticate, it brings you back to your Managed Search Dashboard.
Alternately, you can directly go to https://<Subdomain>.searchstax.com to login, and clicking on the “Sign-In With your ID Provider” will take you directly to Azure Sign In.
SSO + Two-factor Authentication
A User can have SSO and Two-Factor authentication both setup. The 2FA settings for a user will apply to all accounts that the user has access to.
However, for the account that has SSO Setup, while logging in, SearchStax 2FA settings will not apply. In that case, 2FA should be set up at the SSO Provider.
Questions?
Do not hesitate to contact the SearchStax Support Desk.