
May 15, 2023
Tyler Huff
|
Integrating Solr with Drupal can significantly enhance the search capabilities of your website, but historically there hasn’t been an easy or cost-effective way to do it. SearchStax Cloud Serverless fills that gap by offering on-demand Solr and removing the hassle of hosting, infrastructure, and maintenance.
With SearchStax Cloud Serverless, you can now leverage the power of Solr for your Drupal search in no time – and you don’t have to worry about dealing with Solr infrastructure overhead, either.
In this tutorial, we’ll walk you through the process of setting up Solr on Drupal using SearchStax Cloud Serverless. We will sign up for a SearchStax Cloud Serverless free trial, use the SearchStax Search API module to index data, and configure a Drupal search page using views.
Before proceeding with this tutorial, make sure you have the following:
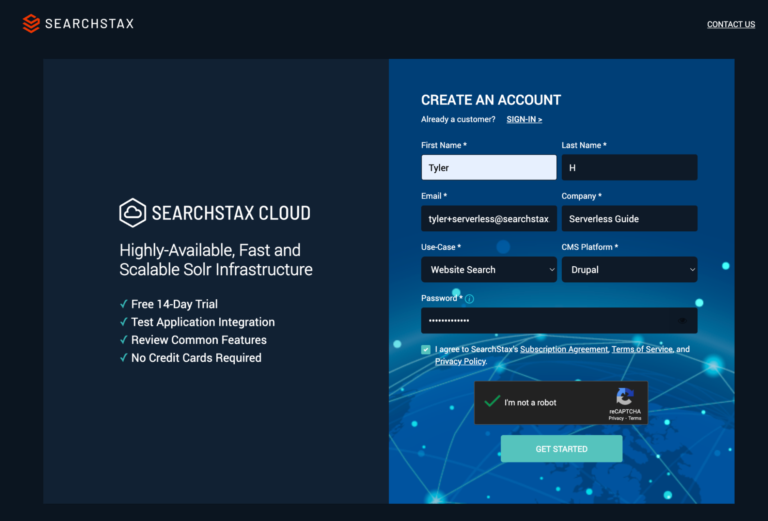
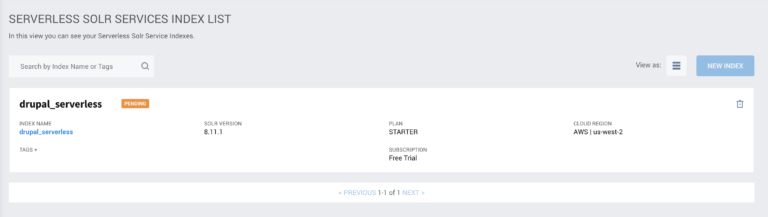
To get started, head over to SearchStax and sign up for a free trial. After signing up, you’ll gain access to the SearchStax Cloud Serverless dashboard, where you can create and manage your Solr indexes.
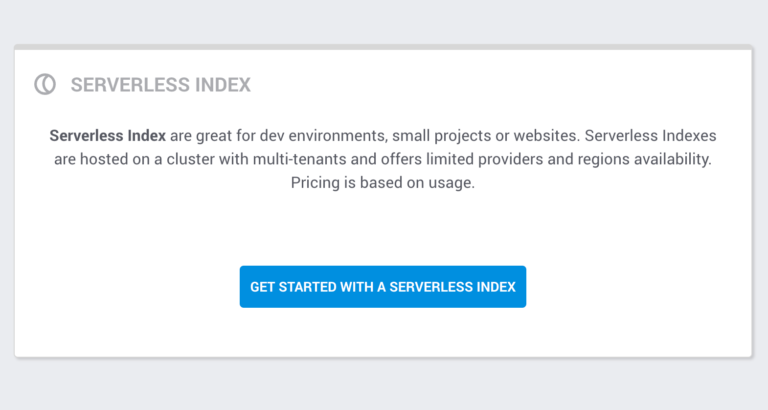
Select “Get Started with a Serverless Index” upon first login.
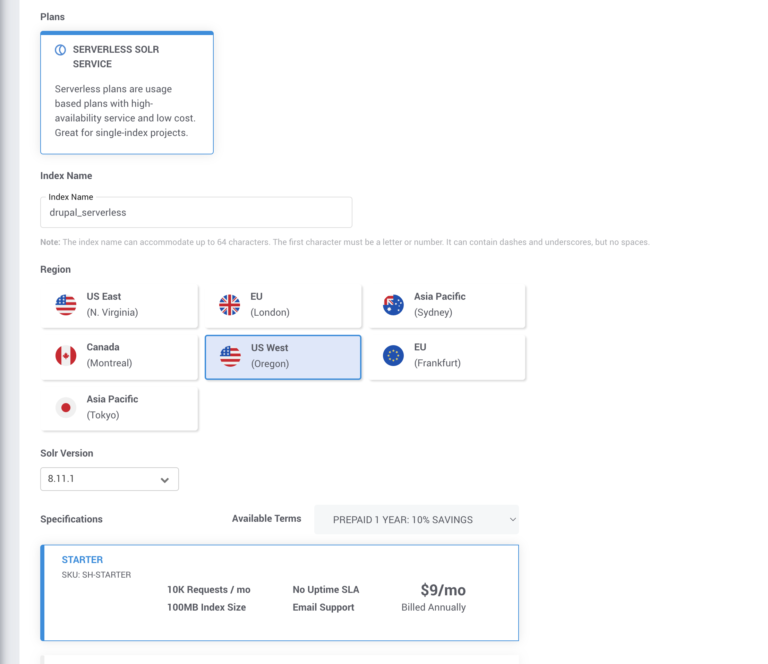
Give your index a Name, Region, and Solr version. Select a Plan, as indicated below:
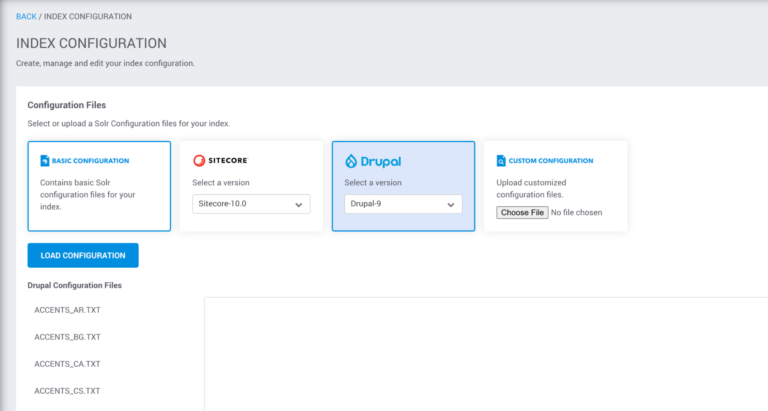
Select Drupal for your Index Configuration and specify the version. Load the configuration and click continue.
Your Index is now provisioning with the selected configuration. Please wait a few minutes for the Index.
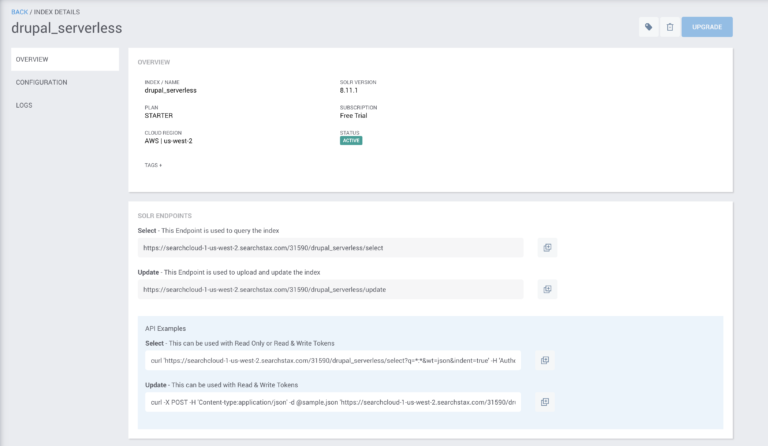
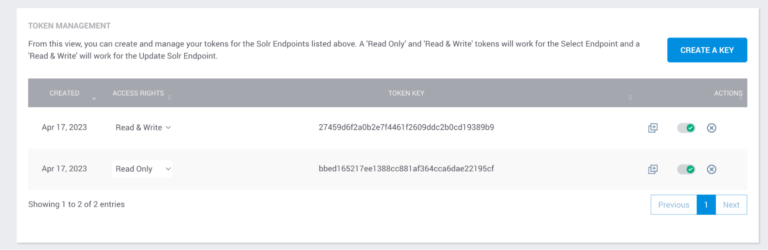
Once the server is in an active state, navigate into the Index details page by clicking on the index name. Make note of your select endpoint and Read/Write token. You will need both when connecting your Index to Drupal.
That’s it! Your Solr Index is up and running. We can now index your Drupal content.
Now that your Solr index is ready, you can proceed to integrate it with your Drupal site.
First, ensure you have the latest versions of the Search API and Search API Solr modules installed.
Then download and install the SearchStax Search API module from the Drupal module page. This module extends the functionality of the Search API module to support SearchStax Cloud Serverless.
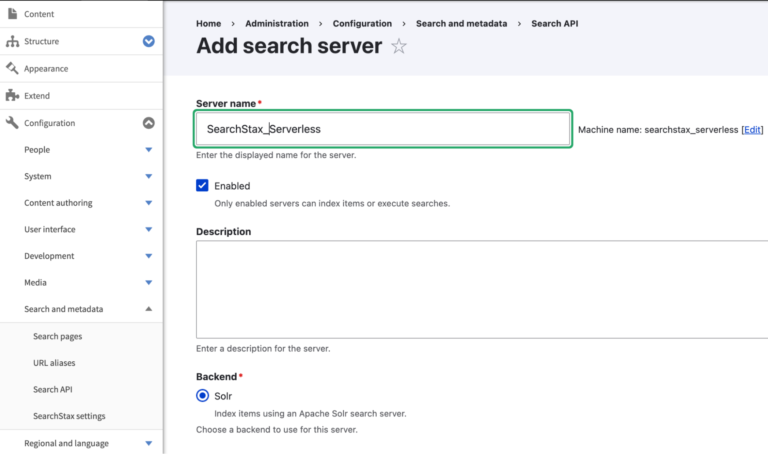
Navigate to the Search API configuration page in your Drupal site’s admin panel.
Administration > Configuration > Search and Metadata > Search API
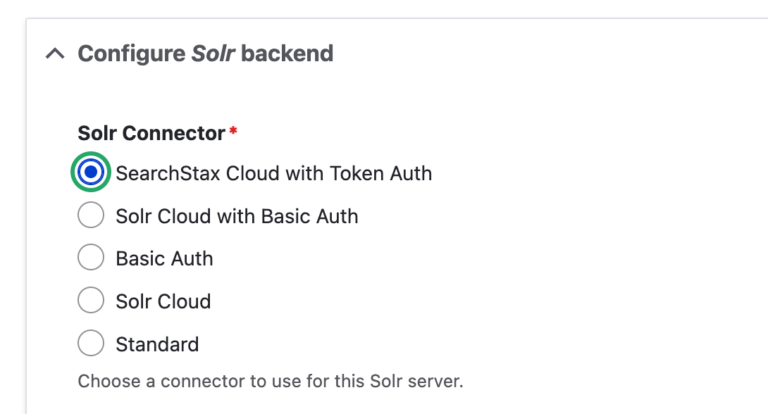
Click Add Server. Give it a name and select Solr as the backend.
Select “SearchStax Cloud with Token Auth“ as the Solr backend in the Configure Solr Backend section.
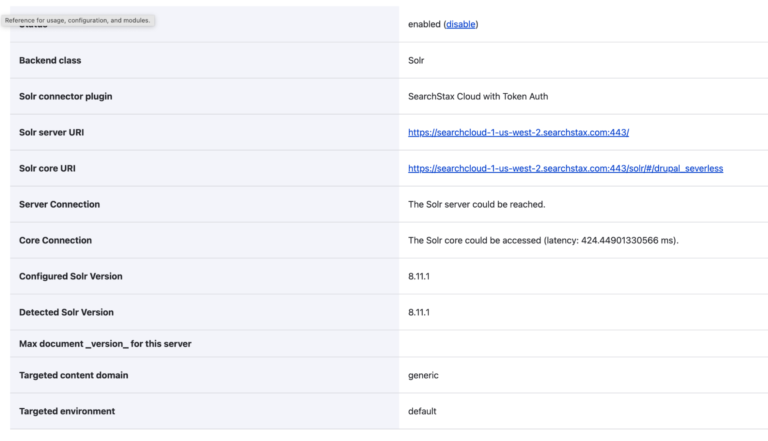
Paste the “select endpoint” from the SearchStax Cloud Serverless dashboard into the Endpoint field. Paste the “Read & Write” token in the Read & write token key field. That’s it! Your server is connected. You’ll be redirected to your server overview page as follows:
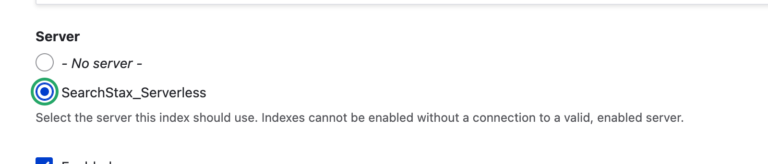
Once the server is configured, create a new search index using the Search API configuration page. Make sure to assign it to the server you just created.
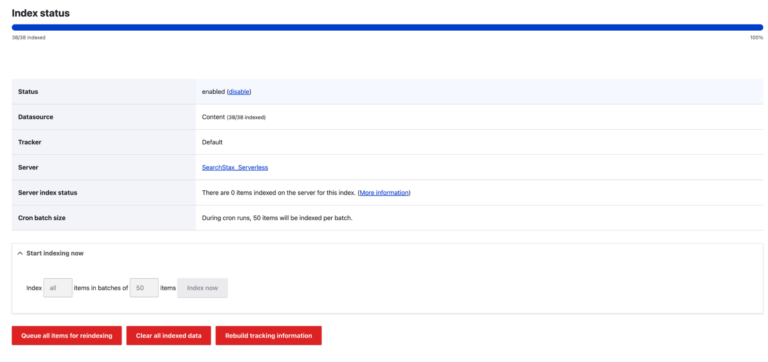
Select the content types you want to index, as well as the fields you want to be searchable. Save your configuration and index your content.
Finally, you can create a search page by leveraging Drupal Views. Create a new view, and select your Index as the data source.
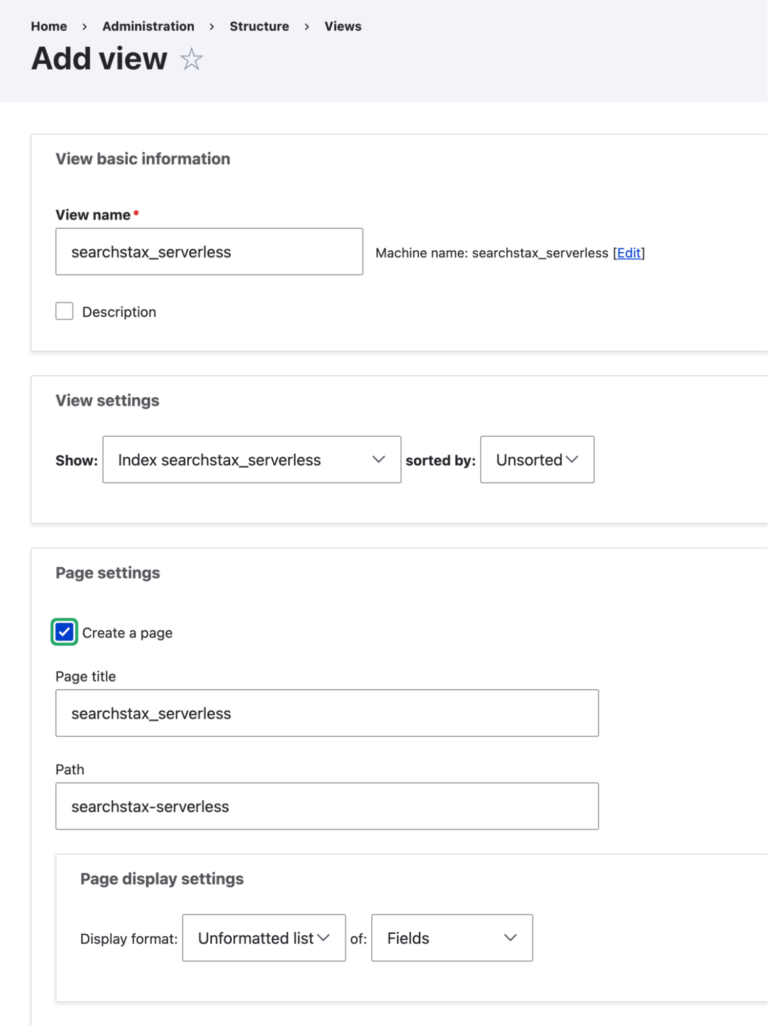
Choose the index you configured in Step 5, and configure the View to display search results as desired. Configure a View as you see fit. Voilà!
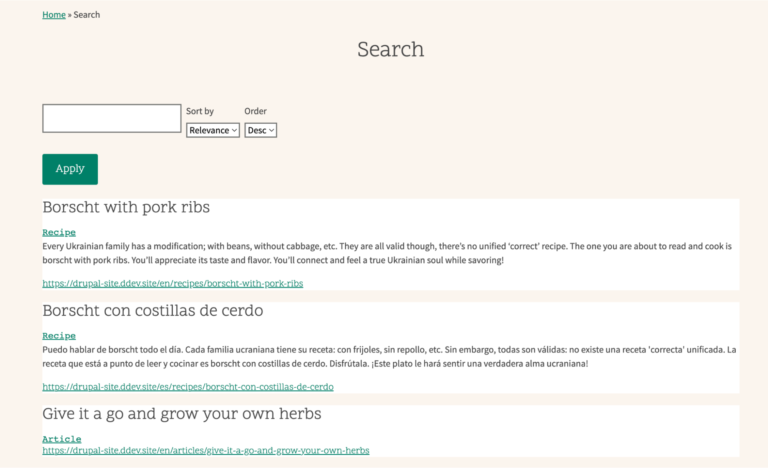
By following these steps, you can successfully leverage Solr on Drupal using SearchStax Cloud Serverless. This integration will significantly improve your site’s search capabilities and provide your users with a faster, more accurate search experience. With the flexibility of the SearchStax Cloud Serverless platform, you can easily scale and manage your Solr indexes as your site grows. Try SearchStax Cloud Serverless today.
SearchStax Cloud Serverless is an infrastructure offering that complements SearchStax Cloud. SearchStax Cloud Serverless allows developers to build web & mobile applications without worrying about sizing, provisioning, or managing Solr infrastructure.
With SearchStax Cloud Serverless, you can easily scale your search functionality without managing servers or infrastructure. You save significant time since Serverless is deployed quickly, allowing you to focus on managing and optimizing your search experience. Finally, Serverless is usually less expensive than managing your own servers or using hosted dedicated Solr infrastructure.
You can start with a 14-day free trial to our Serverless Starter Plan. After that, the Starter plan is $9/annually or $10/monthly. There are other plans available for immediate purchase directly from the Cloud dashboard, which you can see upon setting up the free trial.
The Stack is delivered bi-monthly with industry trends, insights, products and more
Copyrights © SearchStax Inc.2014-2024. All Rights Reserved.
SearchStax Site Search solution is engineered to give marketers the agility they need to optimize site search outcomes. Get full visibility into search analytics and make real-time changes with one click.
close
SearchStax Managed Search service automates, manages and scales hosted Solr infrastructure in public or private clouds. Free up developers for value-added tasks and reduce costs with fewer incidents.
close
close