


Since a single Sitecore instance can be used to manage multiple websites, a frequent question we get from customers and prospects is how to implement this use case in SearchStax Studio so each website has its own search page. This post was authored by Hugo Santos from Konabos is a detailed step-by-step guide for demonstrating how easy it is to set up multi-site search using the SearchStax Site Search for Sitecore module.
Prerequisites for Implementing Multi-Site Search
You can use the SearchStax Studio for Sitecore module to power the search of multiple website search pages configured in a single Sitecore instance. In this article, we assume you already have your Sitecore configured to support multiple websites. If you need help with this Sitecore feature, visit the Configuring Multiple Managed Websites from the Sitecore Developers documentation.
Before configuring Multi-Site Search in Sitecore, make sure you have one search app for each Sitecore site you want to configure. Refer to the Creating a Site Search App article for details on how to create search apps in SearchStax Studio. This step is very important and will guarantee that results from one website will never be shown in other websites.
Now that you have your search apps ready, it’s time to finish the configuration in Sitecore to have SearchStax powering the search experience on each Search page you may have.
Scenario – Two Websites, Each One with a Single Search Page
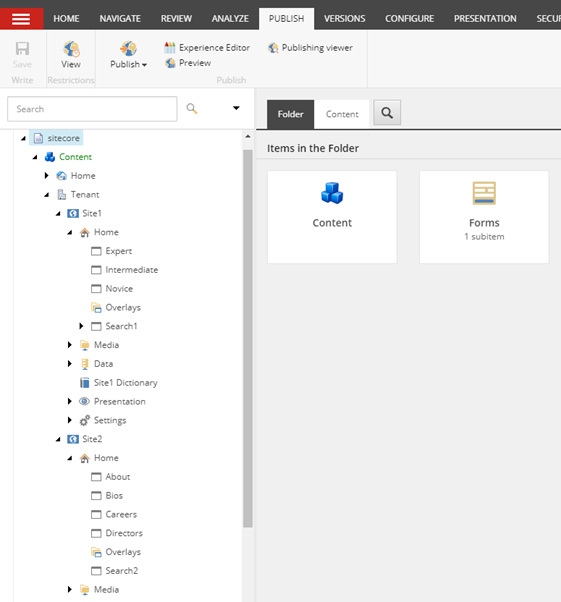
Let’s assume you have the following scenario with two websites, each one of them having a single Search page:
How did SearchStax Contribute to the Project’s Success?
SearchStax helped Analog Devices overcome several challenges with the implementation.
First, we created APIs so they could programmatically and seamlessly transition between Solr deployments when moving from Static to Production instances. The APIs used in the Static deployment included creation and restoration of backups, adding security and creating the vanity URLs. With this solution, Analog incurs zero downtime when switching between their Production and Static versions.
Disaster recovery was a challenge due to the large amount of data and a database with a high commit rate. Analog’s Recovery Point Objective or RPO window used to be 24-hours, but they will be able to reduce that to under 10 minutes by implementing Disaster Recovery with CDCR.
“SearchStax has proven to be a trusted and valuable partner in Analog.com’s Cloud Journey. There were a lot of unknowns along the way but I am proud to say that SearchStax has demonstrated a great level of commitment and support both in terms of the platform and their technical expertise.”
Debajyoti (DJ) Basu, Senior Technical Architect & Applications Delivery Manager
Analog’s Results
The Blue-Green implementation allows Analog to rapidly spin up and then delete their Static system when they no longer need it. Through this process, Analog was able to reduce their cloud deployment costs by more than more than 80% by using SearchStax.
The SearchStax APIs allowed Analog to programmatically deploy a new Solr instance and seamlessly switch from one cluster to another with minimal human intervention which added to the cost savings.
Configure Two Different Index Cores
The goal here is to make sure the Site1 search page only shows results for Site1, and Site2 only shows results for Site2. The way to achieve this goal using SearchStax Studio is to configure two different index cores, each one having a different crawler root.
To complete this step, open the SearchStax Configuration Page and click on CREATE AN INDEX. (For more information about how to do this, check out the SearchStax Site Search Sitecore Module documentation.)
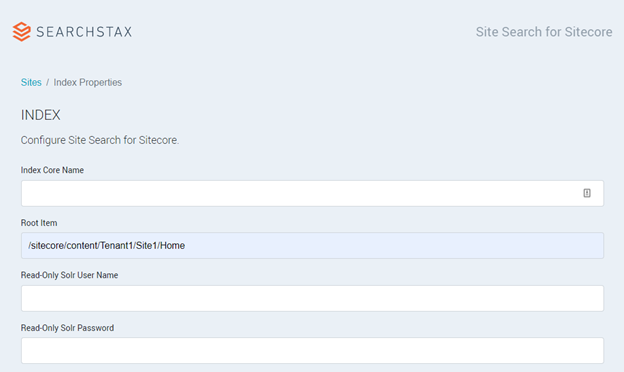
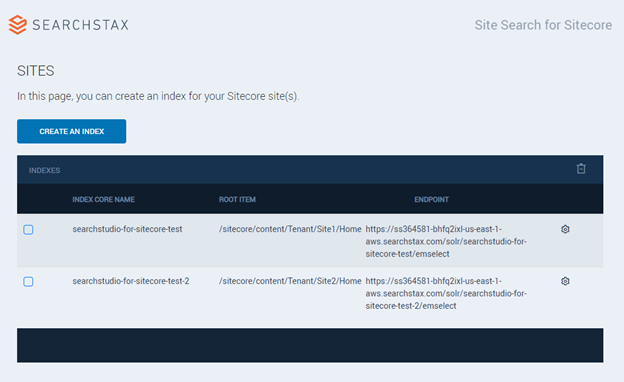
Create two different indexes and make sure you are pointing their crawler roots to your website’s home items.
Once you finish this step, you should have something similar to the following:
Rebuild your Schemas and Indexes
Once the configuration step is done, you need to repopulate your schemas and rebuild your indexes. Open your Sitecore admin page and click on Control Panel -> Populate Solr Managed Schema. Select the new collections and rebuild their schemas.
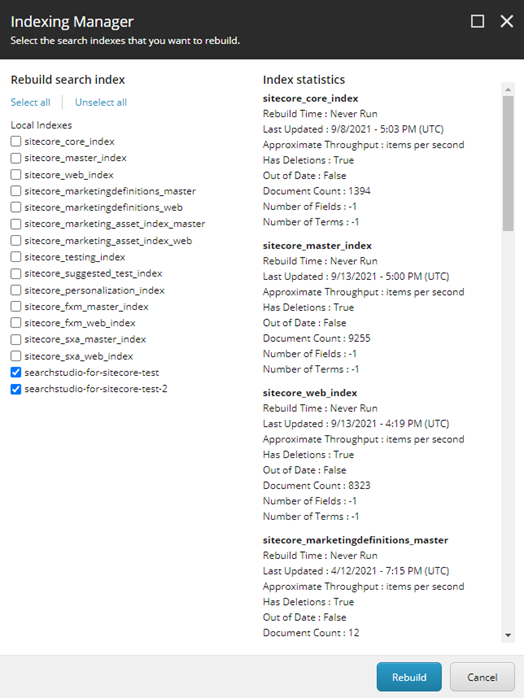
Open the Sitecore Indexing Manager and select all new indexes you just created then click on Rebuild:
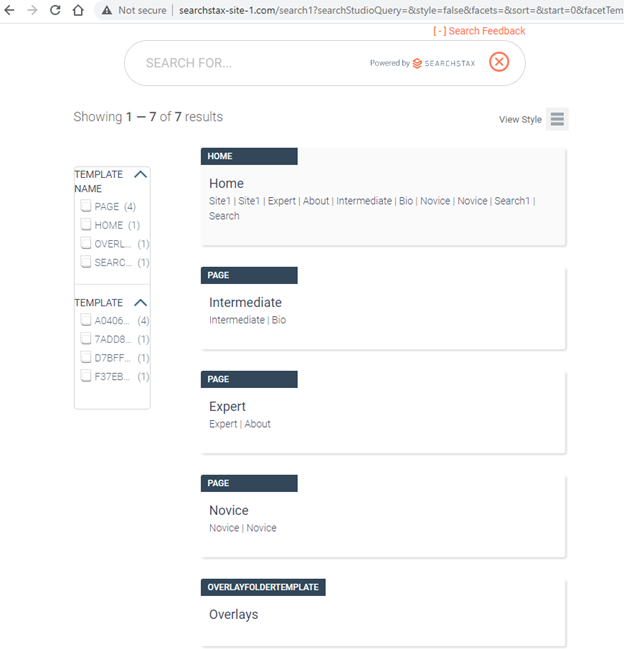
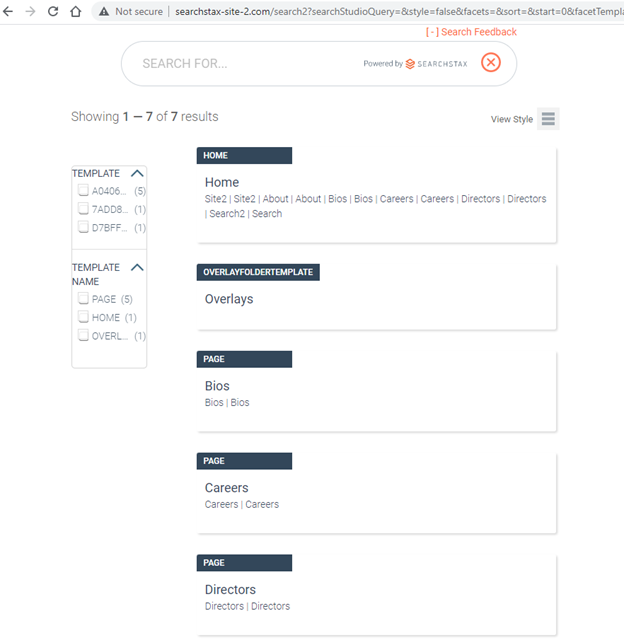
Verify the Search Results
After rebuilding your indexes, you can open both search pages and confirm that they are showing the right results for each website:
SearchStax makes powerful search easy. Learn more about how you can use SearchStax Studio to analyze and optimize the search experience on your website.

Get Our Newsletter
The Stack is delivered bi-monthly with industry trends, insights, products and more