
How to Integrate Apache Solr with Sitecore 9.2 using the SearchStax Cloud Connector for Sitecore
Overview
SearchStax Cloud can be used to enable Apache Solr on a Sitecore website.
This page demonstrates how easy it is to connect Sitecore to a SearchStax Cloud cluster. SearchStax has created a PowerShell 7 script that automates the steps of preparing Solr for Sitecore integration. This script is available to SearchStax clients free of charge from our Github site.
Contents:
- Install Sitecore 9.2 without Solr
- Create a New Deployment in SearchStax Cloud.
- Run the SearchStax Cloud Connector for Sitecore.
- Populate Schema from the Control Panel in Sitecore.
- Problems?
Install Sitecore 9.2 without Solr
Windows 10 Required
Note that a stand-alone installation of Sitecore 9.2 requires a Windows 10 computer. Other prerequisites may be found in the Sitecore installation documents.
Sitecore Optimization
When using Solr as the search provider for Sitecore, there are a variety of Sitecore settings that can be tuned to improve performance. See Performance Optimizations when using Solr.
This section describes how to install Sitecore 9.2 locally without Solr. We’ll connect it to a SearchStax Cloud deployment in a subsequent step.
- Visit the Sitecore Experience Platform 9.2 Initial Release page. Under Download Options for On Premises Deployment, download Packages for XP Single.
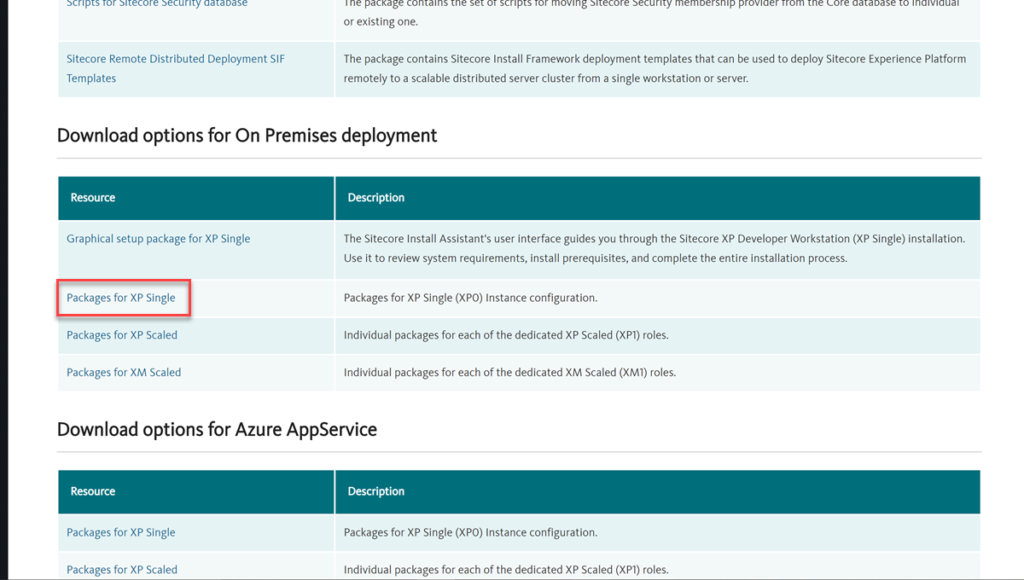
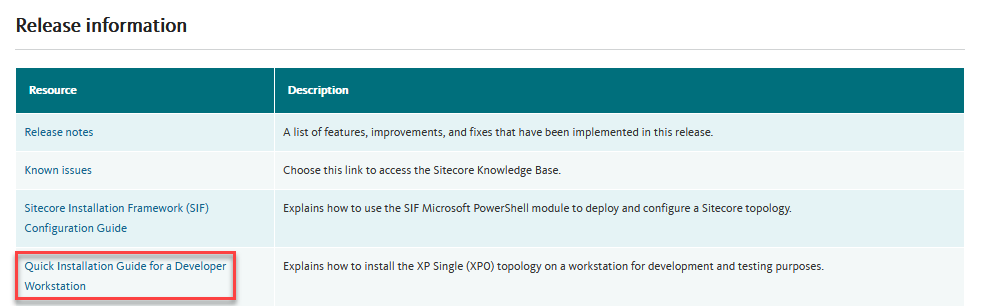
Farther down the same web page, under Release Information, download the Quick Installation Guide for a Developer Workstation.
- With the exception of Solr, install all the prerequisite sub-components as mentioned in the installation guide.
- Make the following changes in the configuration files.
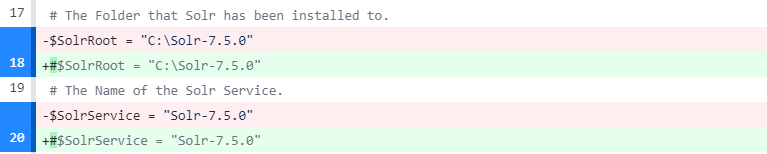
- XP0-SingleDeveloper.ps1: Change the $Prefix to “sitecore”.

Comment out the Solr root and service details:

- XP0-SingleDeveloper.json: Comment out or remove the XConnectSolr and SitecoreSolr “includes:”
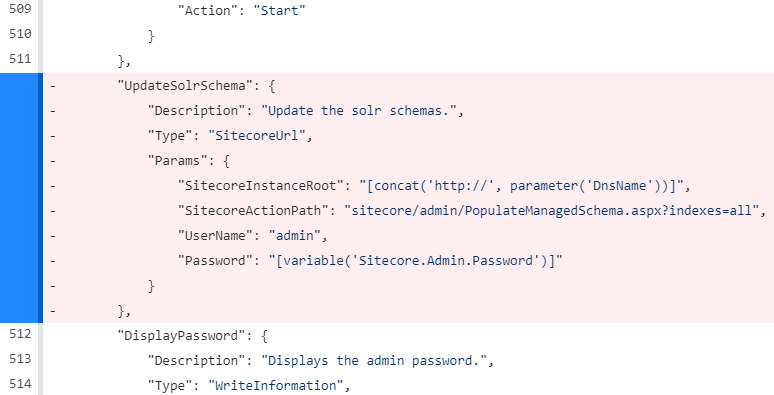
- sitecore-XP0.json: Comment out or remove the UpdateSolrSchema task:
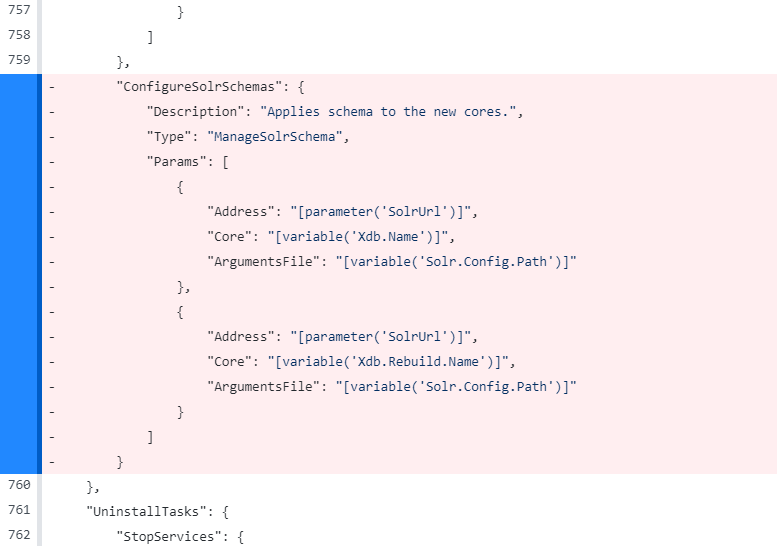
- xconnect-xp0.json: Comment out or remove the ConfigureSolrSchemas task.
- XP0-SingleDeveloper.ps1: Change the $Prefix to “sitecore”.
- Once all the above changes have been made, go ahead with the Sitecore installation by running the PowerShell script .\XP0-SingleDeveloper.ps1 as recommended in the Sitecore installation guide.

Create a New Deployment in SearchStax Cloud
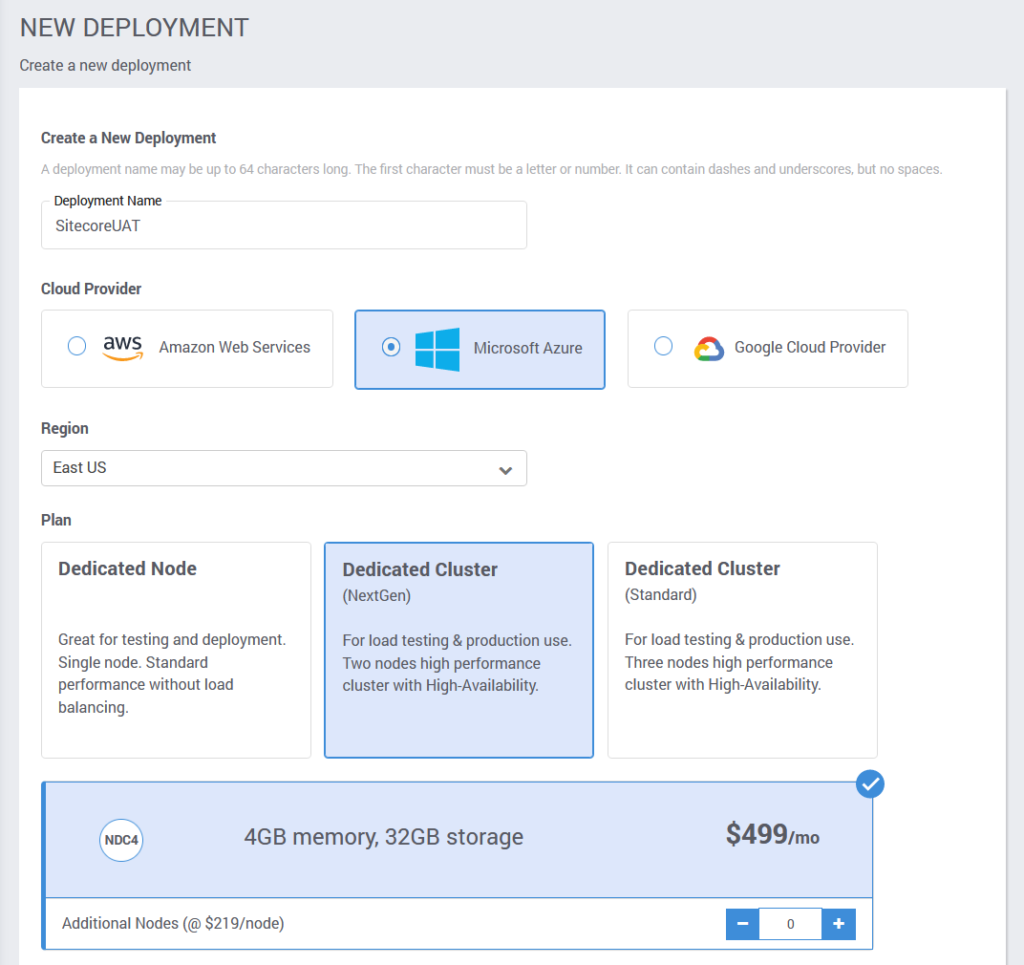
Assuming you have already created a SearchStax account and do not already have a deployment set up, click on the Dedicated Infrastructure tab and then click on the Create Deployment button at the top. Enter a deployment name, and select the most appropriate provider, region, plan, and Solr version for your needs.
Cloud Provider
A self-managed Sitecore project may use any of our cloud providers for the Solr deployment.
Single Node or Cluster
Sitecore will work with a single-node deployment (the “NDN” series of SearchStax Cloud deployments) for purposes of testing and evaluation. However, a production system requires a SearchStax Cloud cluster (the “NDC” series) to provide high-availability and failover features.
Sitecore/Solr Compatibility
Sitecore 9.2 is known to be compatible with Solr 7.5.0. Other combinations may or may not work. See Sitecore’s Solr Compatibility Table for further information.
Once you create your deployment, you will see it in the Solr Deployments dashboard.

Clicking on the name of the deployment gives you pertinent information about your deployment’s servers. The Solr HTTP Endpoint takes you to your Solr server dashboard.
Secure Zookeeper with an IP Filter
The first step for all new SearchStax Solr Cloud deployments is to whitelist the Sitecore computer with an IP Filter. Sitecore will be unable to connect to Solr without it.
Run the SearchStax Cloud Connector for Sitecore
This script is used to connect a Sitecore XP0 installation to a SearchStax Solr instance.
Run the SearchStax Cloud Connector for Sitecore on the Sitecore Computer
The SearchStax Cloud Connector for Sitecore must be run on the same Windows computer as your Sitecore instance.
Account Owner, Admin, or Technical Contact
To run the SearchStax Cloud Connector for Sitecore, you must be the account Owner, an account Admin, or a Technical Contact. See SearchStax User Roles.
The script automates the following parts of the procedure:
- Upload the Solr config files to Solr
- Create the Sitecore collections in Solr
- Configure Sitecore files
Download the Connector
The first step is to visit the SearchStax Github site and download the latest SearchStax Cloud Connector for Sitecore zip file.
Unzip the file to a convenient location. This creates the searchstax-cloud-connector-for-sitecore-x.y directory.
Install PowerShell 7 and Yaml Module
PowerShell 7 has special capabilities that are required by the SearchStax Cloud Connector for Sitecore.
We assume you are on a Windows 10 computer. Open your native PowerShell, and install PowerShell 7 using the following command:
Windows PowerShell:
> iex "& { $(irm https://aka.ms/install-powershell.ps1) } -UseMSI"
Exit native Powershell and start Powershell 7 as the Administrator. Now install the powershell-yaml module:
Windows PowerShell 7:
> Install-Module powershell-yaml
Edit Connector Configuration
Edit the config.yml file in the searchstax-cloud-connector-for-sitecore-x.y directory. The entries take the form shown below. The connector will ignore any values that it doesn’t need as determined by the configurationMode value. Note the required indentation, which is two spaces under the “settings” header.
settings:
  accountName: "SearchStaxAccount"
  deploymentUid: "ss123456"
  sitecorePrefix: "sitecore"
  pathToWWWRoot: "C:\\inetpub\\wwwroot"
  solrUsername: ""
  solrPassword: ""
  sitecoreVersion : "9.2.0"
  isUniqueConfigs : "true"
  configurationMode : "XP"
| Name | Description | Example |
|---|---|---|
| accountName required string | Name of the SearchStax account, upper right corner of the screen. | “ABCInternational” |
| deploymentUid required string | UID of the SearchStax deployment. Look in the deployment URL.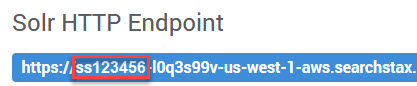 | “ss123456” |
| sitecorePrefix required for Sitecore, XConnectstring | Prefix of the sitecore installation. We advise using the “sitecore” default. | “sitecore” |
| pathToWWWRoot required string | Path to wwwroot folder in inetpub, i.e. your %IIS_SITE_HOME% variable | “C:\inetpub\wwwroot” |
| solrUsername optional string | Solr Basic Auth username | “username” |
| solrPassword optional string | Solr Basic Auth password | “password” |
| sitecoreVersion required string | Version of Sitecore | “9.3.0” |
| isUniqueConfigs required for Sitecore string | Switch between one config for all collections (“true”), and a unique config for each (“false”). (See below.) | “true” |
| configurationMode required string | “XP” means to set up Sitecore only. “XCONNECT” means to set up an xDB index. “XP|XCONNECT” means both at once. For “XCONNECT” with Solr versions 6.6.0 to 8.6.2, you’ll need to have SearchStax Support enable configset.upload.enabled before running the connector. | “XP” |
When isUniqueConfigs is false, the script creates only one set of config files, and use that set for all of the Sitecore collections. The name of the config set is sitecore_<sitecorePrefix>. Example: sitecore_sitecore930.
When isUniqueConfigs is true (the default), the script creates a set of config files corresponding to each separate Sitecore collection. This lets Sitecore properly populate the schemas of the various collections. These configsets are named <sitecorePrefix>_<collectionName>. Example: sitecore930_core_index.
Run the SearchStax Cloud Connector for Sitecore
From Powershell 7, run as Administrator, navigate to the searchstax-cloud-connector-for-sitecore-x.y directory.
Change the execution policy to skip checking.
Windows Powershell 7:
Set-ExecutionPolicy -Scope Process -ExecutionPolicy Bypass
Run the sitecore-searchstax-connector.ps1 script.
Windows Powershell 7:
> .\sitecore-searchstax-connector.ps1
The script will prompt you for your SearchStax user name and password. The script may take a few minutes to run, during which it will notify you of its actions.
Populate Schema from the Control Panel in Sitecore
Follow these steps to populate the Solr schema:
- Log in to the Sitecore Content Management environment.
- Open the Sitecore Control Panel.
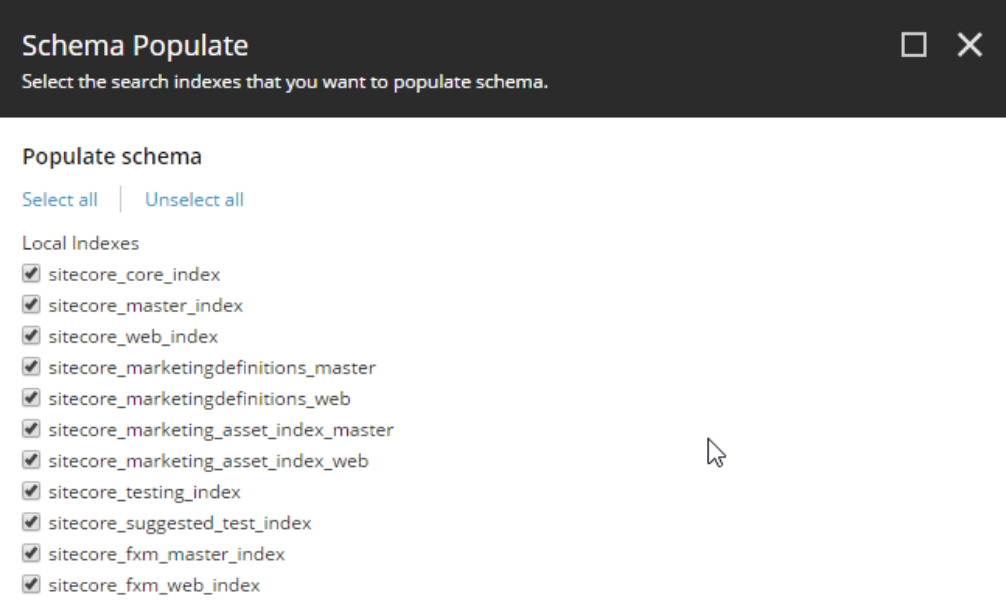
- In the Indexing tab, click Populate Solr Managed Schema.
- Select all indexes and click Populate. (If you have difficulty populating the schema, see Why does Sitecore fail to populate schemas?)
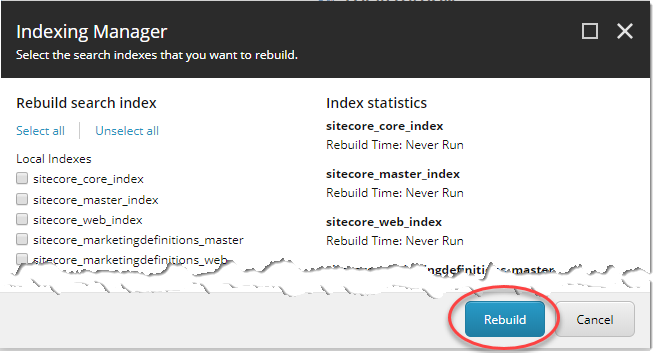
- On the same page, go to the Indexing Manager, select all, and click Rebuild.
Problems?
See Sitecore Connection Errors for a list of the most-common issues that arise when connecting Sitecore to your SolrCloud deployment.
Questions?
Do not hesitate to contact the SearchStax Support Desk.